Urban Cannabis Farming: How to Transform A Struggling Cannabis Grow into A Massive Yield
It wasn’t long ago that the idea of growing an acre of marijuana outdoors, in an urban area, was just a fantasy.
In 2016, California voters voted affirmatively on a partial legalization initiative, allowing outdoor commercial cannabis grows to increase in size to an acre or more. Most of the large outdoor cannabis farms are in rural areas, where there is ample space to spread out. But times are a-changing.
In the Summer & Fall of 2018, I was hired to turn around a struggling commercial cannabis grow in Oakland. I wrote about this project in a 5-part series for CULTURE Magazine. That piece garnered a lot of attention and I wanted readers outside of that magazine’s audience to benefit from the information. So in this particular blog piece, I boil down what we learned and the challenges we experienced when working to revitalize this urban grow.
Here’s How I Helped Turn A Struggling Urban Grow into A Massive Crop Yield

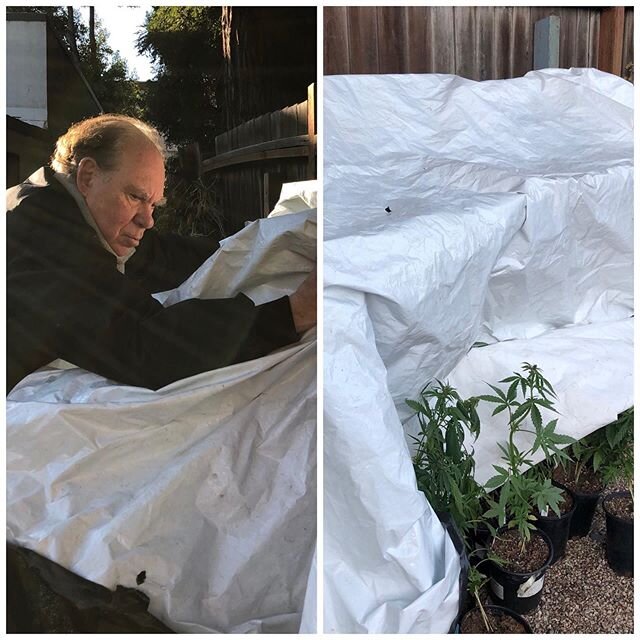
A chain link fence was covered with tarp to make the the cannabis grow’s perimeter visually impenetrable.
LOCATION: In an urban area of Oakland ,California, a grower colleague of mine took possession of a lot that had just been cleared of derelict buildings, abandoned cars and old machinery. It needed some modifications before it could be used as a commercial cannabis farm:
City water would have to be hooked up.
The soil was suspect, but the land was level. They covered it with 20-gallon bags irrigated using a drip system.
A chain link fence marking the perimeter had to be made visually impenetrable before plants could enter.
Learn more about How to NOT Get Busted Growing Cannabis
“Most busts happen when word of the garden makes it to the cops.”

Outdoor marijuana bags and netting setup.
MATERIALS: Rather than buying filled bags, the grower decided to buy bulk soil and fill the bags from a soil pile dumped in the middle of the space using shovels. As the bags were filled, they were set in place and then planted.
Once the containers were in place, the stakes and nettings were installed .
The stakes crossed each other and were tied. Then, the netting was attached to the stakes. Finally, the branches were spread apart and attached to the netting using twist-ties.
Unfortunately, my garden design was not followed to the letter, and the netting was set at an oblique angle to the sun. As a result, portions of the plant that would have been sunlit were partially shaded.
The correct angle would have been for the plants to face N/S, perpendicular to the sun. This becomes especially important in the fall, when the sun drops in relationship to the horizon, casting longer shadows.
Preparation of Cannabis Plants Before Transitioning to The Outdoor Grow Is Crucial

Cannabis plants were transported from an indoor facility to the outdoor cannabis farm.
THE PLANTS: The cannabis plants had been growing under lights for several months, but the intensity was low, so the stems were somewhat stretched, and the leaves were small.
The six-inch containers were slightly root-bound, but the situation wasn’t critical, and the roots would be able to grow into the new planting mix.
Additionally, the planting mix was not ripe, so the plants were held back a little for the first two weeks by pH instability, causing unavailability for some of the micro-nutrients.
Sunburn Is A Problem for Cannabis Plants
When the plants were first set, they looked forlorn. They had some leaf die-back, and then they got sunburned because the leaves of the indoor grown plants were affected by the UV light and got sunburned. They bleached a bit, curled a little and looked sad.
KEEPING THE PLANTS IN VEG: The plants were placed outdoors during the last 10 days of July. The marijuana plants had previously been indoors under HPS lights, which emit no UV light. Once transferred outside, the old leaves got sunburn, just as a light skinned human not used to summer sun would.
In spite of all these problems, the plants adjusted to their new environment and the newest growth showed that the soil problems had been resolved.
Once the plants were in place, the days were already growing shorter and the longer night would induce the plants to flower. Normally these plants would have been tipped into flowering by the longer nights in mid-August, but we didn’t want this to happen—we needed them grow in a vegetative stage for a period, while they acclimated to the environmental transition.
Learn more about the steps and stages for the cannabis ripening process

Soon after placement, however, the marijuana plants started to look better. New growth, that is, the branches and leaves, have a fine field-green color and are far larger than indoor-grown foliage.
To keep the plants growing vegetatively, a caretaker walked a 400-watt HPS lamp slowly down the rows each night near midnight. Another HPS light mounted on a rolling cart also supplied dark-breaking light. Breaking the dark period halfway through the night resets the countdown so the plants never receive the 10-11 hours of uninterrupted darkness they require each night to start flowering.
Preparing for Harvesting and Processing
Six Weeks Later

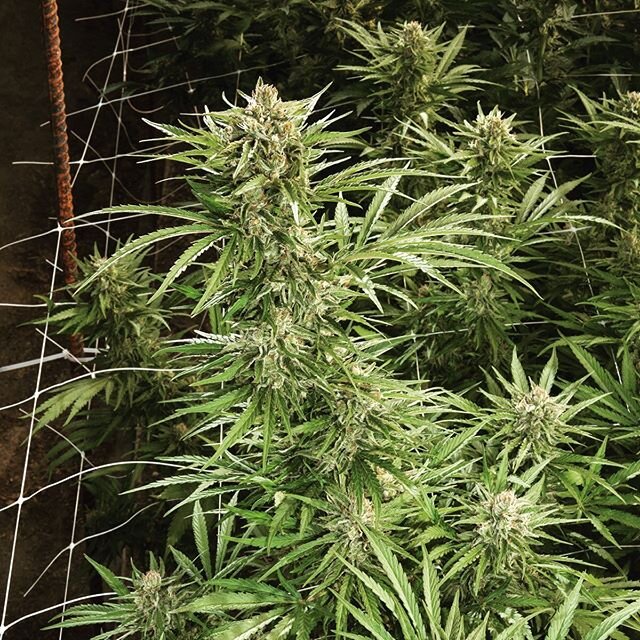
Cannabis plants flowering.
FLOWERING: Six weeks later, the plants had grown considerably and we allowed them to flower. To keep the plants upright and give all the branches exposure to the sun, they were woven into 6-inch square plastic netting.
Night lighting was stopped on Sept 7, so the plants would ripen between the last week of October and the first week of November.
With California’s rainy season looming, we knew we were in a race against bad weather. As a test, several rows of plants were not treated with flashed light. Those plants started flowering in mid-August and were estimated to ripen in about 4 or 5 weeks. The test plants were considerably smaller than the treated plants. However, they had tight premium buds that would definitely ripen before the bad weather typically would set in.
Next Step: Preparing for Harvesting and Processing

Clipping cannabis buds from the plants while in the field.
RIPENING: We anticipated a minimum of about half a pound per plant, so preparations were made for processing. We planned to clip the buds off the plants while they were still in the field and then hang them to dry. Out of necessity, our strategy remained in the planning stages while we considered which of several harvesting options was right for this grow:
Hang the whole plants. Process when dry.
Hang the branches with buds to dry. Then de-stem the buds and manicure them using auto machines.
Clip the plants and run them through debudder machine
Clip the buds or use debudding equipment and manicure the buds using a roller machine. Then, place them in trays to dry.
Cut the buds from the plants in the field. Slice the stems off the plants using power equipment, and then run the branches through de-budding machines to gather the leaves. Dry or freeze the leaves for further processing.
Outdoor Cannabis Crops Are Completely at The Mercy of Nature’s Vagaries
10 ½ Weeks Later

Close up photo of cannabis bud.
When we stopped the dark cycle lighting ended on Sept 10, the autumn dark period was long enough to immediately send the plants into flowering. All of their energy was then devoted to reproduction and the plants were growing big buds in a vain search for pollen.
Cannabis Terpenes: learn how plants produce them and the TOP 10 most abundant terpenes in cannabis
This variety of OG fills out late in the bloom period. In these photographs the plants were entering their 6th week of flower and they had about 2 weeks to go, so we expected to start cutting around November 1.

Healthy cannabis plants and buds that will be ripe to harvest in a few weeks.
ASSESSING AND REASSESSING THE WEATHER: So far, nature had been good to our crop. There was a rainstorm in late September, but it quickly dried with the help of a nice warm breeze. There were mainly clear, sunny skies with highs in the mid to high 70’s, and nightly drops into the low 60’s to high 50’s. The humidity was high, ranging from 60-80%, with a constant salt air breeze coming off the ocean which helps to keep fungi and molds from attacking cannabis plants.
Learn more about how to avoid the heartache of bud rot and powdery mildew
The forecast for the following two weeks was mostly sunny. But just before harvest, cloudy weather and a slight chance of drizzle hid the sun for three days. On Nov. 1, the scheduled harvest date, the sun began to peek through the clouds again.
Prepare for Rain Before Your Cannabis Harvest

Photo: Espalier cannabis plant.
“TIP: The image above is an espalier cannabis plant system. We trained some of the plants to grow up the netting. Training a cannabis plant to grow this way, allows it to widen and flatten out and spread out so that the plants get more sun and airflow, which helps to avoid molds and fungi.”
When it rains, there is a good chance that the moisture and cool weather will promote germination of molds and fungi. To prevent this from happening, after the rain stopped, we sprayed the plants with water pH’d to 8.5. The alkaline condition inhibits mold and fungi from germinating.
Here’s why microbial contaminants in cannabis are dangerous
PLANNING, PLANNING, PLANNING: Our intention with this crop was to remove the high quality “A” buds and preserve them for sale as flower. As a result, they would need to be carefully dried and trimmed. We planned to dry the smaller buds and biomass using heat sources and very low humidity. Those buds would be used for concentrates and extracts.
Harvest was to take three to four days with the growers processing the material as it was harvested. The highest quality buds would be preserved as flower first. Then the biomass would be removed and processed..

This initially struggling urban cannabis farm has been transformed into a thriving marijuana grow, with what will be a massive yield.
Later, after all the plants had been processed, the roots were to be removed, the containers planted with alfalfa and left out in the field. Alfalfa will supply Nitrogen and help the microorganisms thrive, amending the mix so it will provide a healthful environment for next year’s crop
“TIP: Now that you have had time to taste the crops, start regenerating the clones from your favorites. During vegetative growth, take clones from the plants for later evaluation. Provide the selected marijuana clones with more light and space to grow them up or to use for cloning.”
15 1/2 Weeks Later: Time to Harvest
Your Plants Don’t Wait for You

Cannabis buds ready to be harvested.
THE BEST LAID PLANS: The garden was finally ripe to harvest. As expected, the buds were ripe on Nov. 1. However, there was a delay in preparing for the harvest process and the crew played catch-up.
“Every cultivator eventually learns that plants don’t wait. No matter what your intentions, plants develop somewhat mechanistically; Inputs determine outcome including timing. ”

Close Up of a ripe Bud.
An effective harvest requires an inordinate amount of planning—much more planning than you think it requires! As I mentioned, our light extension regime (interrupting the dark cycle by passing HPS lamps through the field several times a night) ended on Sept 1st. The buds ripened on Nov 1st, 60 days after our light regimen ceased. This was the time to start preparing a space to accommodate the plants that would be harvested. In this case, our harvest preparations were implemented too close to ripening and therefore delayed the harvest.
Learn more about the steps and stages for the cannabis ripening process
HARVEST UNDERWAY: Buy Nov 19th about 40% of the field had been harvested. Luckily, in California. through October and early November, the days featured clear bright sunshine with highs in the 70’s and UV light ratings as high as 5.
Harvesting continued through Nov 27th with some urgency in harvesting the plants, because some of the buds were beginning to over ripen.
Harvest Time: Here’s the 8 Steps in The Cannabis Harvesting Process

Pulling the trellis netting off the cannabis is the first step in the harvest process.
Steps we took to properly harvest:
The plants were trellised using netting. The plant branches were woven into the first layer of netting, When the plants had grown larger, with more branches, netting was wrapped over each side, so that there are three nets holding the plants in place. The outer nets were removed in order to clip the plants. Initially, crew members were using small clippers. Later, an electric mini hedge-trimmer was used to cut and remove the netting.
Using a limb cutter at first, then later a small chain saw, the plants were cut down and placed on small garden wagons.
The wagons were pulled to the processing area.
In the processing area, plants were dunked in 1% hydrogen peroxide solution and hung on racks to dry outdoors. This prevents them from molding as they dry out.

Changed to: Marijuana plants dunked in 1% hydrogen peroxide solution.
5. The plants were cut into top and bottom sections and hung to dry.
6. The space was outfitted with a room dryer so that the drying space was warm enough for the plants to dry quickly. Fans were placed around the drying area to support air circulation.
7. The cannabis plants were dry in about a week and were then placed in a separate area to cure at 55% humidity for an additional two weeks.
8. After the plants were dried, they were sorted into A buds, smalls and concentrate material.
Drying and Curing Your Cannabis Harvest
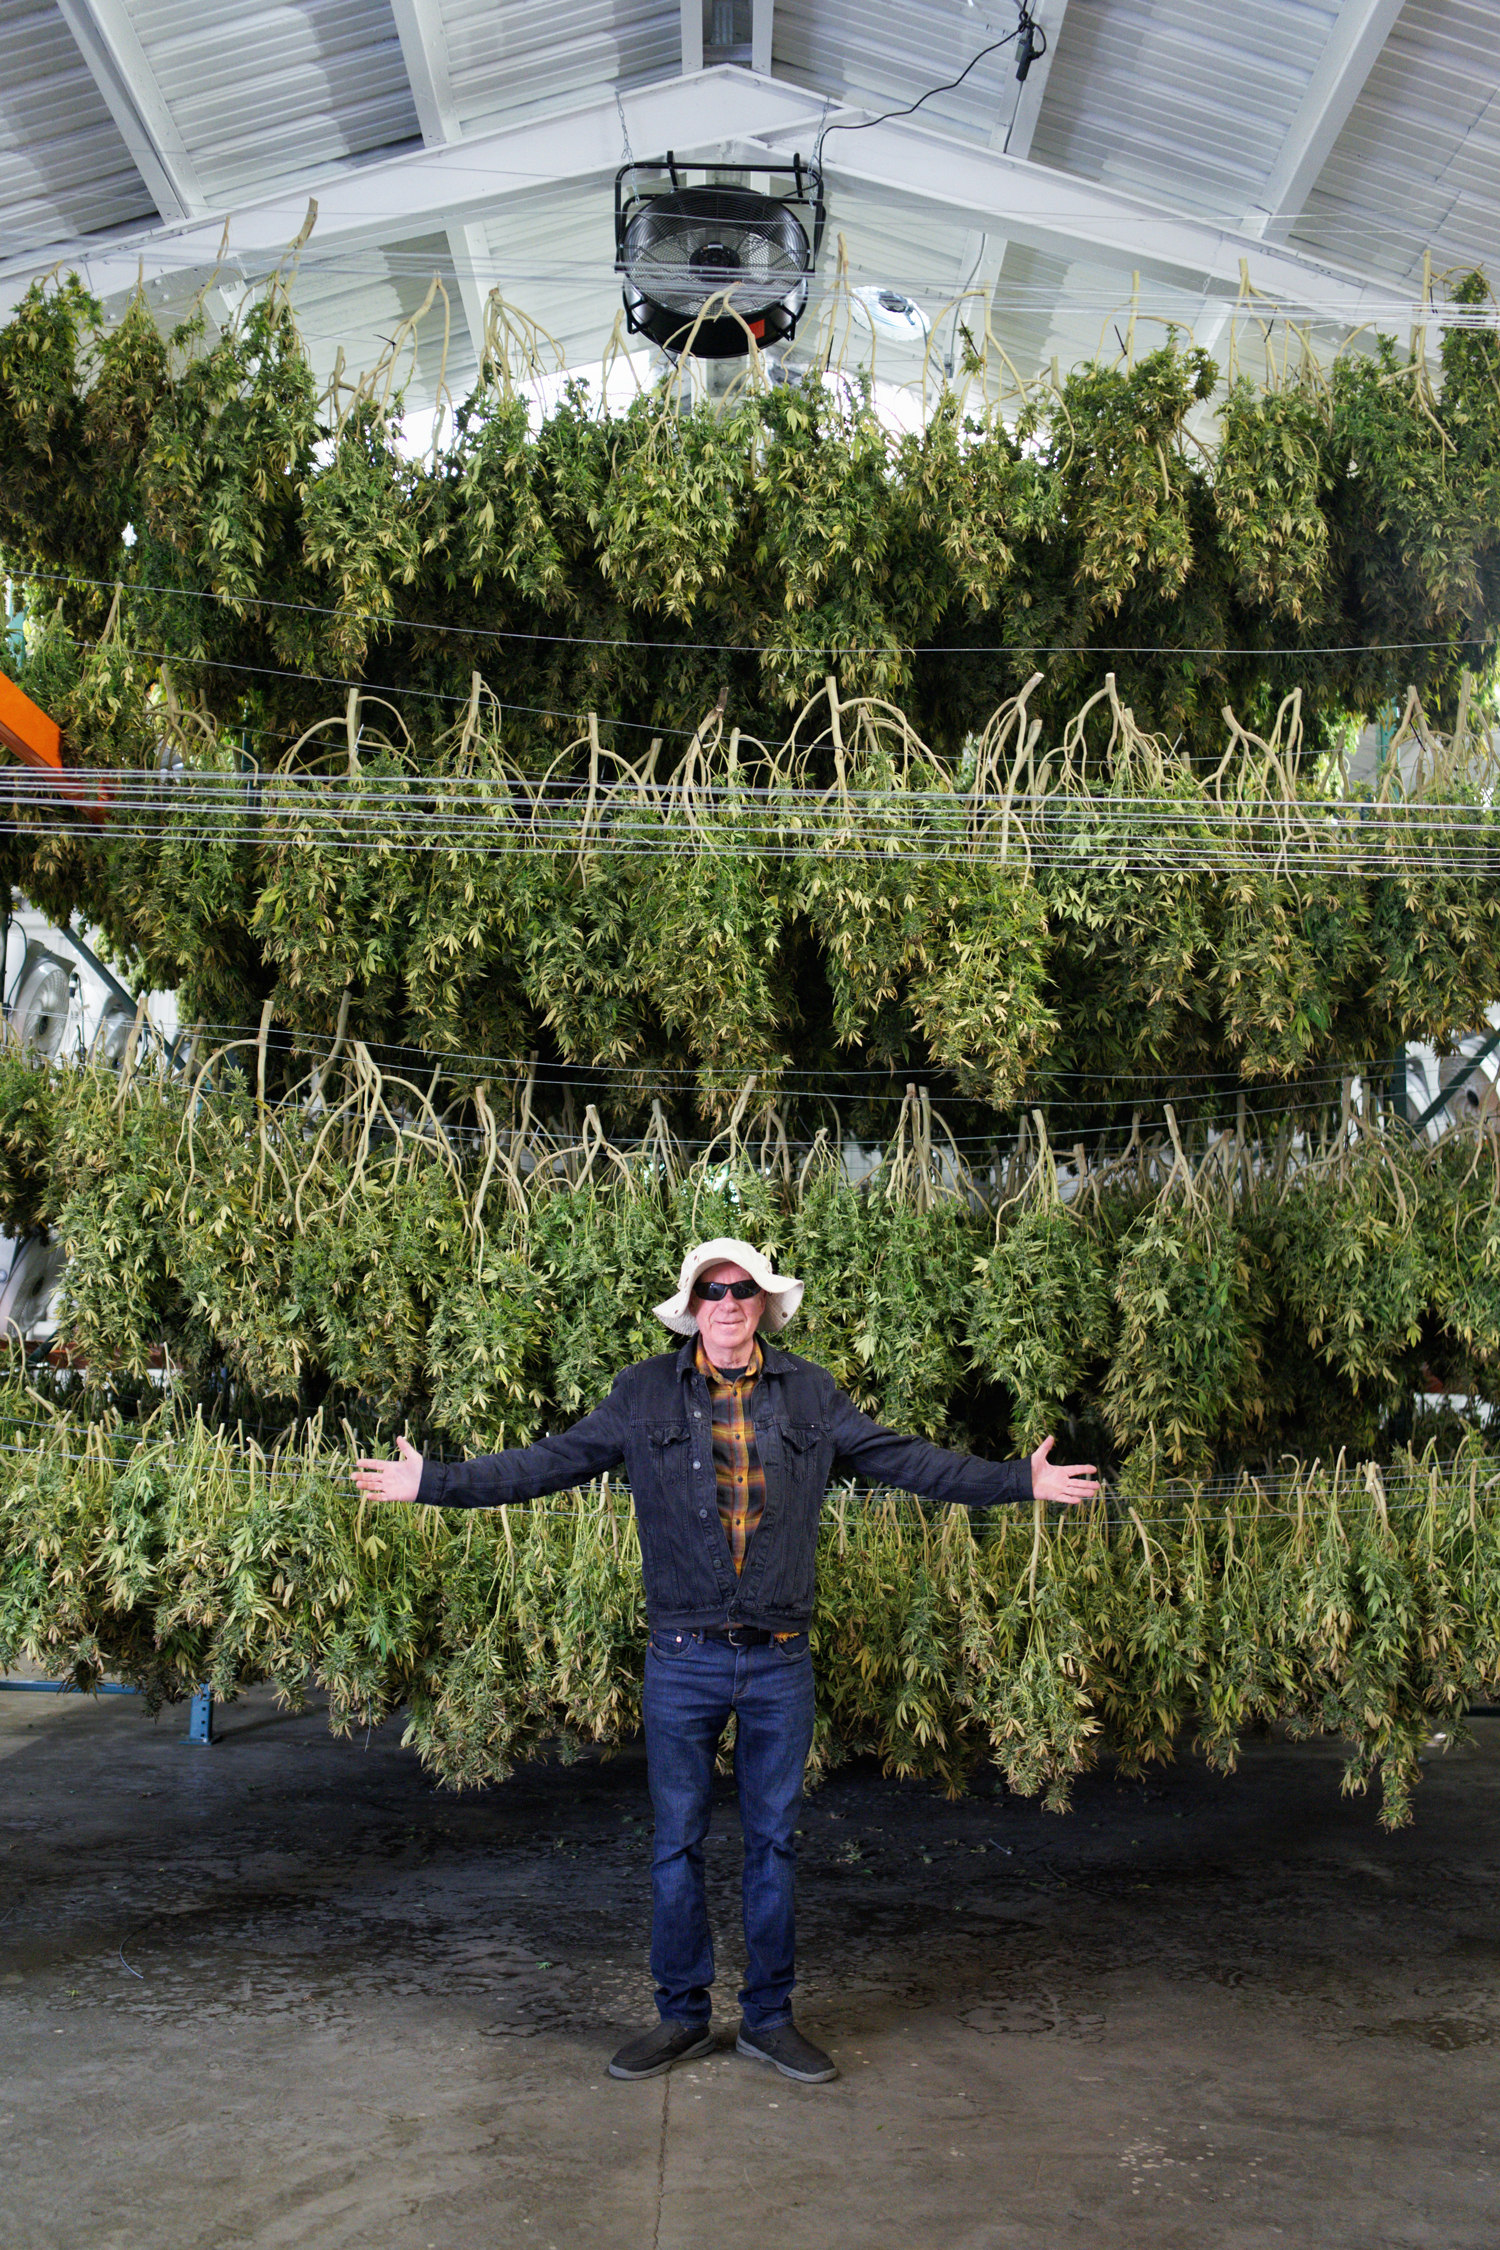
Building the Cannabis Drying Frames
Cannabis plants are attached on a drying frame.
THE DRYING FRAME: A drying frame was constructed of steel beams with 4 levels of wire hung across the area. Wires were spaced 3 feet apart to promote air circulation. The space was heated and dried using a blower powered by its own generator, which filled the room with warm air with an RH of less than 40%. The temperature was just under 80 degrees. The perimeter of the drying area was surrounded with powerful fans that circulated air between the rows.
By the time the frame was filled with plants and buds, the plants hung earliest in the process were dry and ready to be moved into the curing area.
Read about drying and curing cannabis: the art of enhancing effect and flavor by the late and great strain hunter franco loja

A massive cannabis drying rack is filled, with a battery of fans on each side to help the cannabis dry.
Setting Up A Cannabis Curing Area
Cannabis curing area with marijuana plants stacked in layers between craft paper.
CURING: The cannabis curing area consisted of a slightly cooler and more humid area. The plant branches were laid on craft paper only one cluster deep.
Then another sheet of heavy craft paper was laid down and another layer of branches was placed on them. This was repeated five or six times.
Some plant tops were hung on wire along the walls increasing the capacity of the curing center.
The Process of Drying and Curing Your Cannabis Harvest

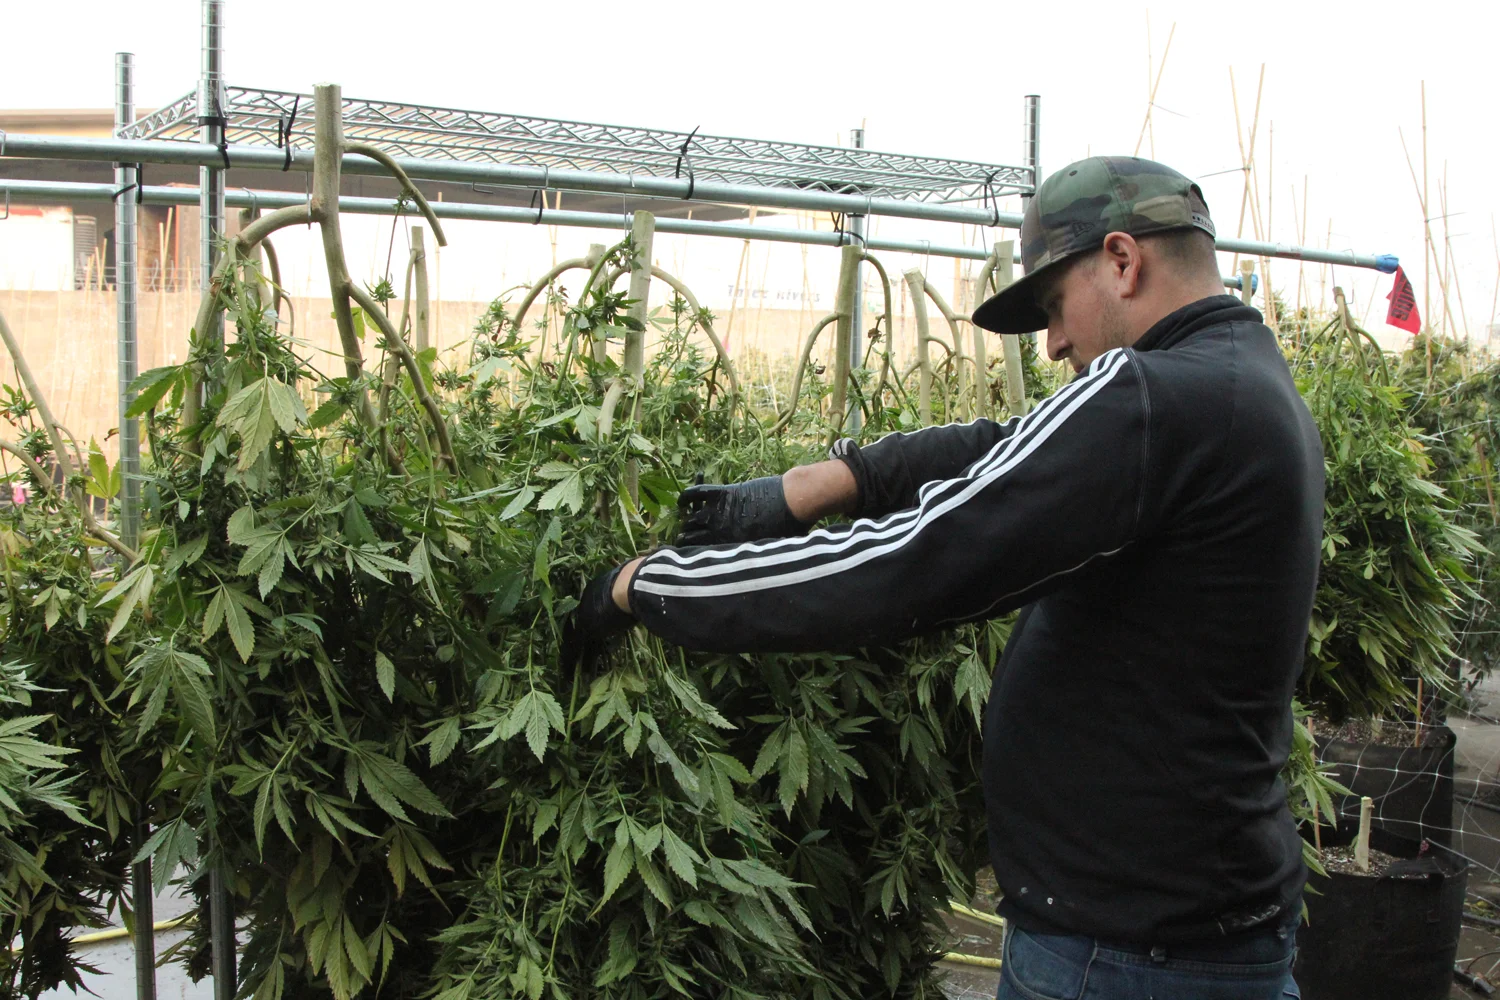
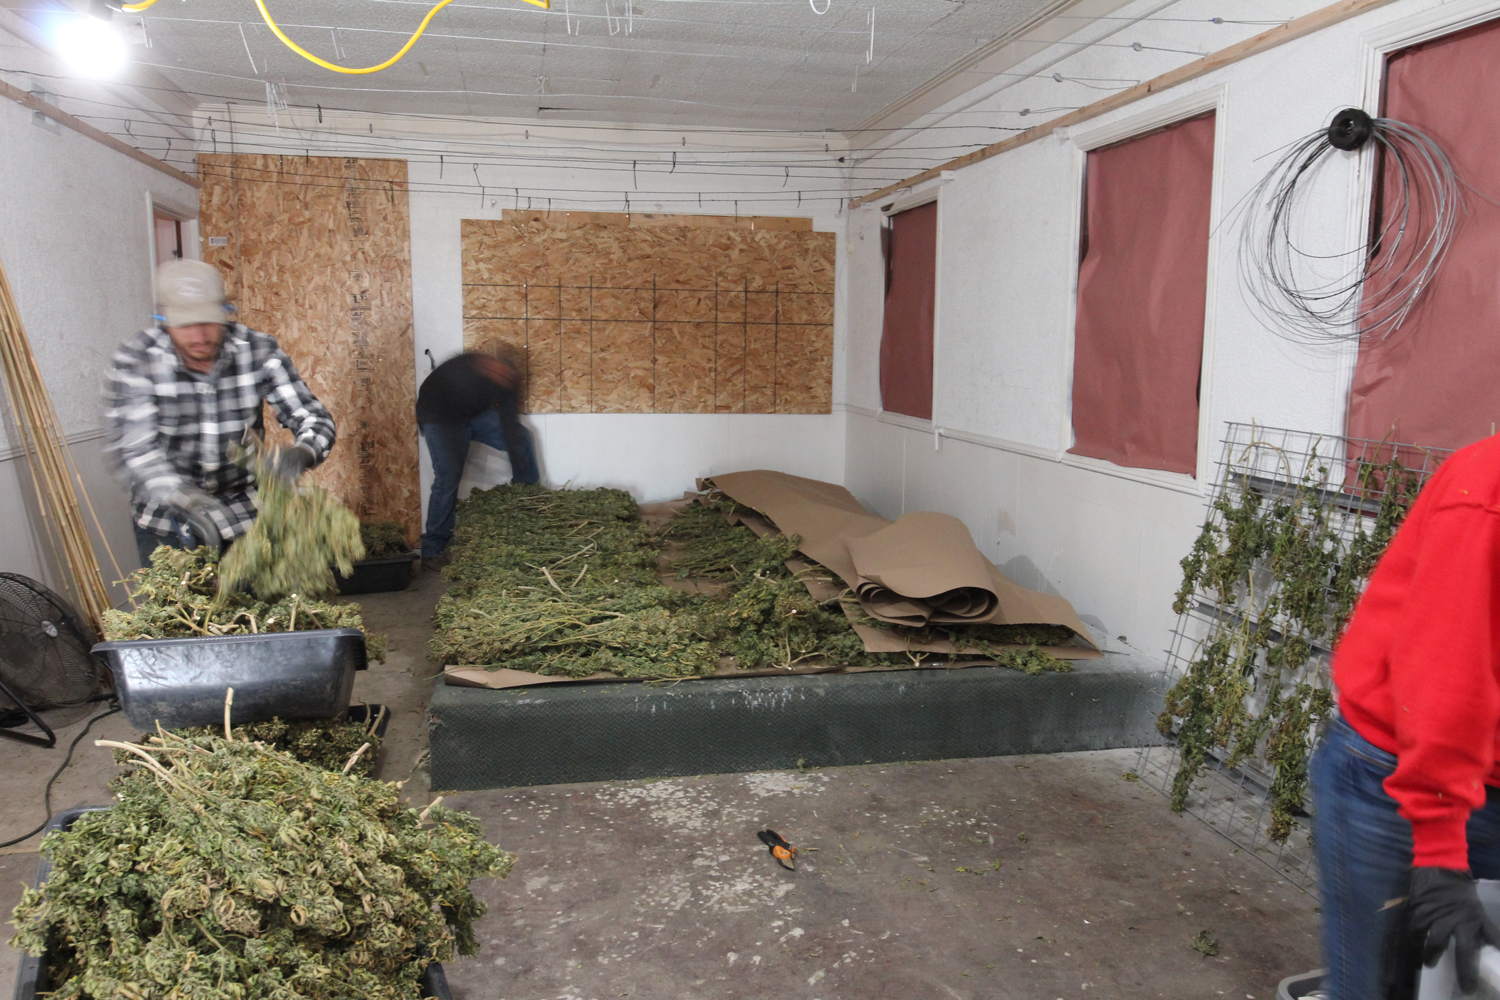
Workers de-budding cannabis after it has been cured.
BUCKING: After spending at least a week in the curing section, the branches were bucked. This process is pretty straight forward, but it can be accomplished is several ways:
Strip the plants by hand. Wearing heavy canvas gloves the branches are pulled through a mostly closed hand, stripping the plant.
A more efficient method uses a rim that fits over a 5-gallon bucket. Branches are fitted through the slots in the bucket and pulled through. The foliage is stripped off.
A de-budding machine. The stem is fed into a hole in the machine and it pulls the marijuana through, automatically removing the bud and other foliage. This really speeds up the process.
We elected to buck using the 5-gallon bucket method since we had the labor on site and costs were minimal. Once bucked, the buds were stored in cans, uncapped, until the buds are mostly dry. The canisters were capped only when they wouldn’t sweat.
Takeaways From My Urban Grow Experience:
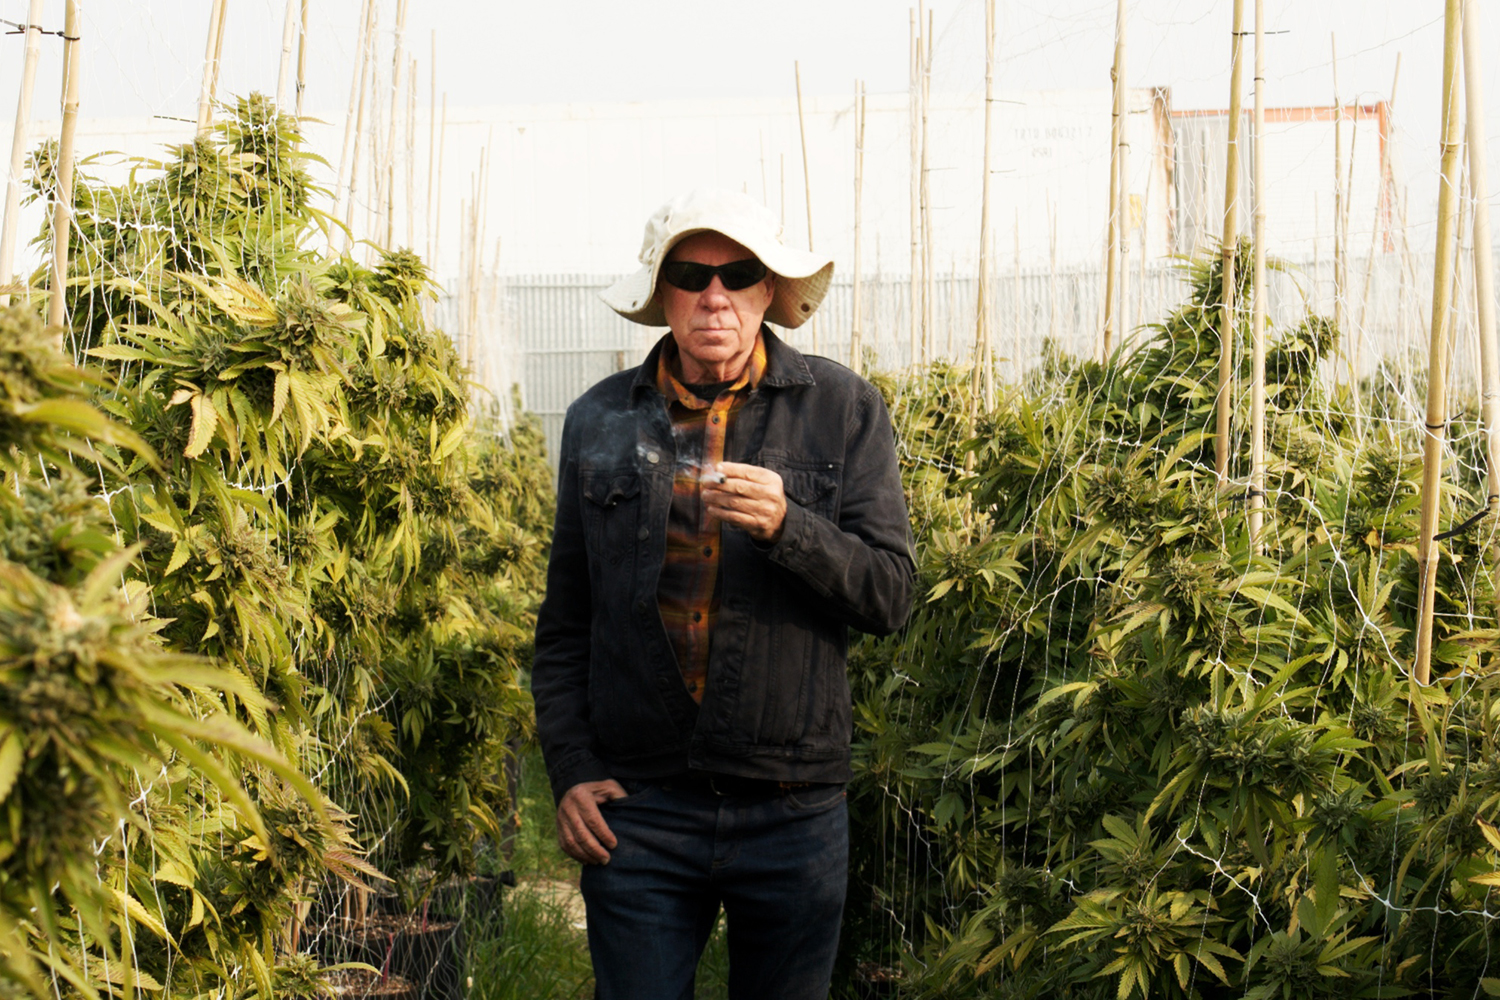
Ed Rosenthal in cannabis drying room.
This was a very unique consulting opportunity. I’ve been at this a while, and get asked to help out with lots of grows. But given the newly opened opportunities for growing in Oakland, this gig was special. The results we achieved were impressive. My client harvested 1300 pounds of high quality bud and sold it into California’s legal market.
As with anything, there is always room for improvement. Here are a few things we could have done better. Hopefully these tips will help you in maximizing your own large or medium-sized grow :
ASSESS THE QUALITY OF YOUR PLANTING MIX: I urged this client to buy pre-filled bags of quality planting mix, optimized for cannabis, but due to financial constraints we were forced to buy in bulk. The mix that was delivered was not yet ripe and we sacrificed some valuable time trying to get the pH levels right and the plants stabilized.
MAKE SURE TO FOLLOW THE GARDEN PLAN DURING INITIAL SETUP: The way you position your plants can mean as much to their health as the soil they’re planted in. Unless you have specific limitations with your grow space, be sure to face your plants N/S, perpendicular to the sun. This is particularly important in the Fall.
PLAN, PLAN, PLAN: When scheduling a harvest, inclement weather forecasts may require you to assess and reassess your plans. But don’t let that slow down your preparation. In this case, the client’s delay in getting the space prepared, the drying lines hung, and the staff on site for harvest, cost us valuable time and resulted in some overripe buds toward the end of harvest.
HAPPY GROWING!
“TIP: Are you planning to grow some big plants outside this year? January and February are the months to get the seeds or clones started. Give them bright light and start training them to grow into the shape you prefer. By May or early June when you set them out some varieties that are four or five feet tall have the potential to grow to 10-15-foot giants. ”
Join our cannabis community
Follow Us