How to Professionally Germinate Cannabis Seeds: Award-Winning Seed Breeder’s Step by Step Instructions
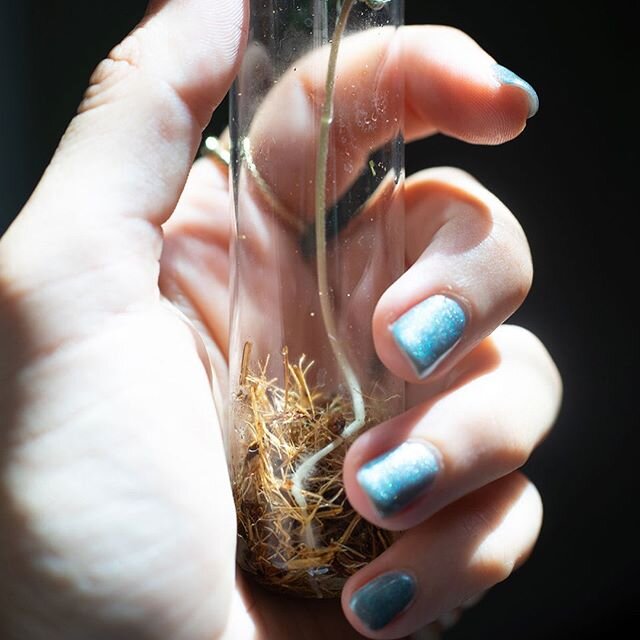
Popped cannabis seeds by Purple Caper Seeds. Photo by Lizzy Cozzi.
Cannabis germination: Otherwise known as “popping seeds”
Germination is the process by which a new plant grows from a seed. The process of moving from seed to seedling is sometimes referred to in growing vernacular as “popping” seeds or beans.
A grower’s germination rates (the % of seeds that yield a viable plant) vary based on a number of factors—these include:
The quality of the cannabis seeds
The conditions under which the cannabis seeds have been stored
The process the grower uses to pop their seeds (Perhaps most important and often overlooked factor!)
Why is the process a cannabis grower uses to germinate their seeds so important?
Money and time.
Cannabis seeds aren’t cheap. Higher germination rates save growers money and time. The process a grower uses to germinate can have as much of an impact on their success rate as the seeds themselves.
To prove this, Frank from Purple Caper Seeds, an award-winning cannabis genetics breeder for over 25 years, gave us a tour of his cannabis genetics facility and showed us his unique method of popping seeds.
Purple Caper’s genetics can be found in the clones you find in major west coast dispensaries. Recently, Purple Caper’s 4G, was selected as “a Cola of the Month” by High Times.
This guy knows what he’s talking about.
Having just had an embarrassingly low germination rate with some 10-year old cannabis seeds of our own, we were anxious to learn what we could have done differently.
Here’s Frank’s step-by-step process for how to germinate cannabis seeds and maximize your germination rates
Frank completely sterilizes his hands with alcohol before working with any of the materials in the cannabis germination process. Purple Caper Seeds photo by Lizzy Cozzi.
Begin with a sterile environment and a methodical process
As anyone who has ever spoken to a group of cannabis growers knows, any process concerning this plant can be as simple or complex as the grower makes it.
This method is a simplified technique, with the home grower in mind.
The bar we’re setting here is not unreasonably high, but if you’ve been germinating on the fly and in paper towels, this 12-step process will require more preparation and individual steps than you’re used to.
Trust us; it’s worth it!
With this in mind, lets first go over same basic housekeeping and best practices. Before beginning to work, be prepared to:
Sterilize everything you are planning to work with, except for the paper towels.
Prepare everything you will need BEFORE you start.
Work quickly but accurately. The faster you work the less chance pathogens such as gray, blue, black and white molds will affect your seeds.
Keep your work area clean and organized.
You want to create as close to a clean room as you can get:
Purple Caper Seeds’ genetics facility has six air purifiers, and Frank does all his cannabis seed germination work in a sterile room with a laminar hood.
We’re going to assume not everybody has access to this kind of a setup. So as a stand-in practice, Frank recommends bleaching your bathroom clean and bringing in an air purifier.
Do your best to create a clean room. We used a kitchen island disinfected with 91% alcohol.

Materials needed to germinate marijuana seeds effectively. Purple Caper Seeds photo by Lizzy Cozzi.
The materials you’ll need to pop seeds:
A gallon or more of distilled water.
Peroxide 3% solution.
Iso alcohol 91%.
Nutrient Solution—We’ll describe how to make this in the steps that follow.
Cal (Calcium) Mag (Magnesium) supplement – Frank recommends Cal-Mag Plus by Botanicare.
General Hydroponic Flora Microbe Series. This series comes in 3 bottles: Grow, Bloom and Micro.
PH Up or PH Down by General Hydroponics.
Organic agave extract.
PH meter —
Test Tubes—Frank recommends laboratory quality glass. Cheap test tubes will break when you sterilize them. While all of these materials can be purchased at Home Depot it is possible to buy a quality tissue culture kit for under $150, thus saving yourself a lot of running around.. Microclone.com – produces good basic kit.
Push Rod—Chopsticks work well.
Yeast tube Caps – Available at Home Depot.
Feeding Tube—Available at Home Depot.
Coco Coir (prewashed and charged)—Coco Coir is a natural fiber extracted from the husk of coconut. Often used as a soil amendment it adds organic matter, aerates the soil and improves water holding capacity near the root zone.
Small plastic cups with lids.
Liquid waste container.
Aluminum foil precut to size—You’ll use these to wrap the tubes.
Plastic tube holder.
Sterile plastic pipette—Make sure to open the plastic bag of pipettes only when you are ready to use them.
How to germinate cannabis seeds in 12 easy steps
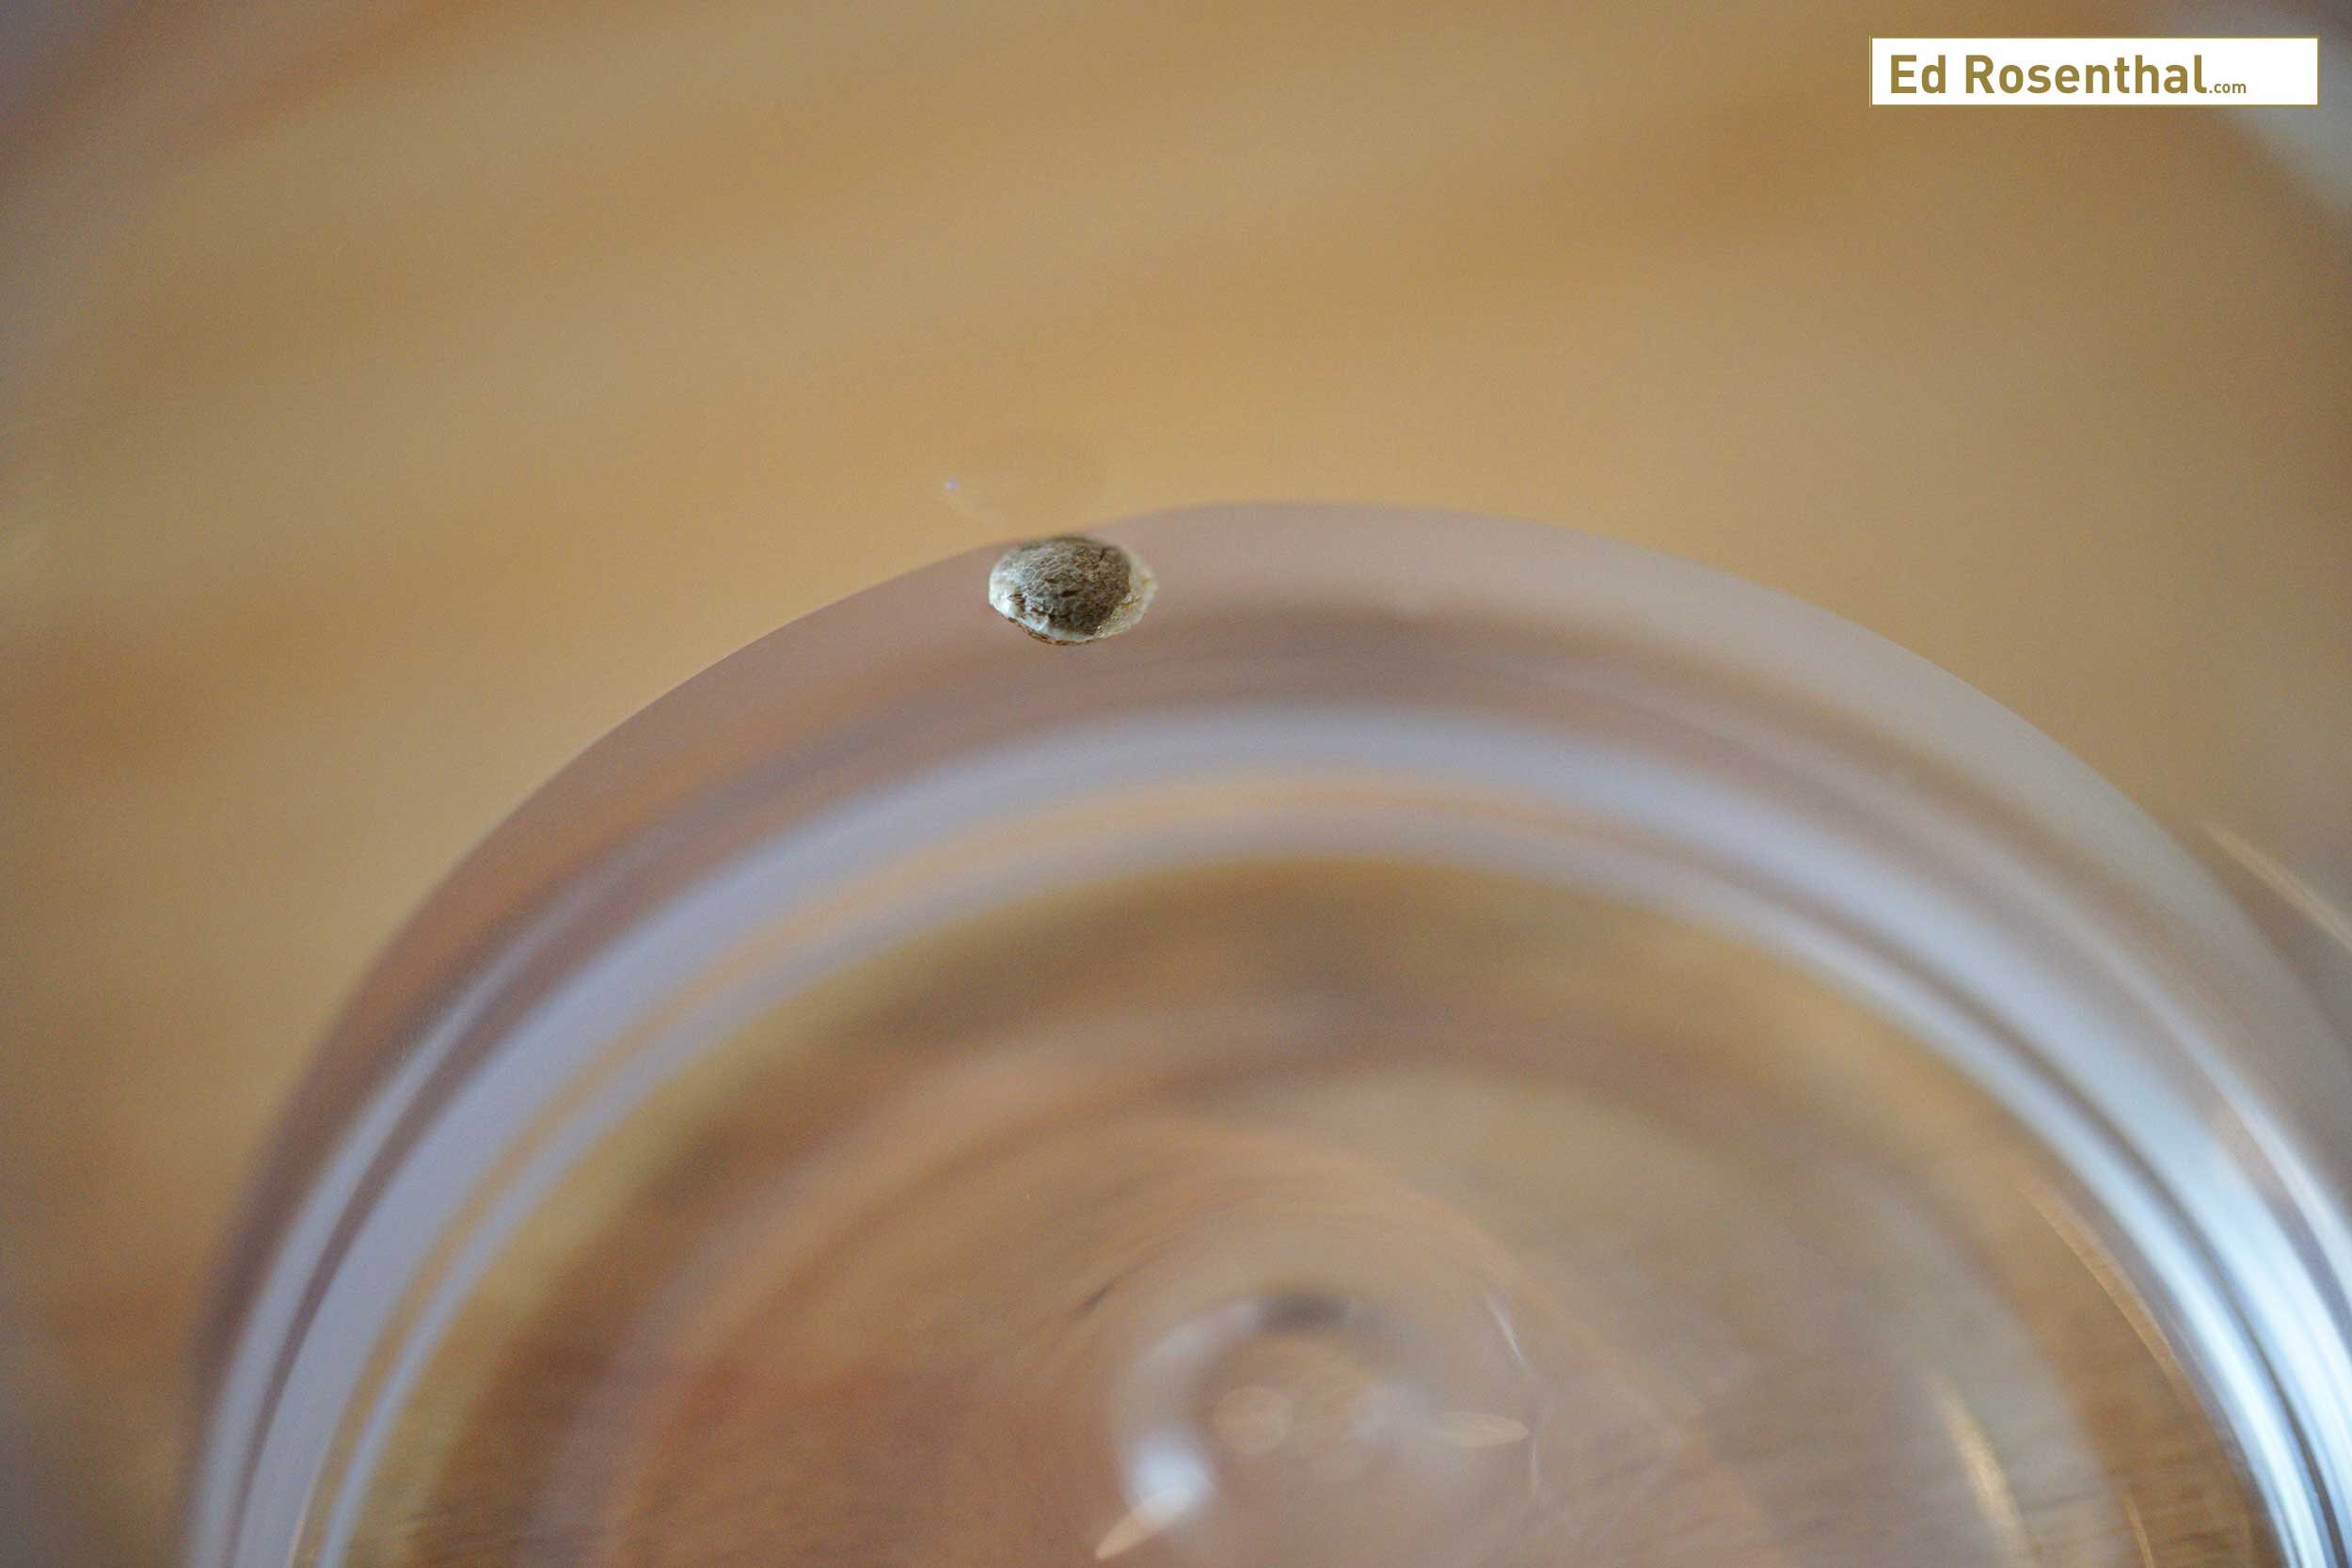
A cannabis seed soaking in distilled water. Purple Caper Seeds photo by Lizzy Cozzi.
Step 1:
Clean the seeds and soak in distilled water for 48 hours
Bring a gallon or more of distilled water to a complete rolling boil. You’ll use this sterile water in several steps in this process. (Contrary to what many believe distilled water is not sterile.)
Remove excess dirt from the seeds, cover them with the water and leave them to soak.
Step 2:
Make your nutrient solution
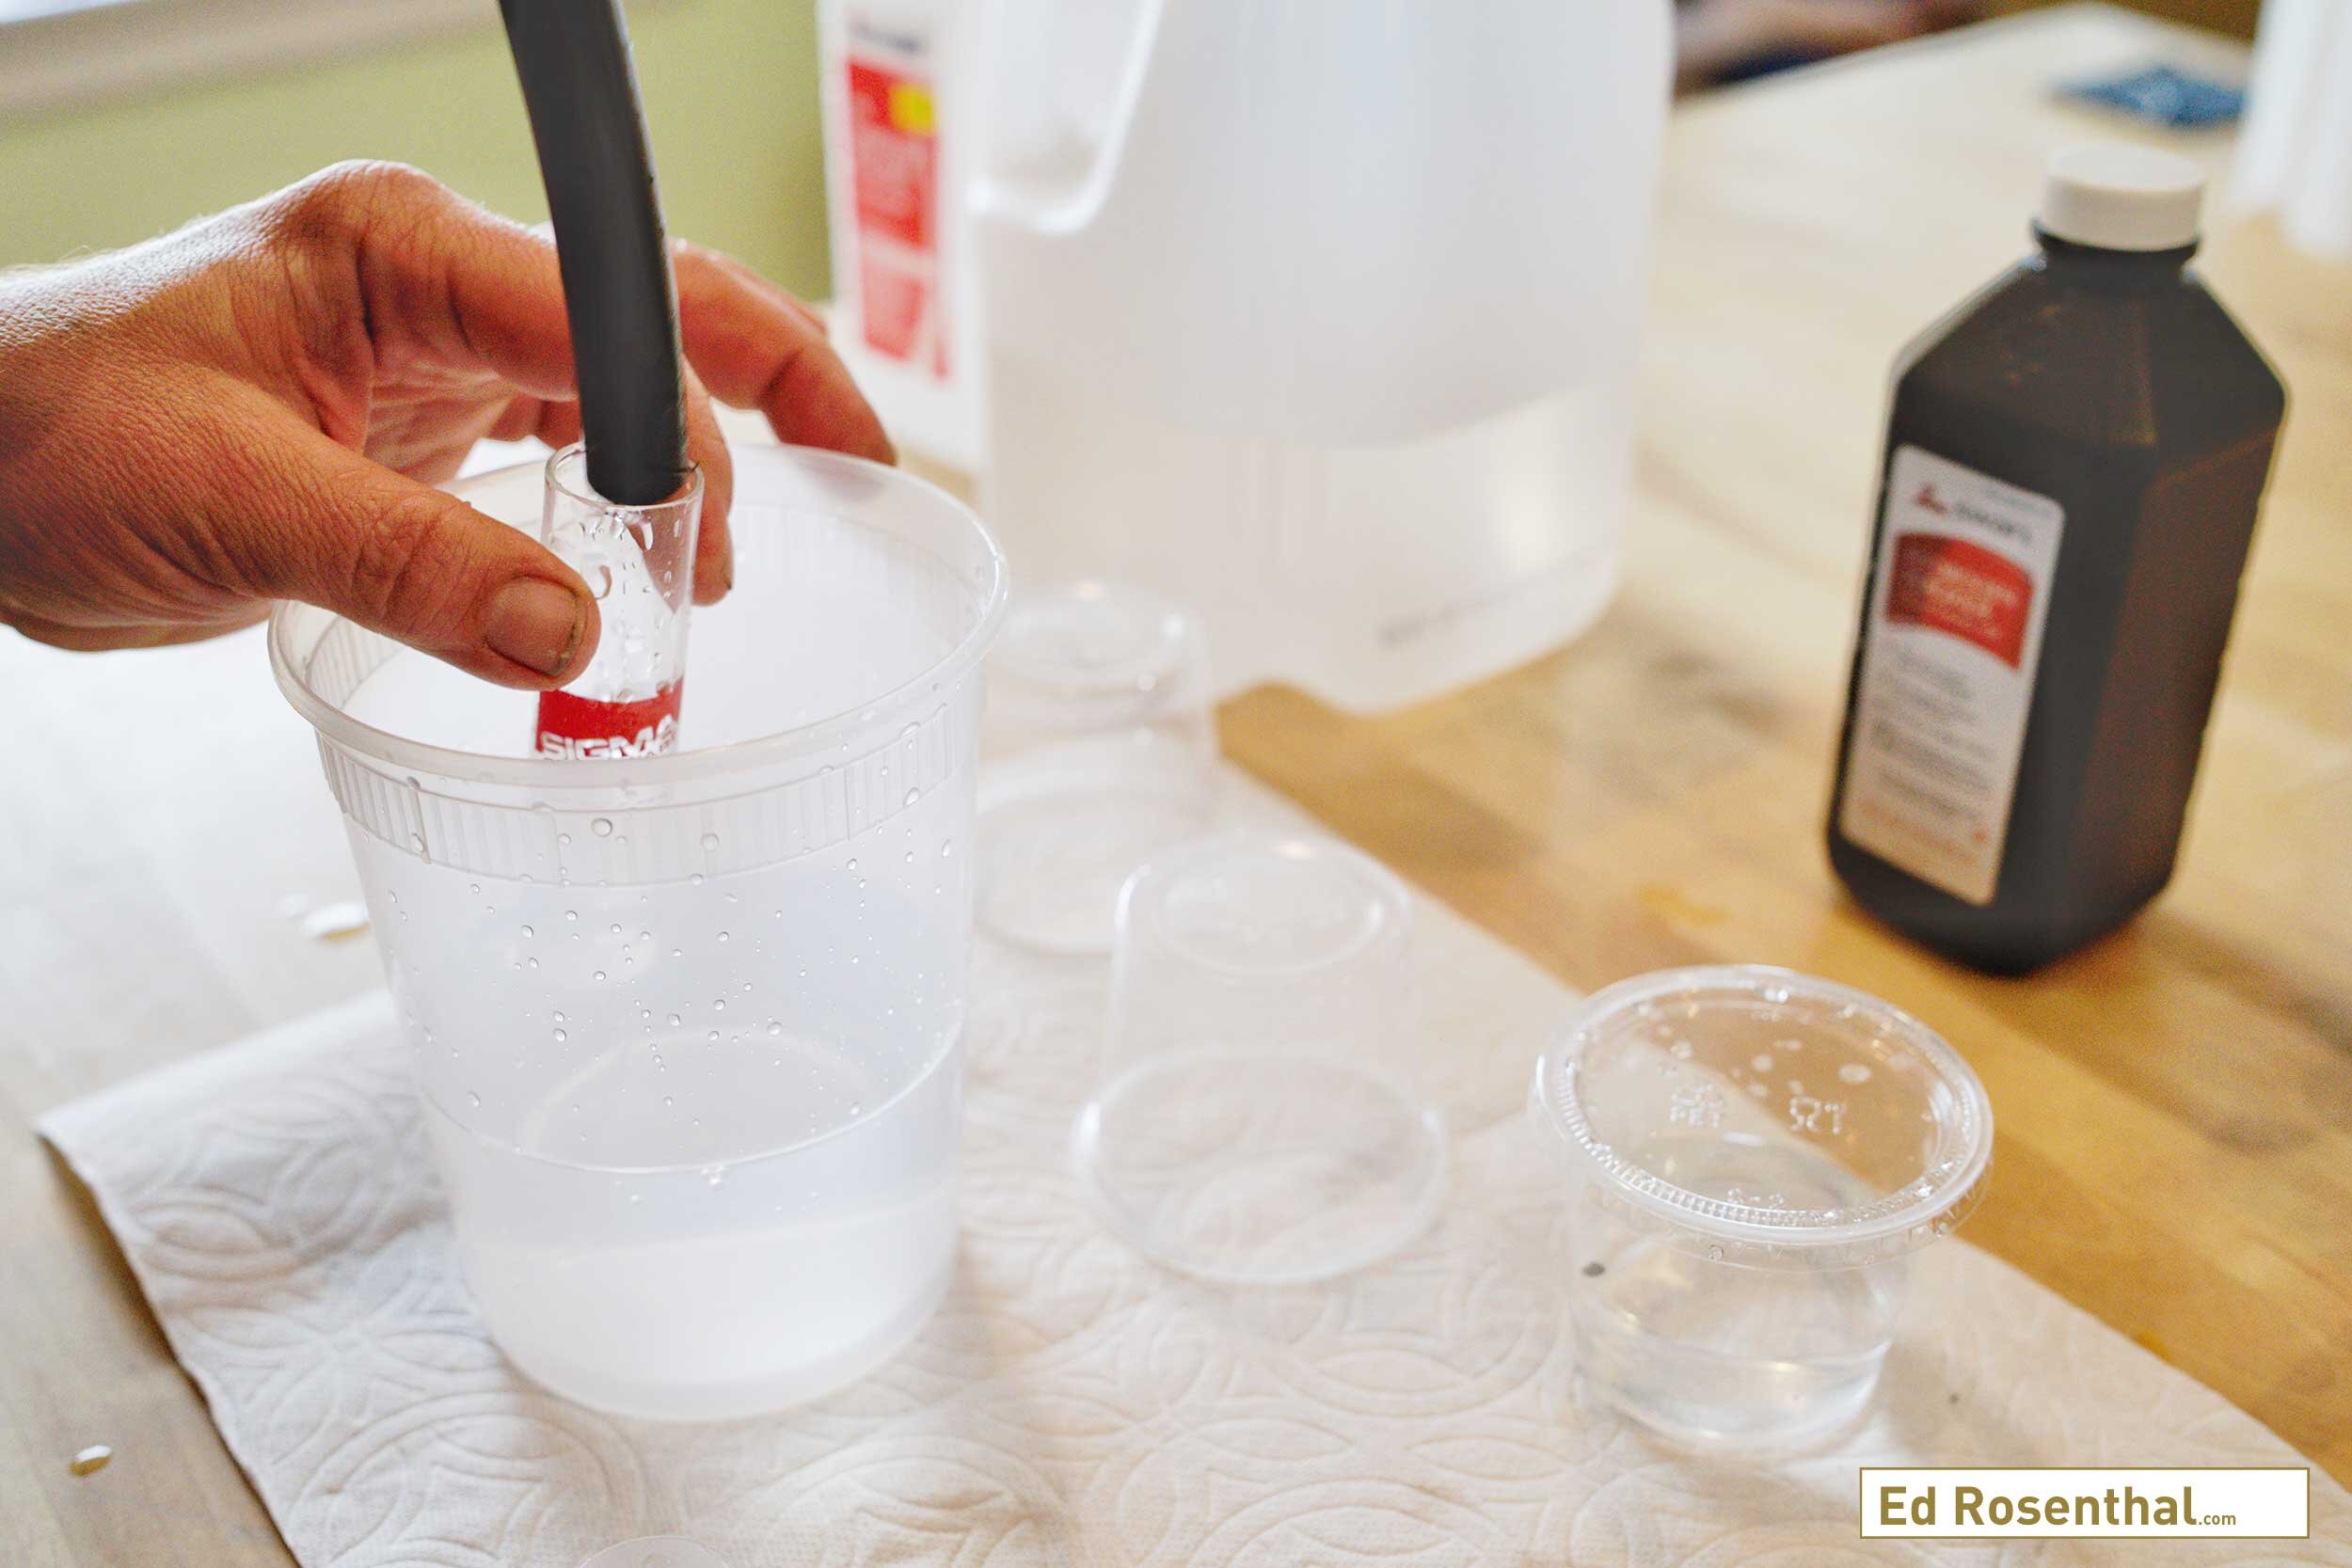
Start with a ¾ gallon of sterile, distilled water.
Add 2 ml organic agave extract into the distilled water when it is still hot. Let it dissolve and cool.
Add 2 ml Cal (Calcium) Mag (Magnesium) supplement – Frank recommends Cal-Mag Plus by Botanicare
Add General Hydroponic Flora Microbe Series. This series comes in 3 bottles: Grow, Bloom and Micro. Add 1ml of EACH to your solution.
Use your PH meter to test the solution. The PH should be as close to 6.0 as possible. If the solution is too acidic or basic adjust with PH Up or PH Down by General Hydroponics.
Put the solution back in the distilled water container for easy transport to your clean room.
Step 3
Soak your seed in the nutrient solution for 48 hours
Cover the seeds with the solution. Small, sterile plastic cups with lids are effective for this; they are easy to re-sterilize and reuse.
Once the seeds have sat in the nutrient solution for 48 hours, it’s time to move into the next phase of prep.
Step 4
Prep your tools
Sterilize the test tubes, yeast caps, feeding tube, push rod and the coco coir.
You can sterilize your equipment in two ways:
A simple, and often overlooked way to sterilize materials in your home is with the help of a pressure cooker.
If you don’t have a pressure cooker, submerging the equipment in boiling water is another sterilization technique. Sterilizing with boiling water works for all material except the coco coir, which becomes hard to work with when saturated with water. Coco coir is pre-washed but not sterilized. Frank recommends sterilizing the coco coir by pressure cooker, if possible.
When using a pressure cooker, begin with the coco coir. Put some coco coir in a petri dish and place it inside the pressure cooker.
Start the pressure cooker. As soon as it reaches its max temperature, release the pressure. Open the cooker in your clean area to minimize contamination.
Sterilize the other tools in the same way.
Store all tools in a clean environment.
Step 5:
Prep yourself
Use a healthy dose of iso alcohol 91% and clean your hands. Take your time with this. Frank does not use gloves because he feels it gives him a better feel for working with the seeds.
To further minimize contamination, it is recommended you wear a surgical mask while you work.

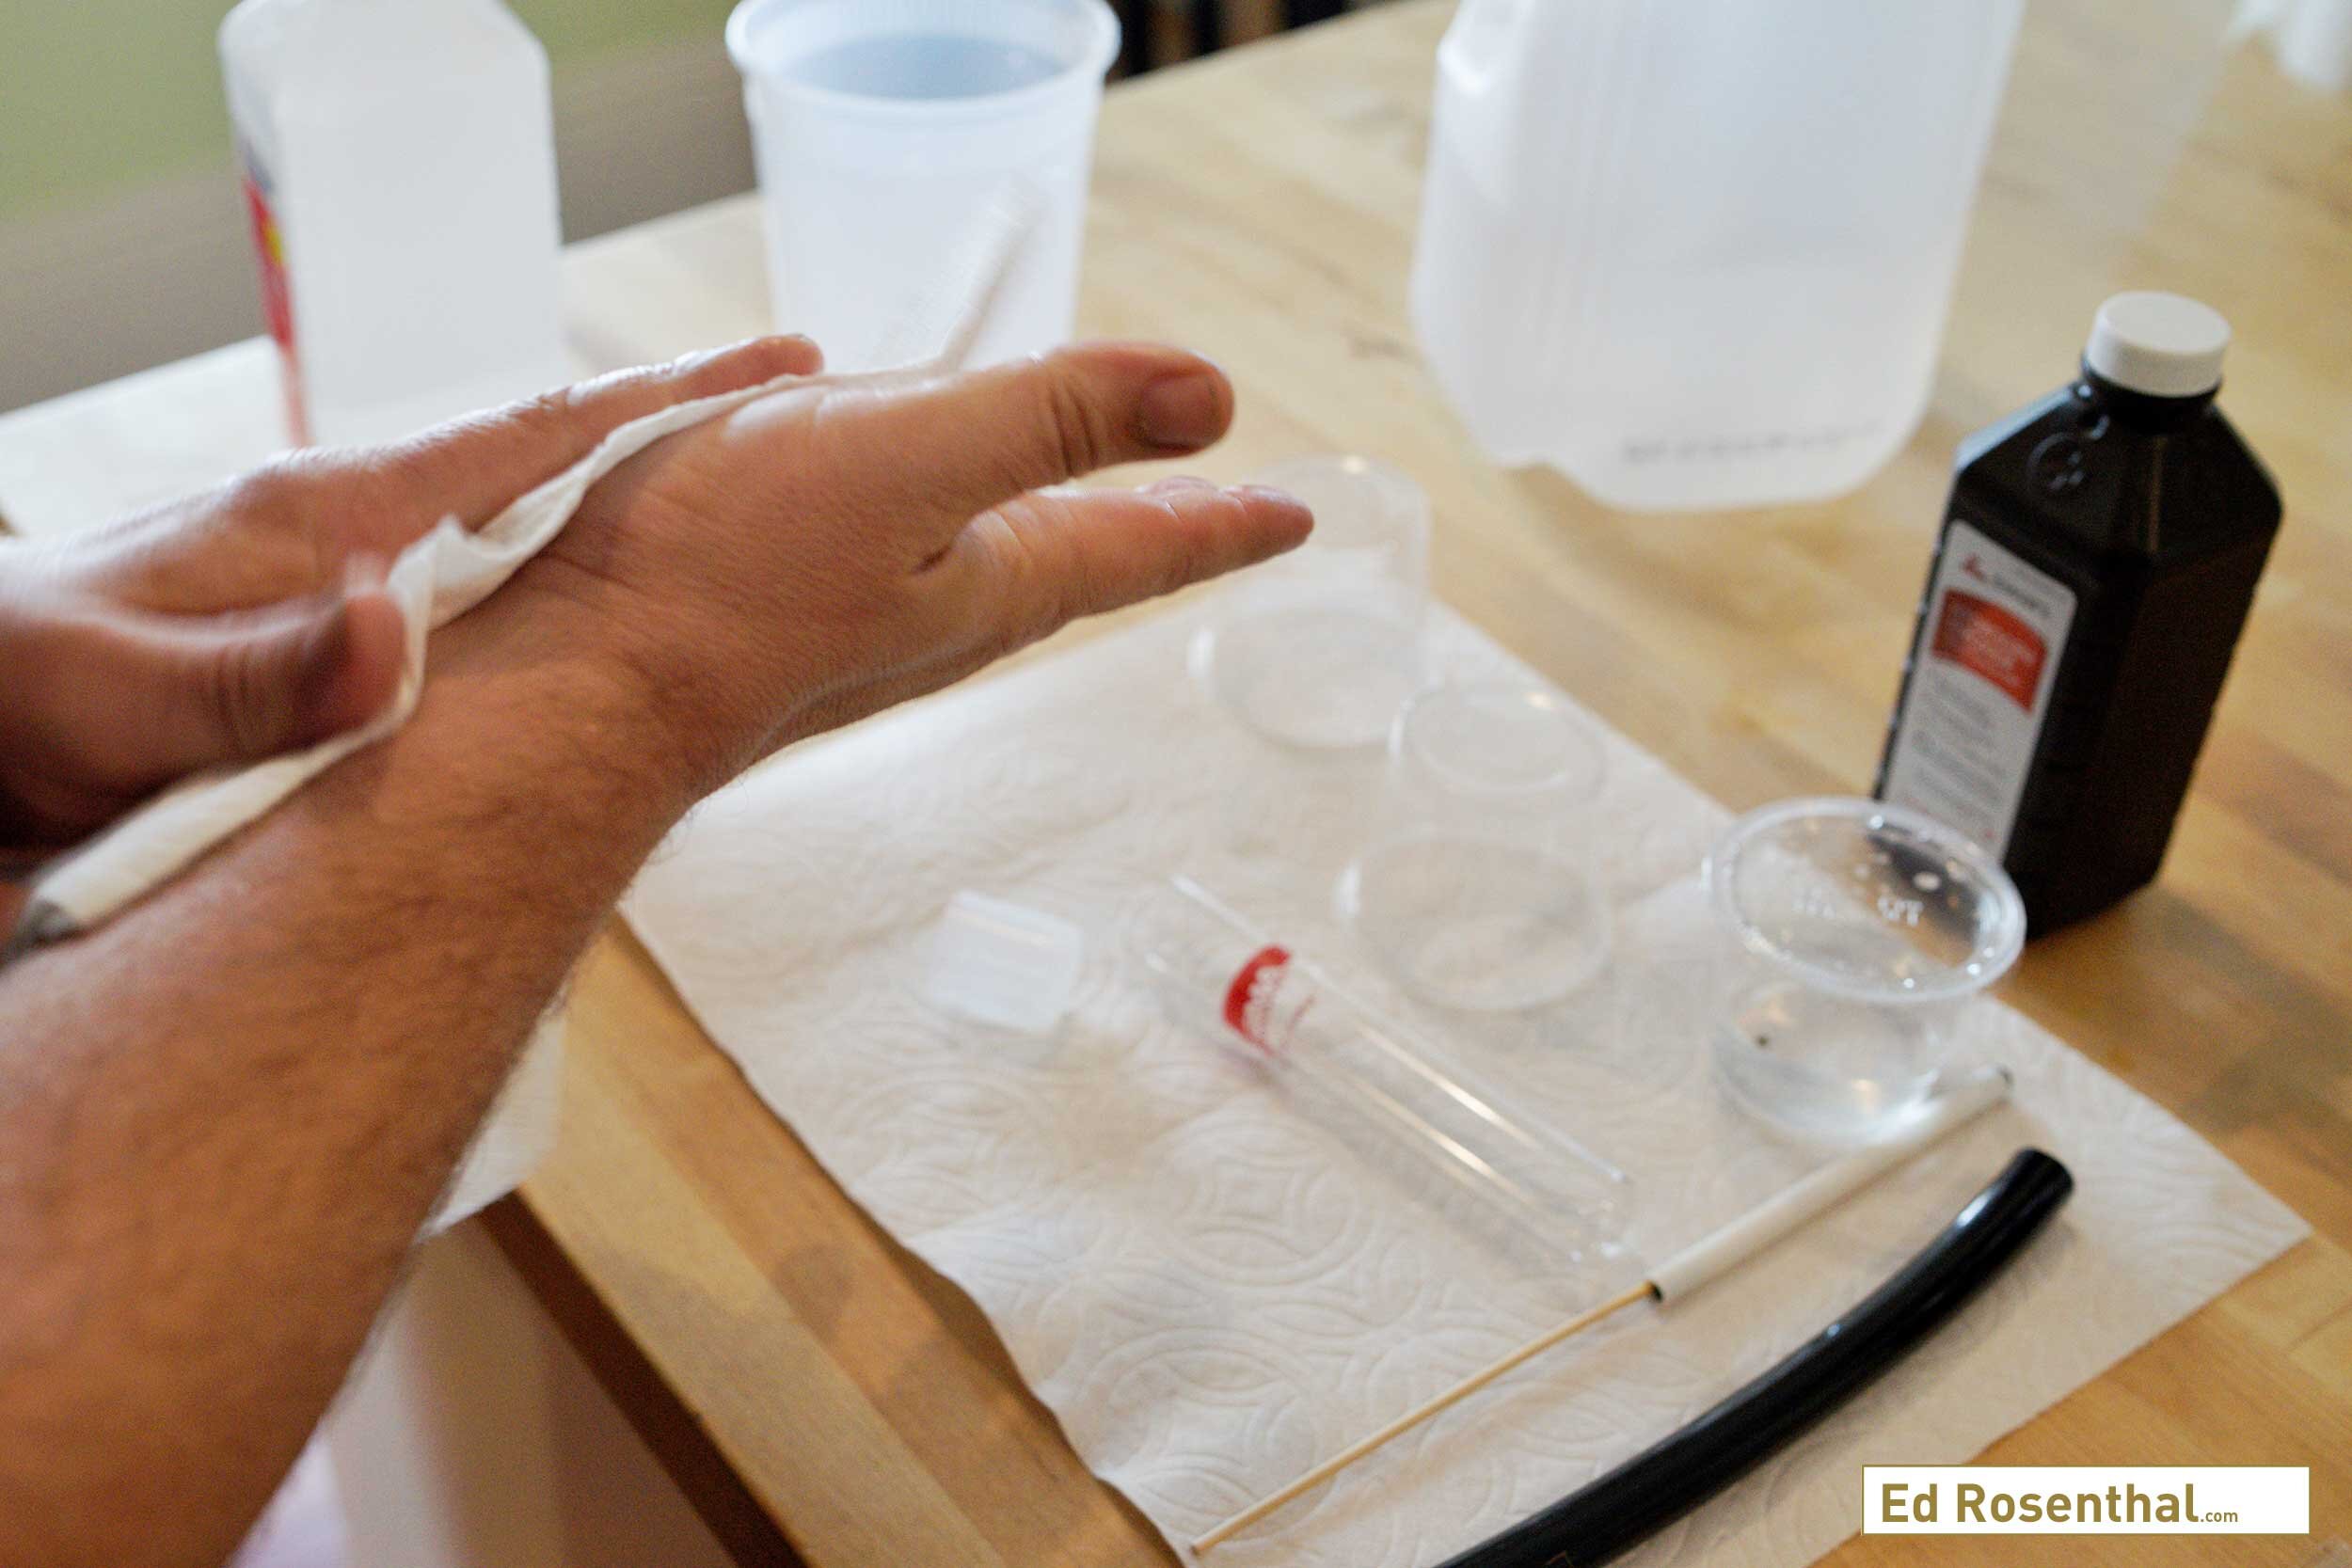
Alcohol and distilled water are necessary for cannabis seeds germination. Purple Caper Seeds. Photo by Lizzy Cozzi.
Step 6:
Prep your work area
Begin by cleaning all surfaces with the 91% iso alcohol. Keep in mind it takes about 20 seconds for alcohol to do its job so don’t assume all surfaces are immediately sterile after you wipe them clean.
Set up all the tools you need.
Wipe down the top and sides of the nutrient solution bottle with the iso alcohol.
Step 7:
Sterilize, sterilize, sterilize
Dip the test tube, the yeast cap, and pushrod in a solution of 3% peroxide.
Let the peroxide sit in the yeast tube for several minutes.
Discard the peroxide into the waste container and then flush and/or clean all items with the nutrient solution.
Sterilize everything you touch and use while you germinate your cannabis seeds. Purple Caper Seeds photo by Lizzy Cozzi.
Step 8:
Create the Coco-Plug
Take a pinch of coco coir and load it into a feeding tube. In this case, the feeding tube is used to keep the walls of the test tube clean when depositing the coir.
Put the contents of the feeding tube into the test tube.
Push the coco into the test tube with the push rod.
Remove the feeding tube and rod leaving approximately ½” of coco at the bottom of the test tube.
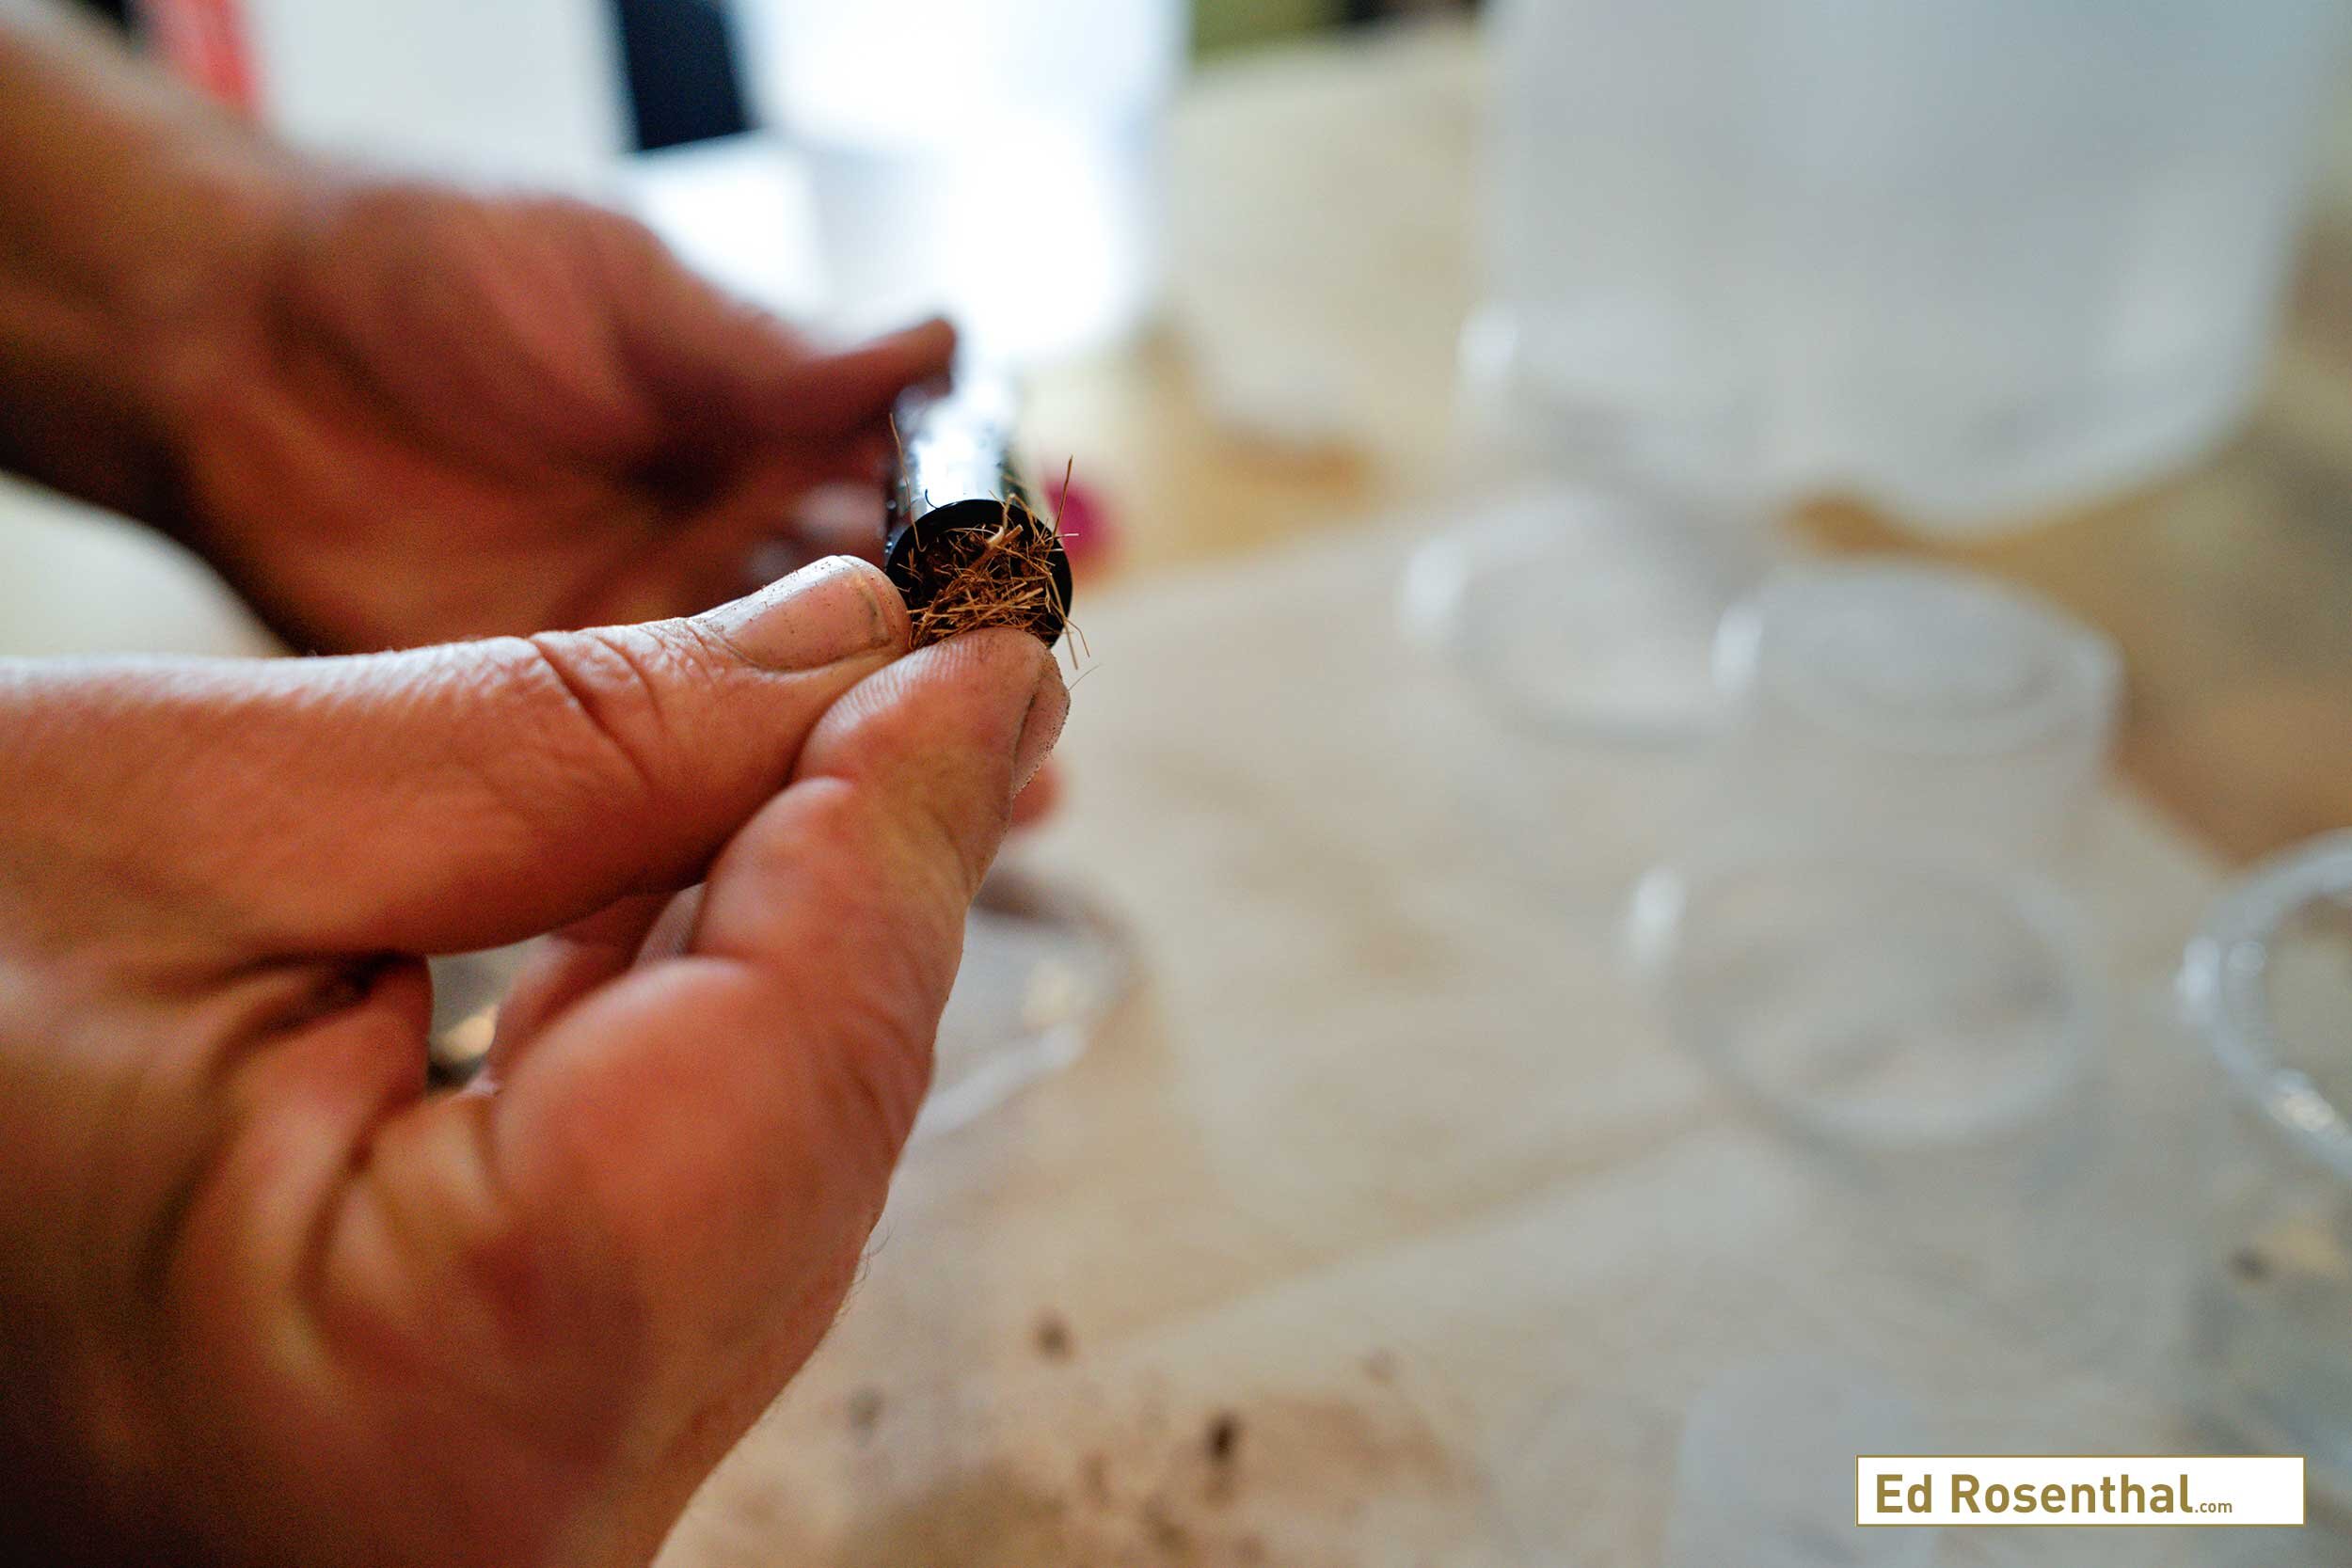
Coco plugs inserted it into the feeding tube for Purple Caper Seeds cannabis germination. Photo by Lizzy Cozzi.
Step 9:
Soak the seeds in peroxide
Using tweezers, pick up a seed from the nutrient solution where it has been soaking for the last 48 hours. If using plastic cups with lids, open and close the lid before and after you remove the seeds.
Drop the seed into the 3% peroxide solution.
Soak for 15 seconds, NOT longer. The peroxide will damage the seed if you soak it for much more than 15 seconds.
After removing it, clean the seed with the nutrient solution or with distilled water to neutralize the peroxide.
Step 10:
Prepare test tube
Using tweezers, drop the seed into the test tube. Ideally it should sit in the middle of the coco but it need not be perfectly centered; the seedling will grow against the glass.
Cap the tube with a yeast cap.
Open the bag containing the sterile pipettes . Remove the yeast cap and add 2 ml of nutrient solution to the test tube with the seed in it.
Seal the tube again with yeast cap. Don’t close it all the way. Yeast tube caps control airflow. If you don’t push the cap all the way down it will allow for a little external airflow. Yeast caps are made to burp. By not fully pushing down the cap you are allowing only about 1/64th of an inch of airflow, thus risking some contamination. But Frank swears by this process. He explained to us that the process still works when the yeast cap is fully sealed, but in his experience, the seedlings seem happier when a little airflow is allowed.
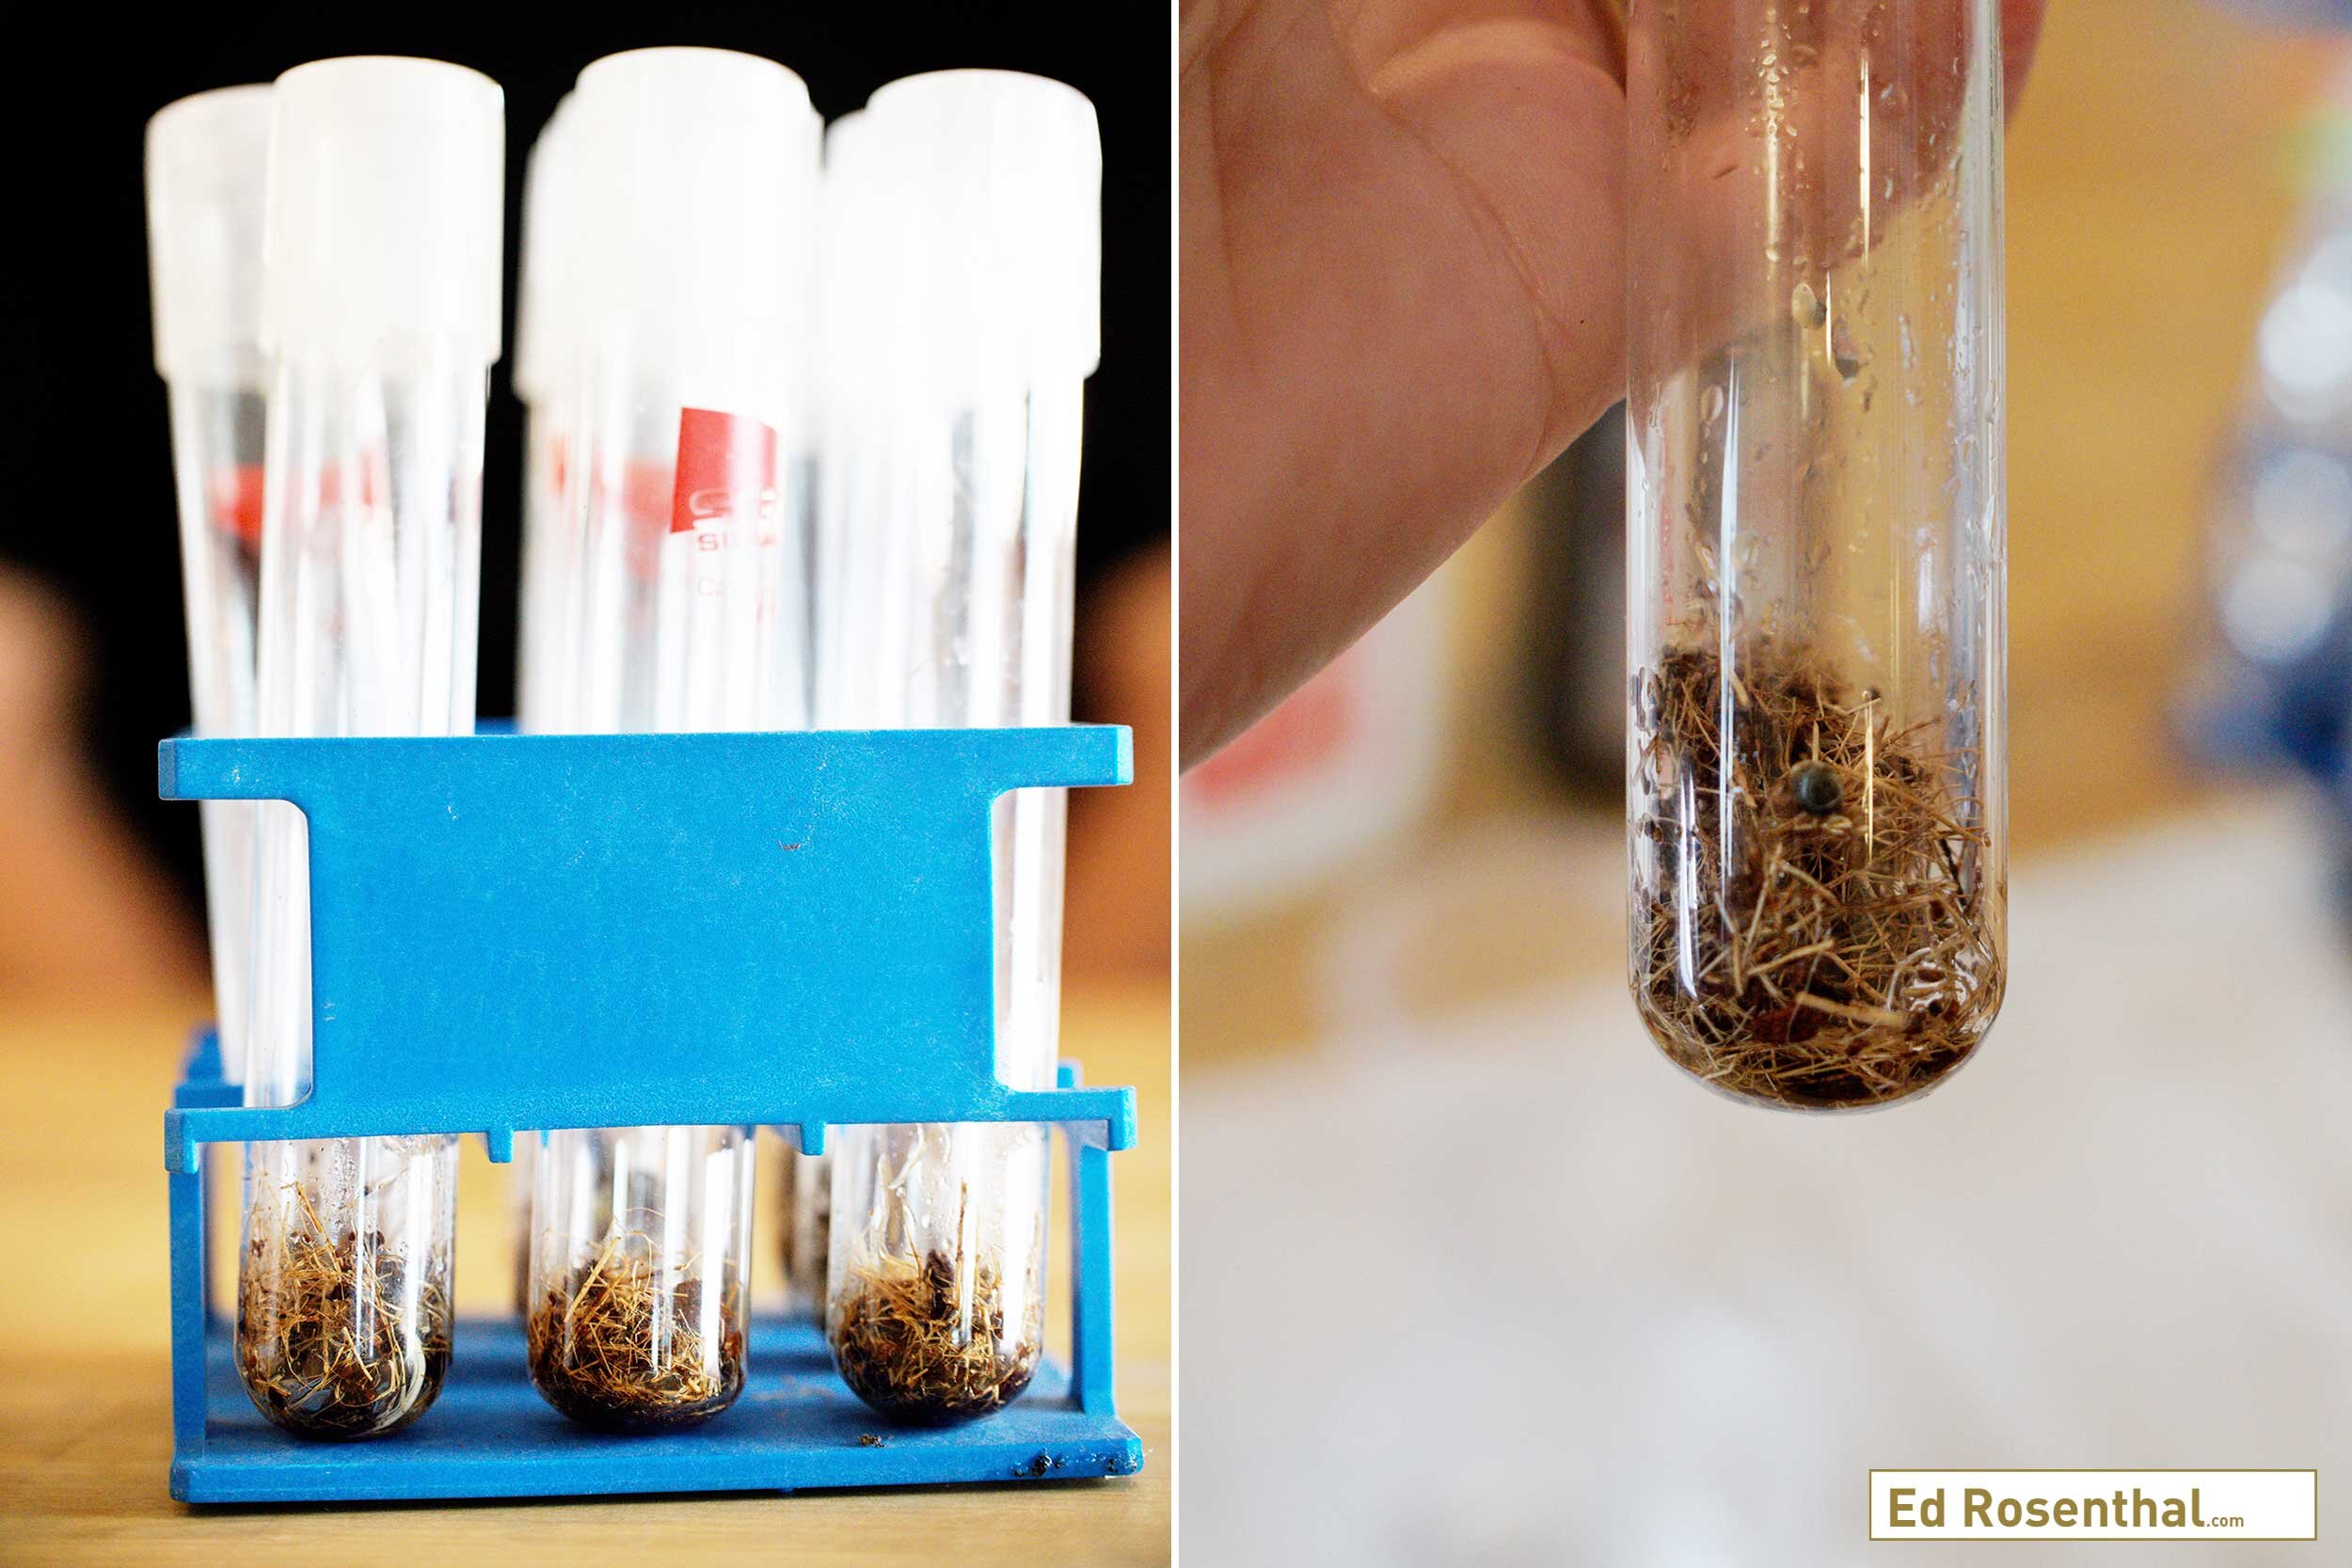
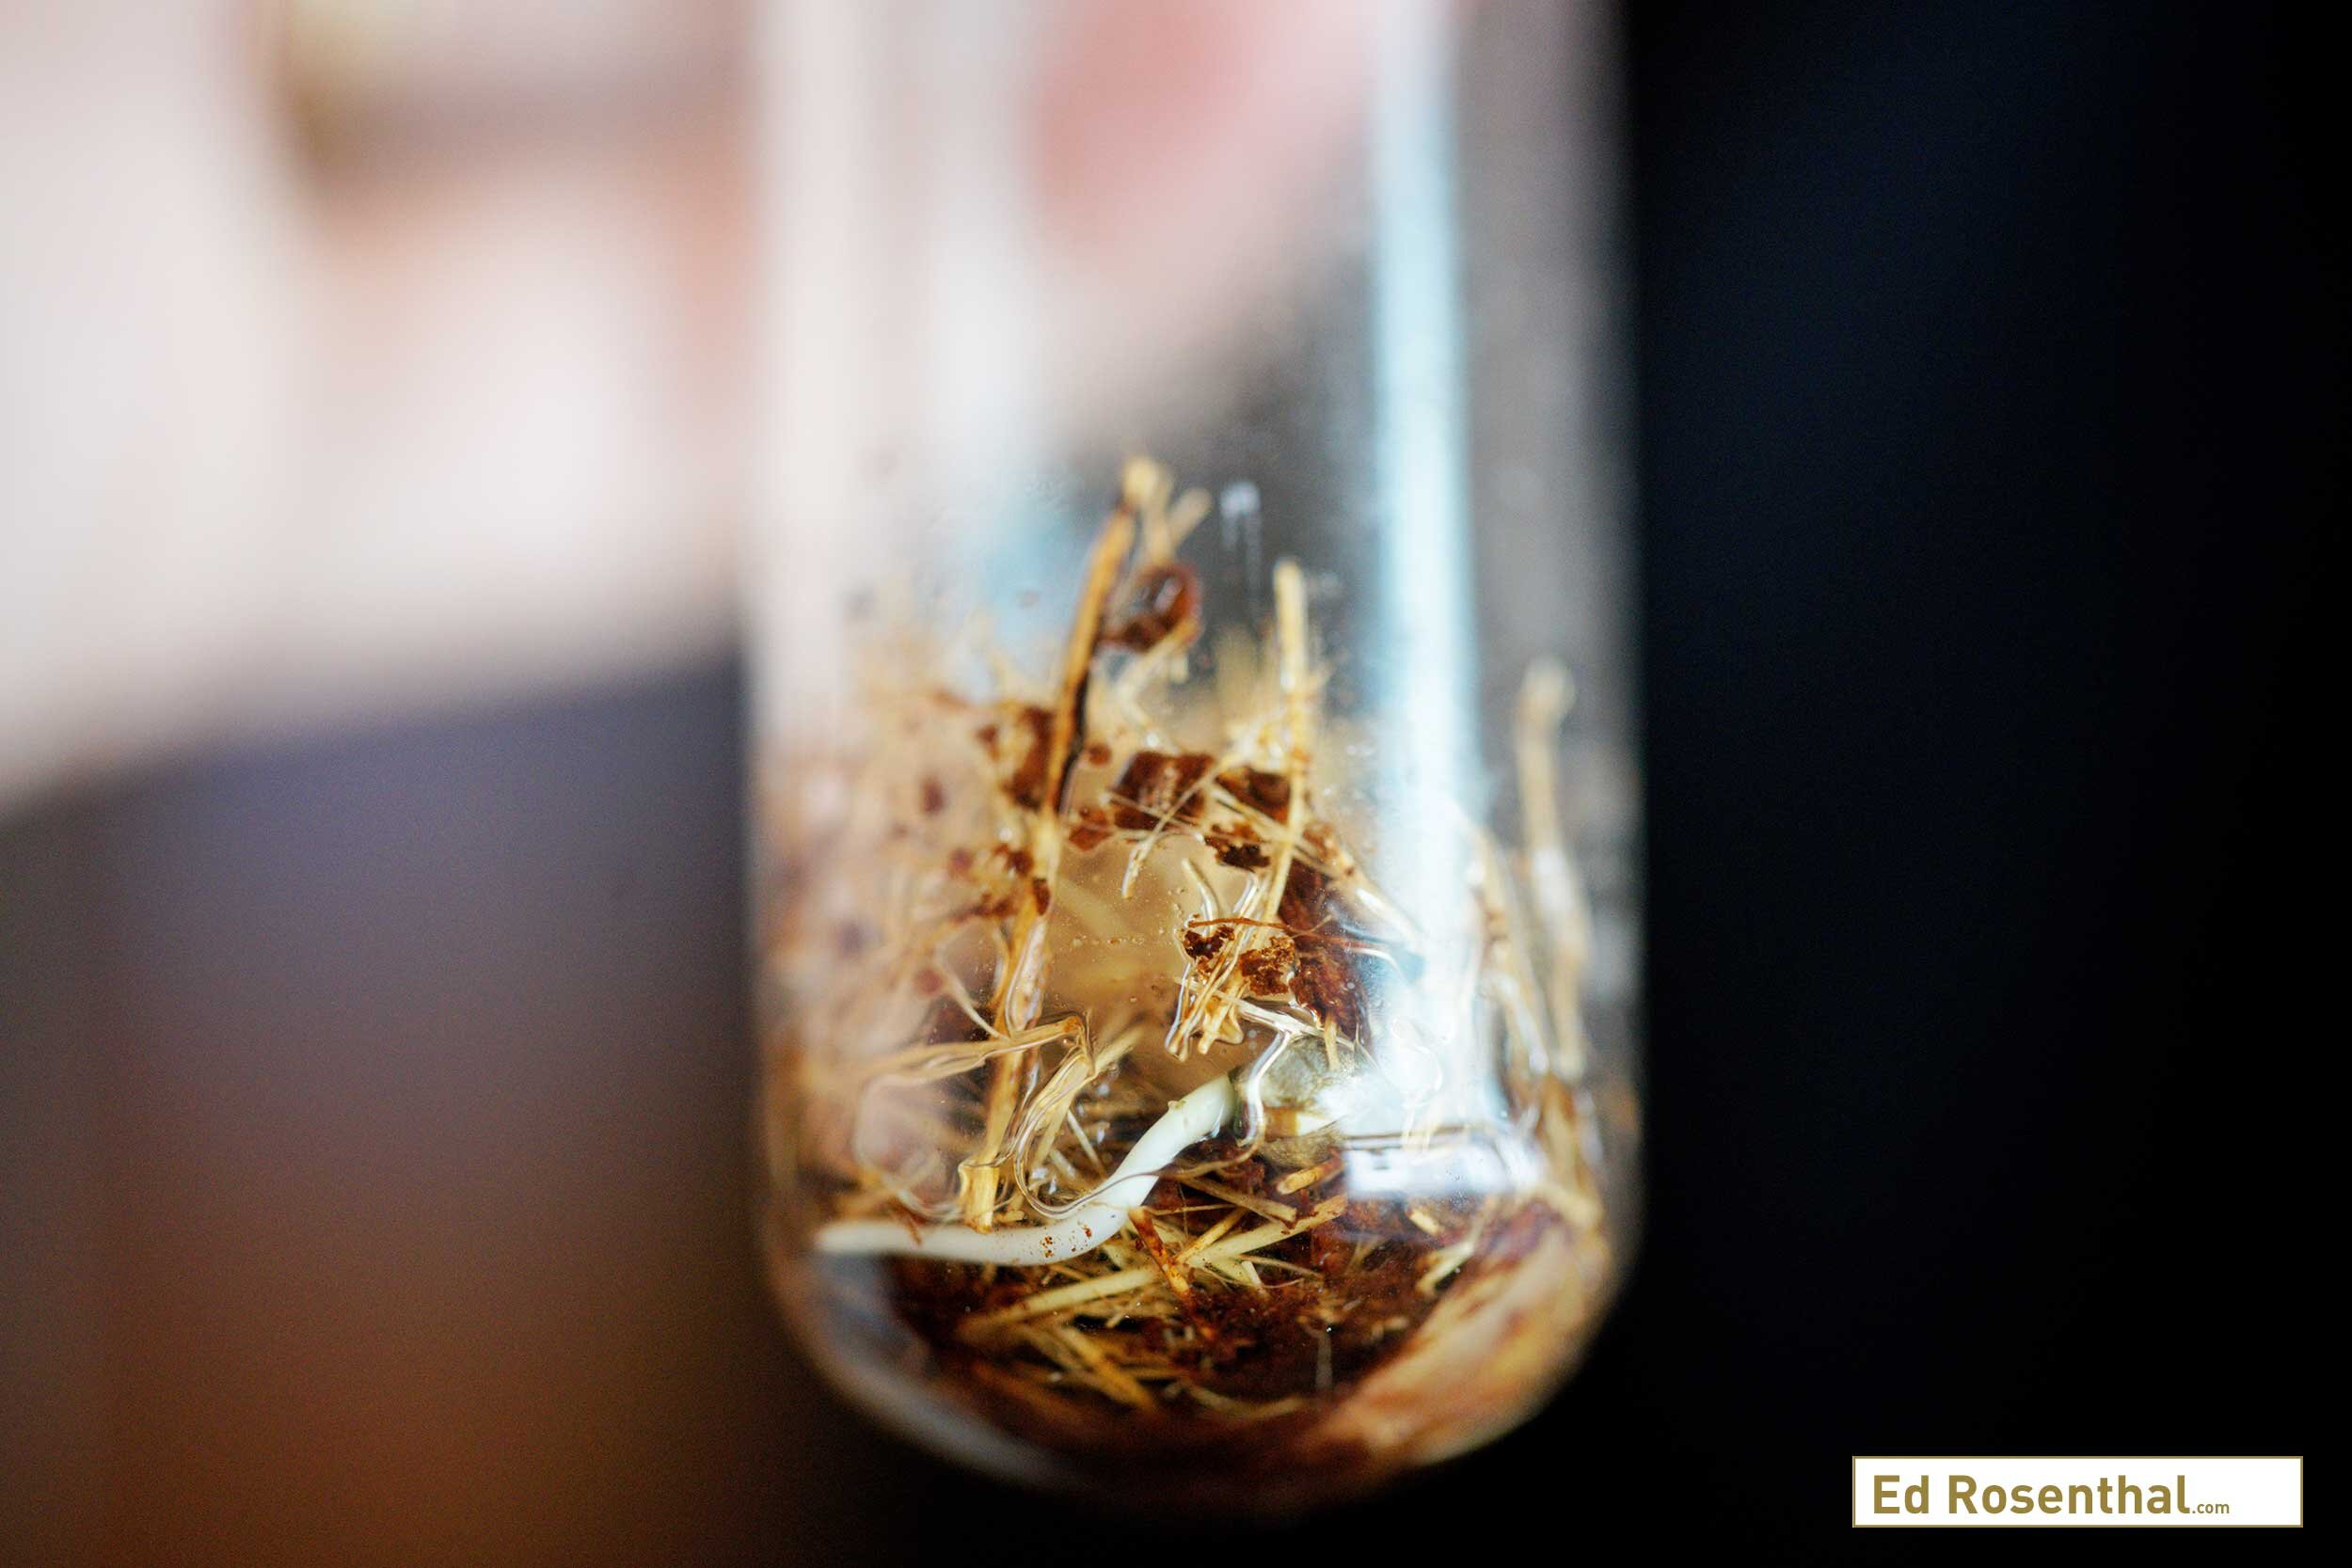
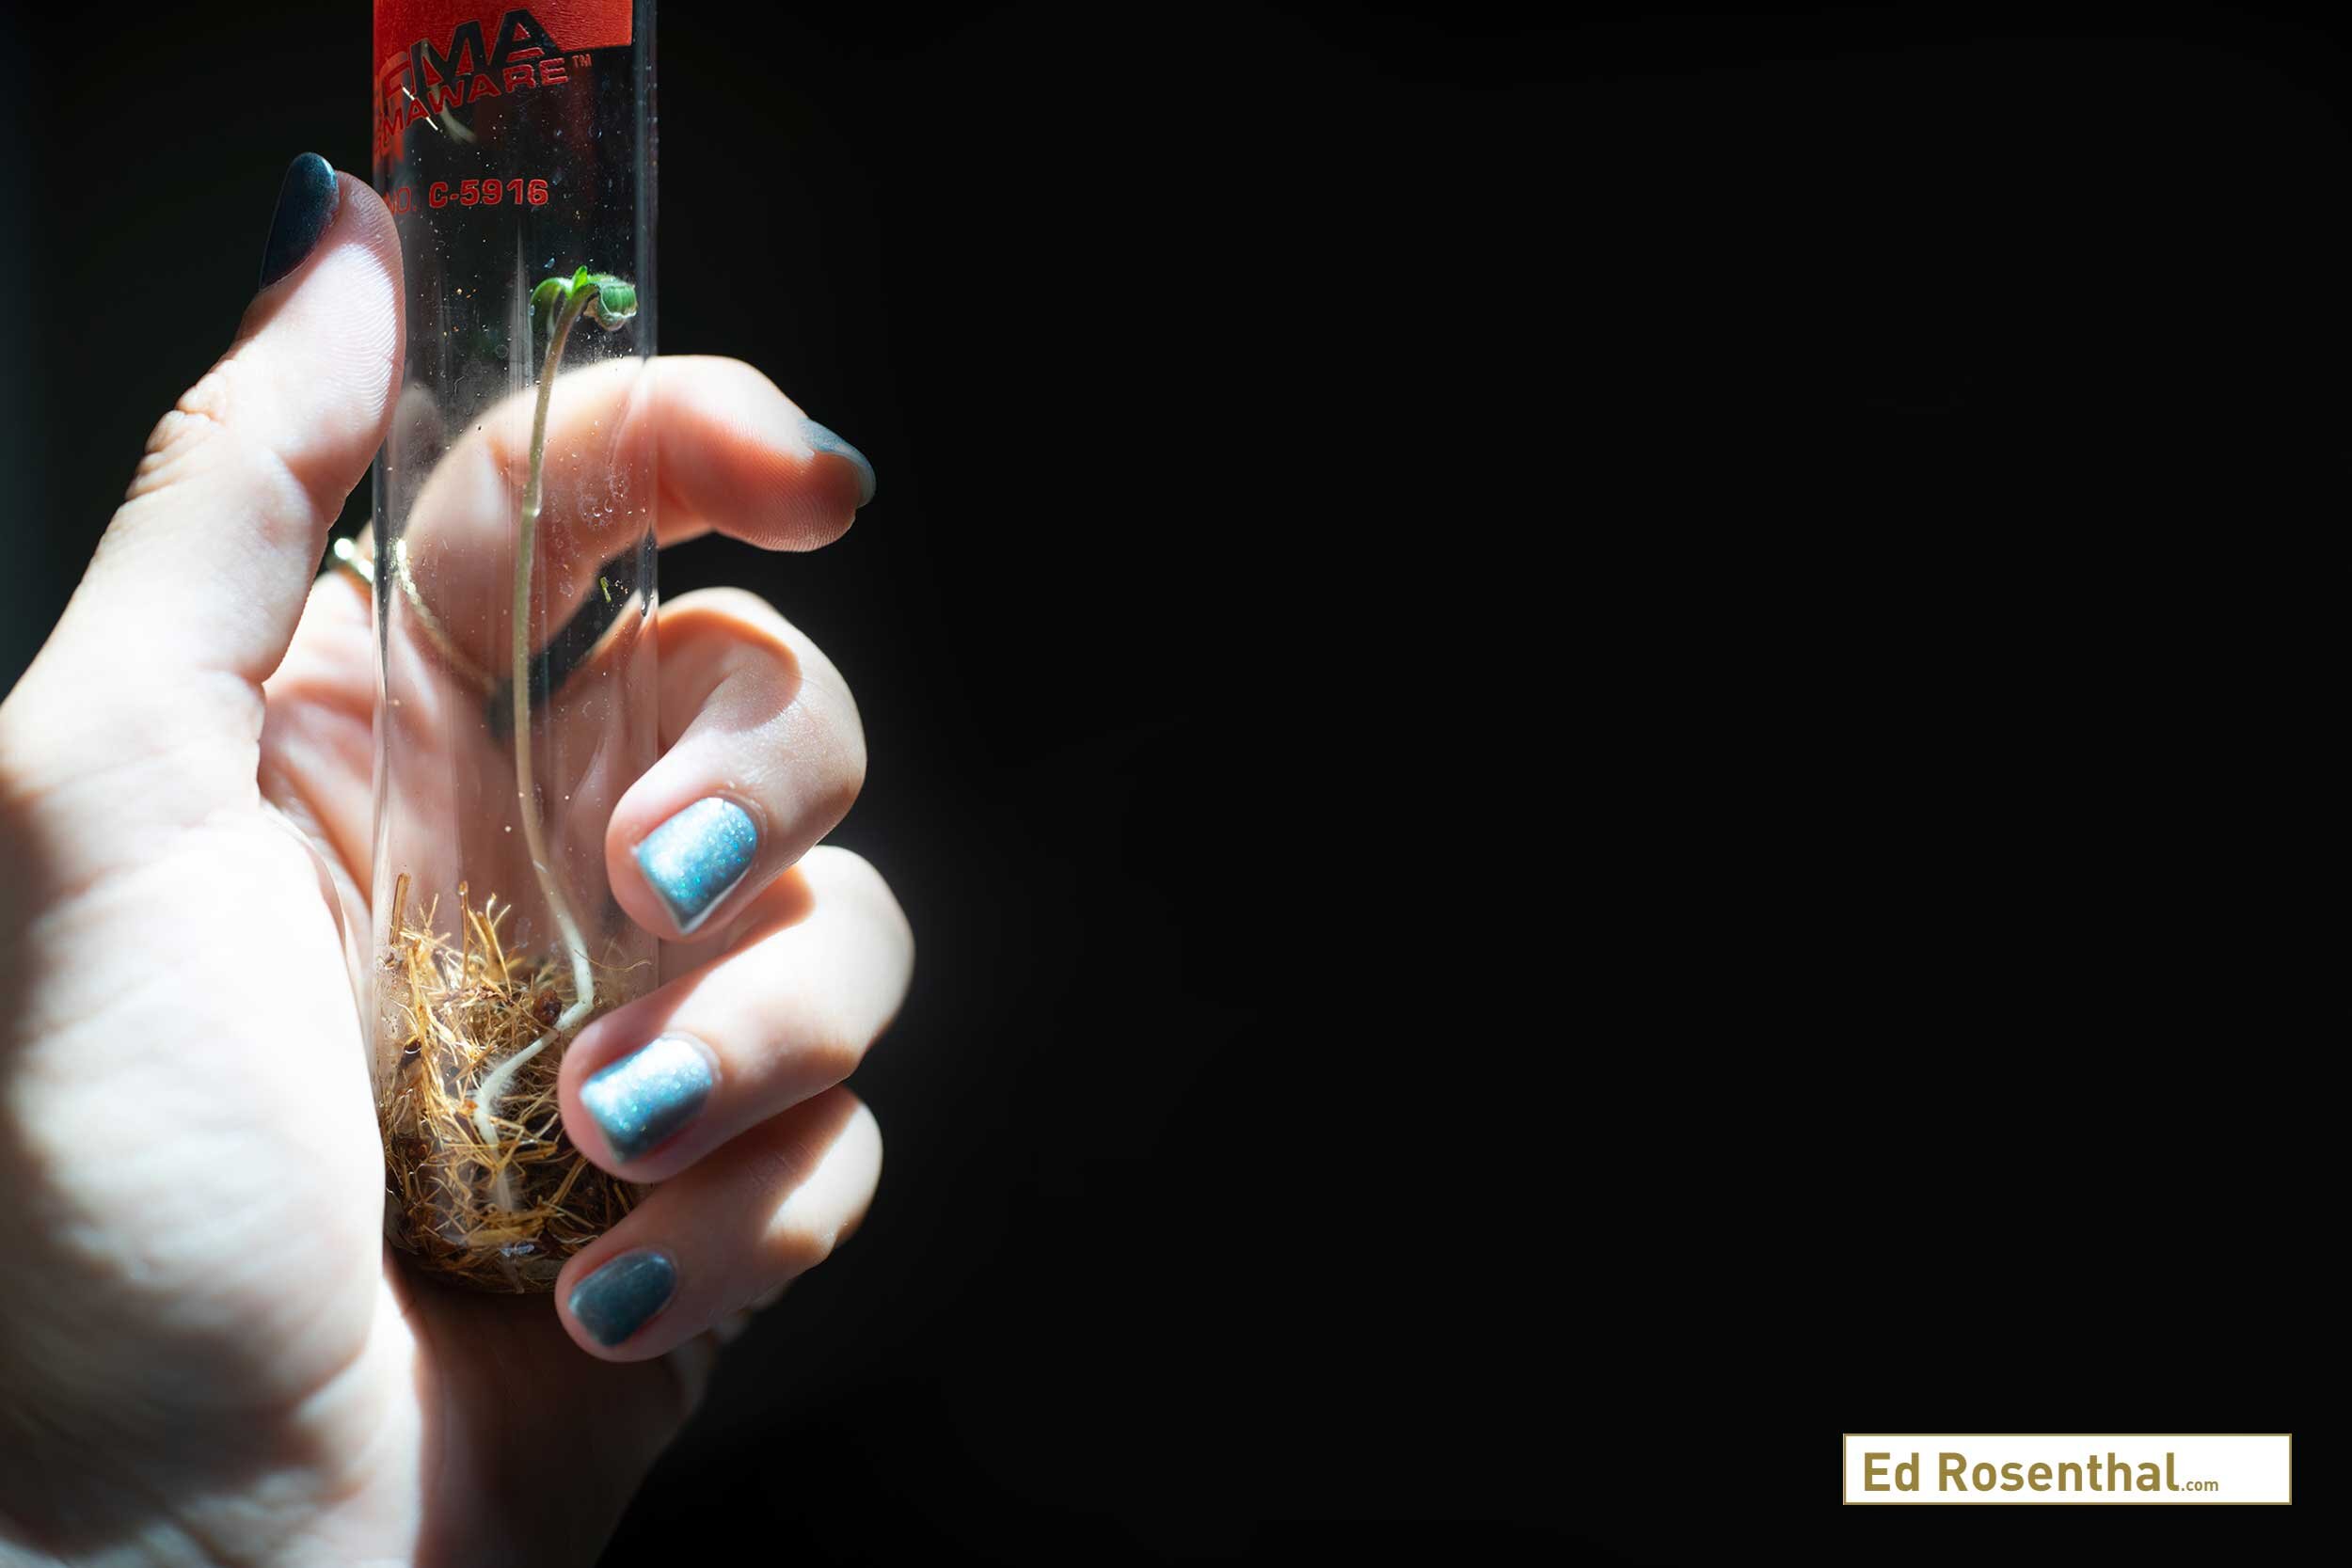
Ready to germinate cannabis seedlings: capped test tubes filled with seeds and coco coir. Purple Caper Seeds photo by Lizzy Cozzi.
Step 11:
Wrap the capped test tube
Wrap the test tube with a single layer of aluminum foil. Seedlings typically grow towards the light source. The goal here is to control the light, encouraging the seedling to grow north/south.
Stack the sealed tubes in your tube holder.
Continue until all seeds are used and all test tubes are placed in the holder.
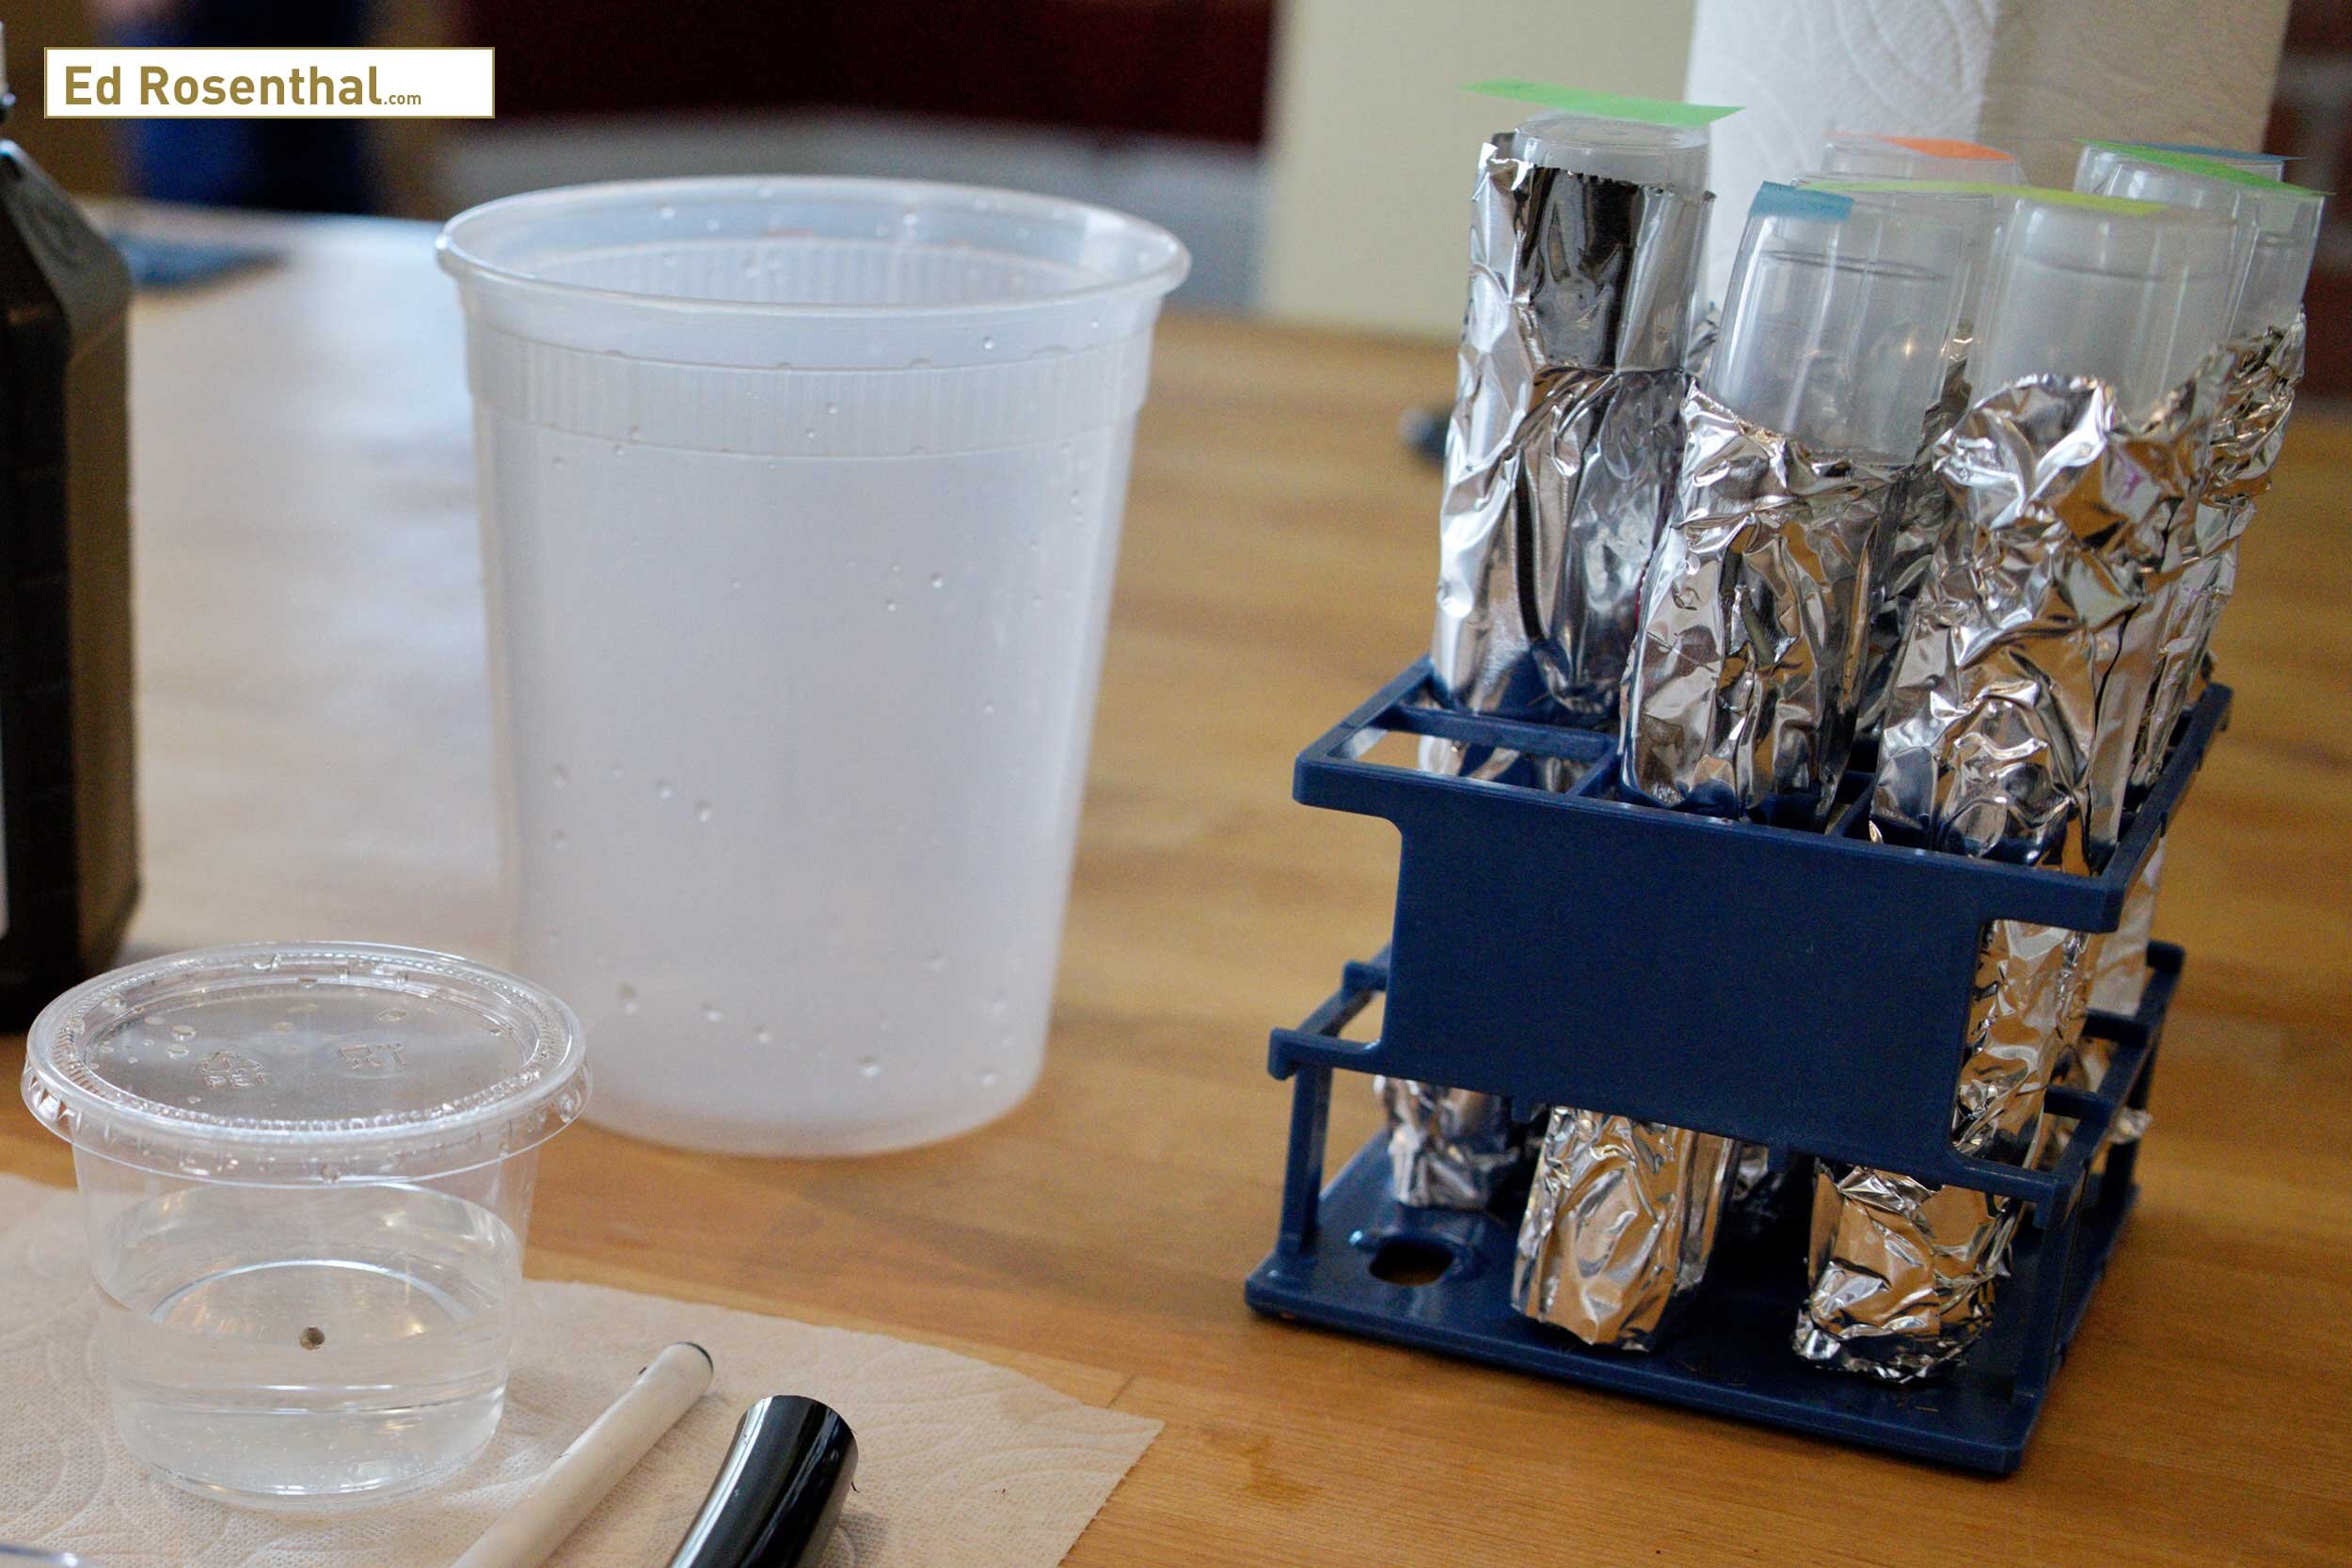
Wrapping the test tubes in aluminum foil encourages the cannabis seedling to grow toward the light. This makes transplanting cannabis seedling easier. Purple Caper Seeds photo by Lizzy Cozzi.
Step 12:
Place the seedlings under a light source
Place under a florescent light in a 78F environment.
Check every other day on the progress
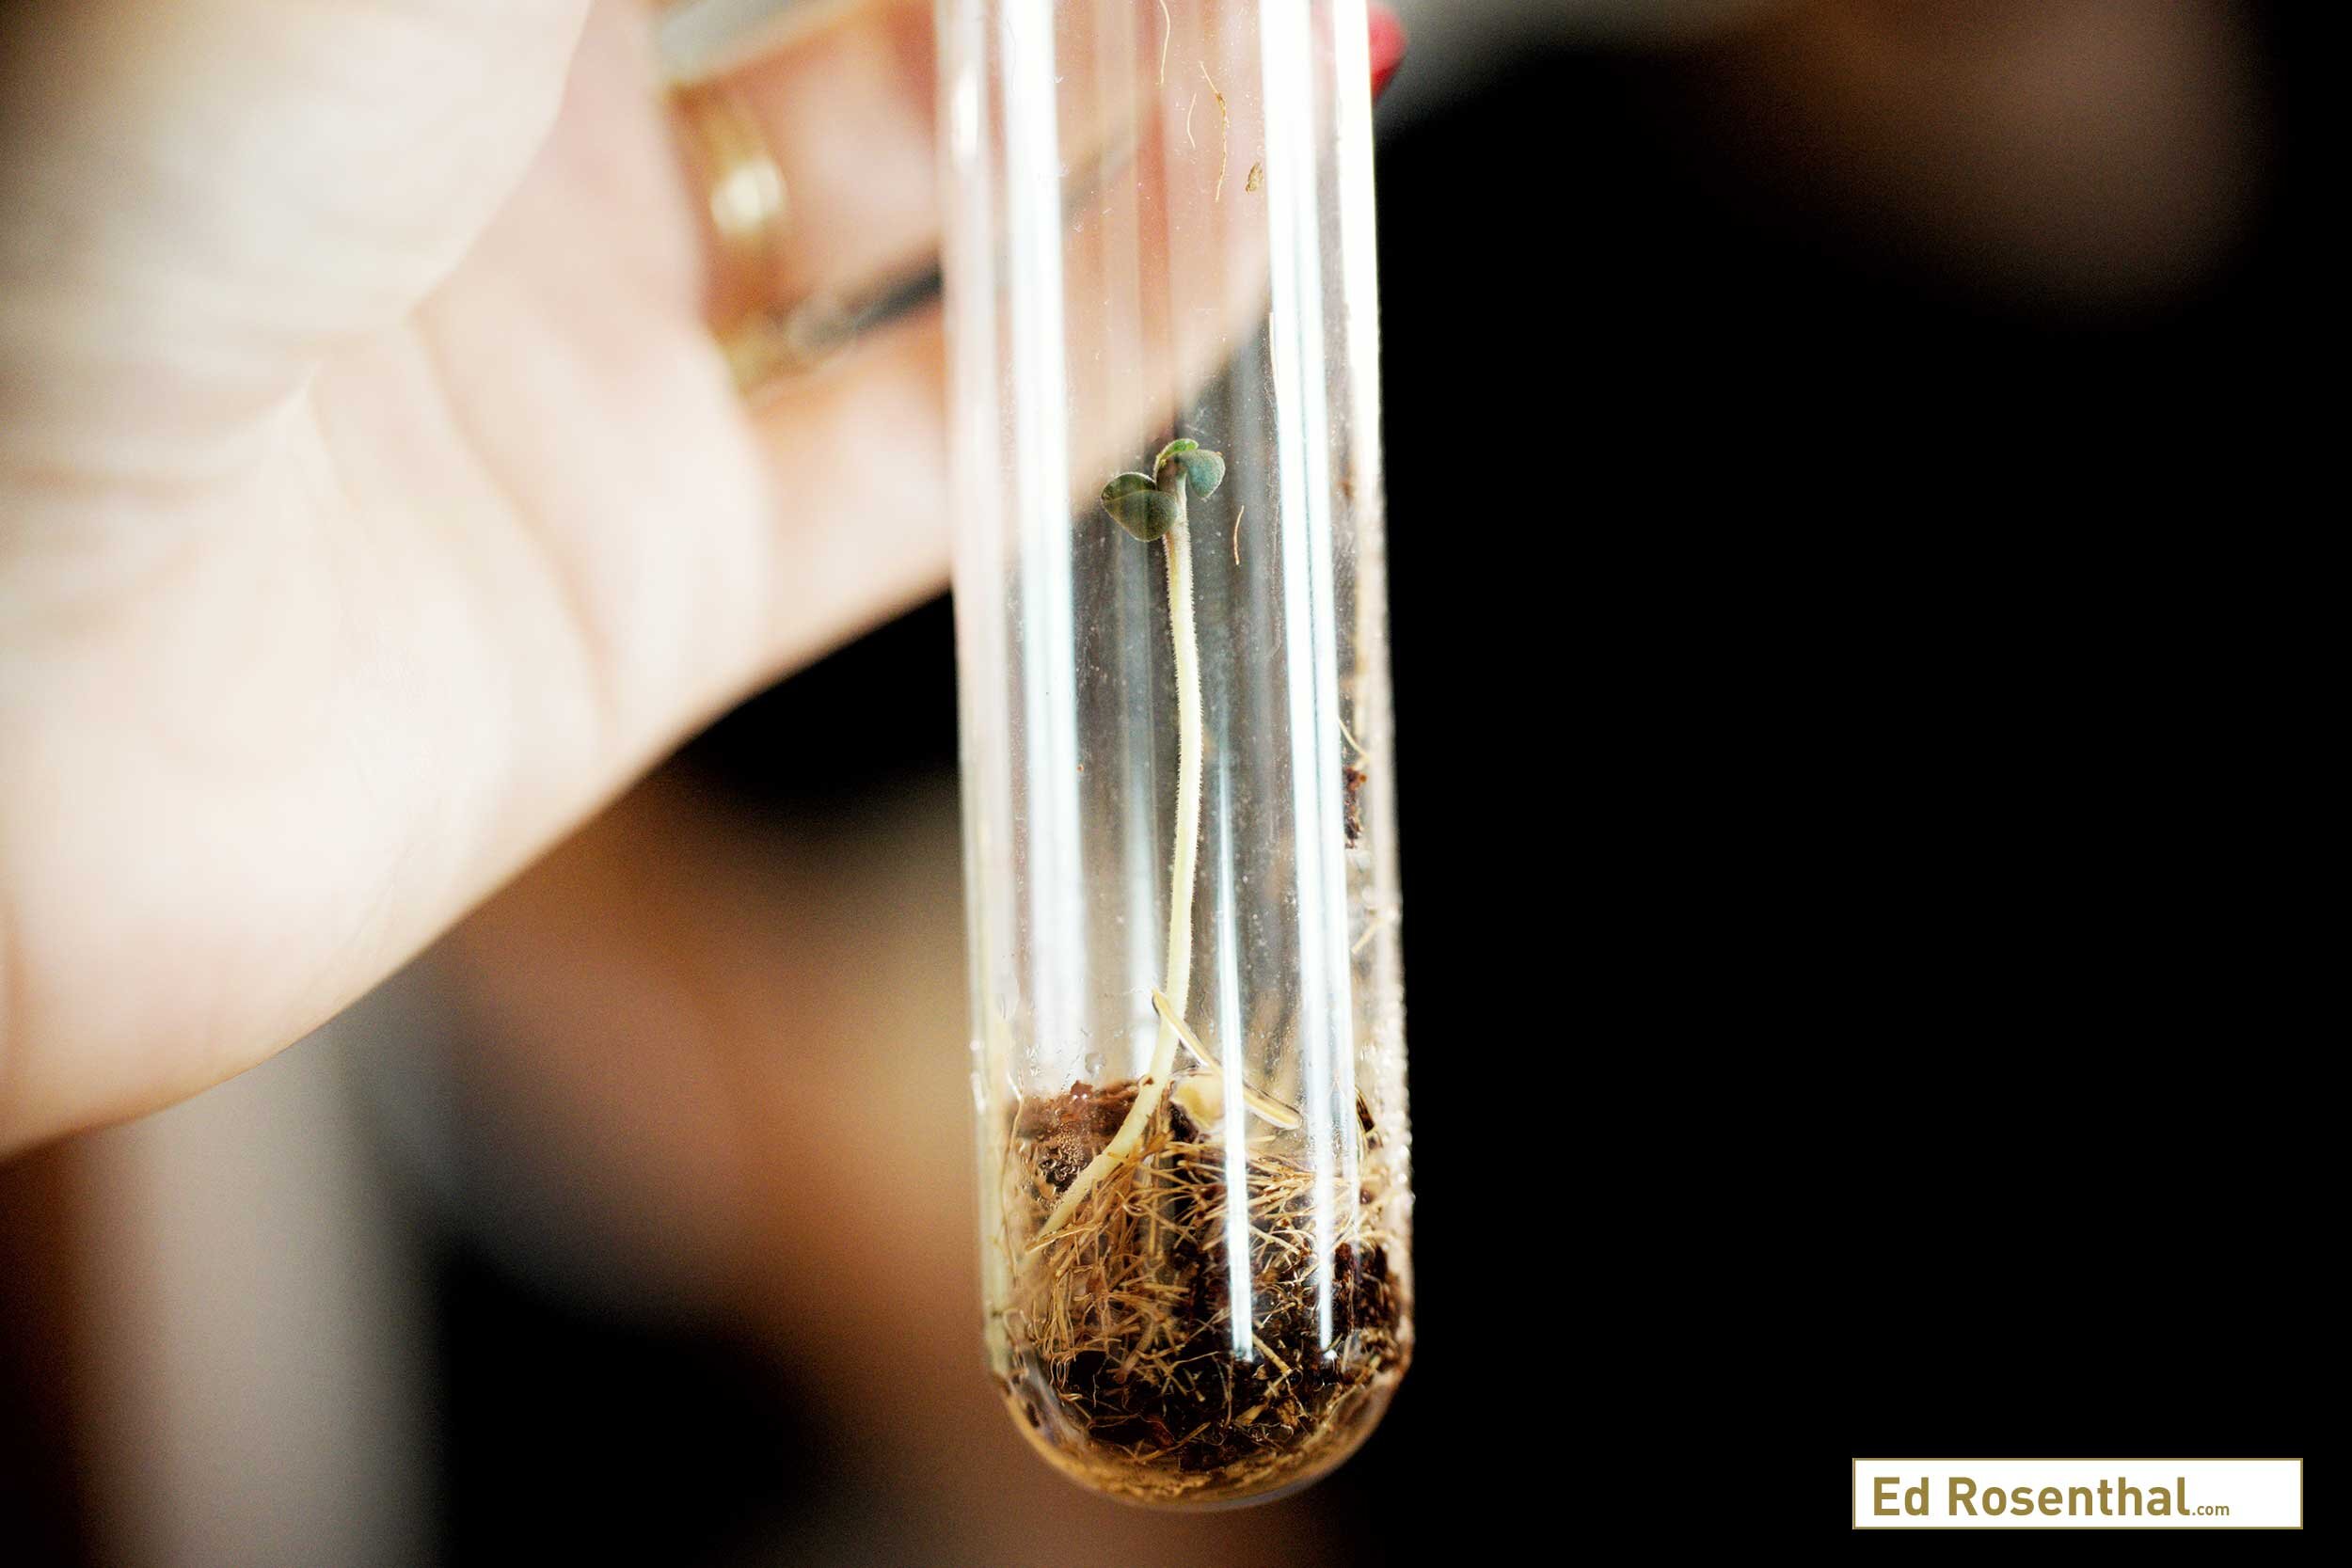
Close up of a newly sprouted cannabis seedling. Purple Caper Seeds photo by Lizzy Cozzi.
Don’t transplant the seeds immediately after germination. The optimum height for transplanting is about 1” in height, so use 1” as a guide. Ideally you don’t want to transplant too early or too late.
When the roots have generously filled the coco-plug, it’s time to transplant.
Part II: Transplanting your germinated seeds to soil

Beginning the process of transplanting cannabis seed into the coco coir. Purple Caper Seeds photo by Lizzy Cozzi.
Once the seeds pop, it is time to transition them into a starter growing medium.
The materials you’ll need to transplant your seeds:
Tweezers
Root Riot cubes
Nutrient solution
Pipettes
Plastic containers—Root Riot cubes come with a 50 plug holding tray that works well.
A plastic tray
Step 1
Remove the Seedlings
When the seedlings are ready, use tweezers to remove them. Ideally grab the coco substrate or root ball so as not to damage the seedling.
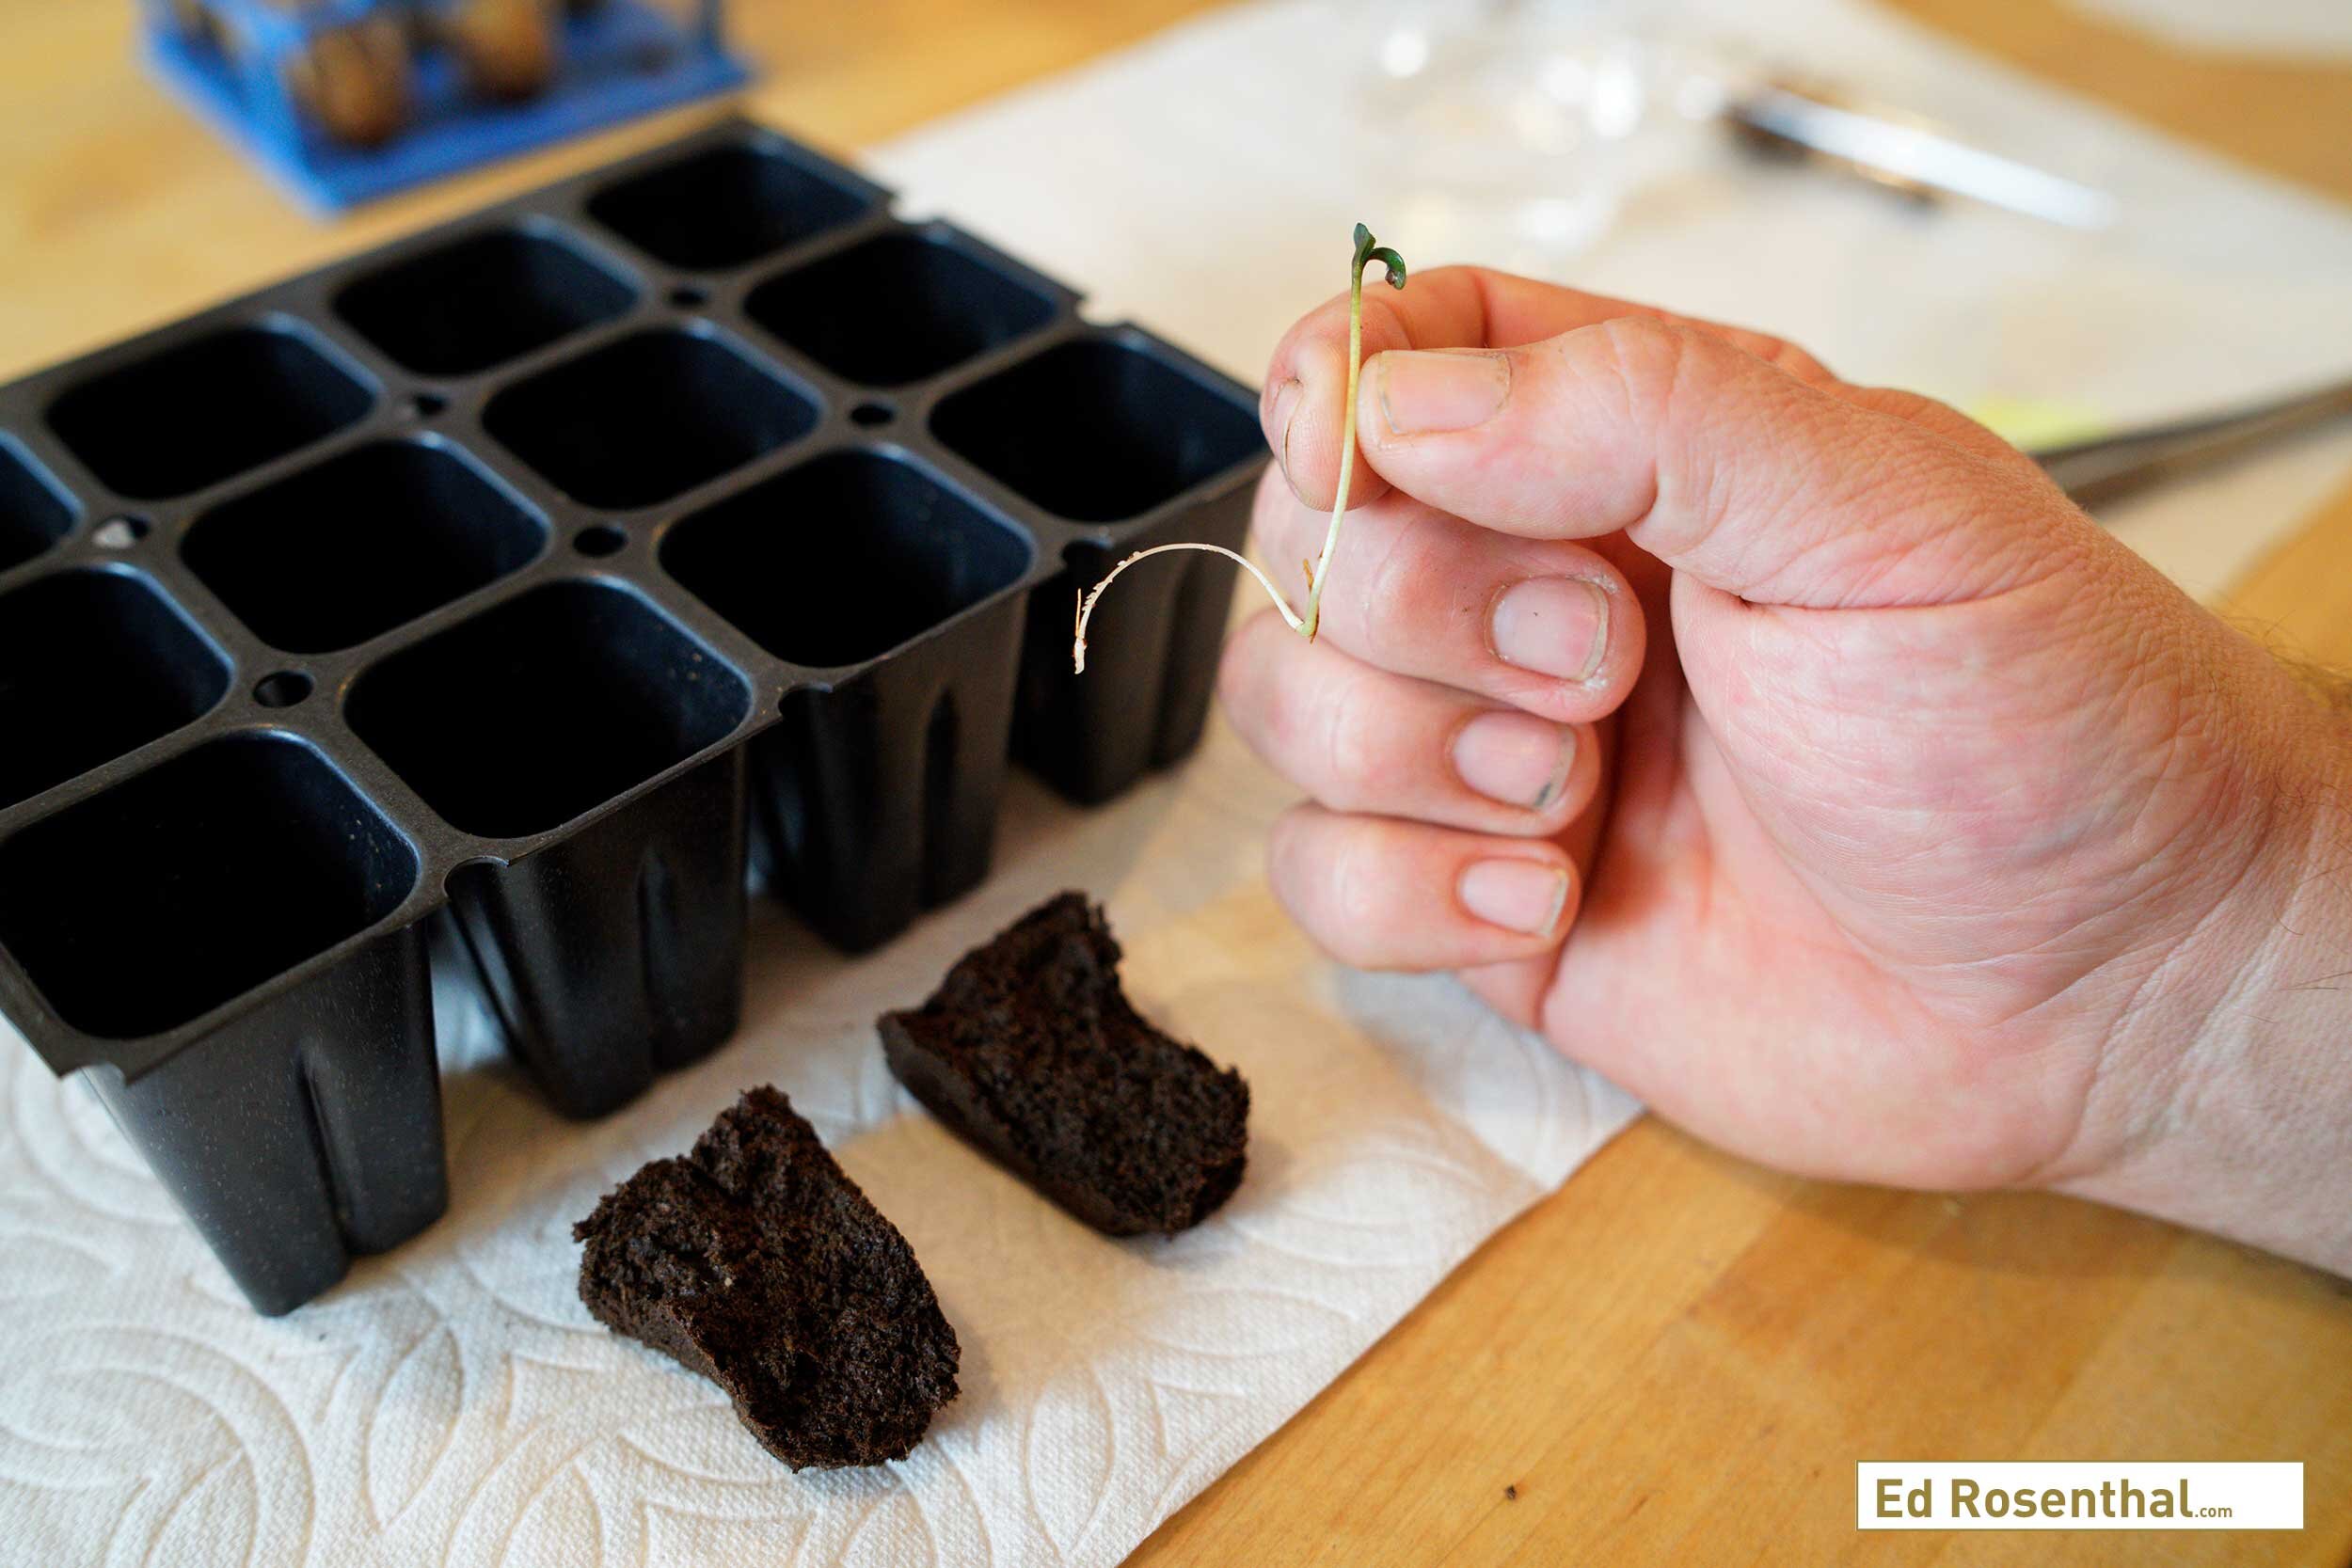
Moving the cannabis seedling to the rooting cubes. Purple Caper Seeds photo by Lizzy Cozzi.
Step 2
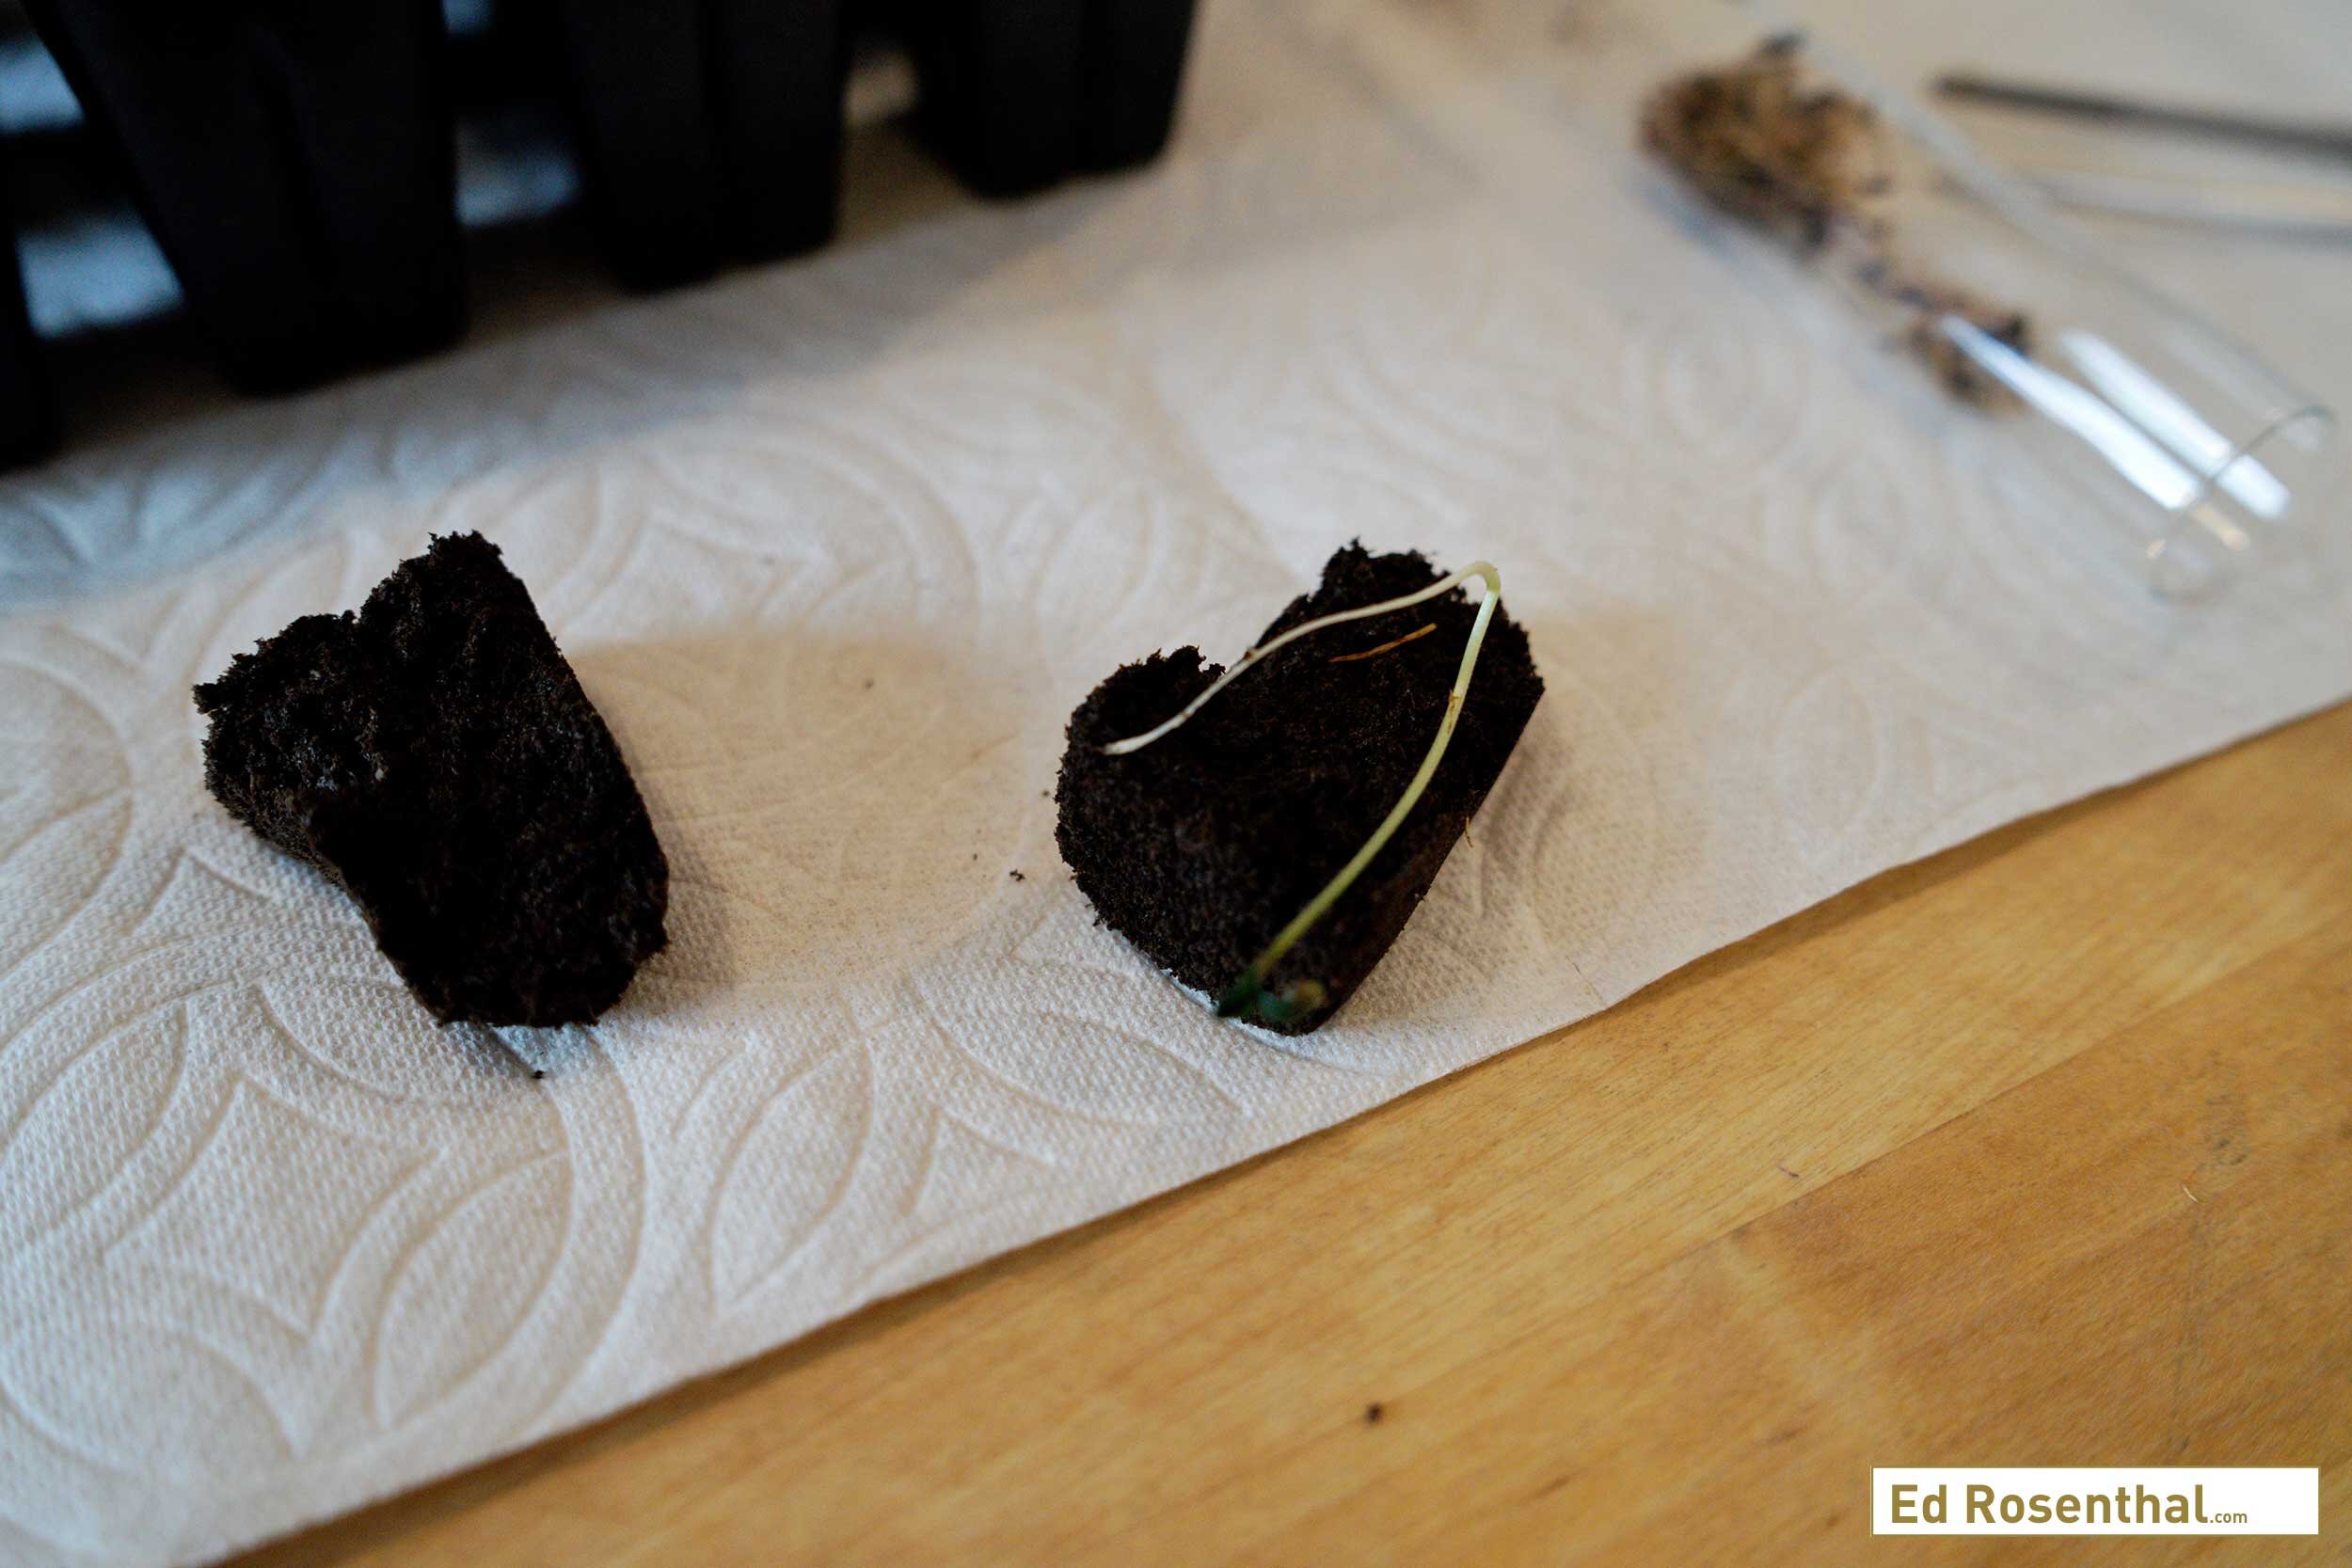
Create a Rooting Environment
Frank uses Root Riot cubes to start the seedlings. Break the cubes in half.
Place the seedling roots on one half of the Root Riot cube.
Place the other half of the cube top of the roots to create a “sandwich.” Put the rooting cube in a plastic container or holding tray.
Add 2 ml nutrient solution to the cube using a pipette.
Placing the cannabis seedling in the rooting cube. Purple Caper Seeds photo by Lizzy Cozzi.
Step 3
Move the Cubes into a Wet Environment.
Put the plastic container in a plastic tray.
Add a ¼ inch of water to the tray.
Top off the tray with approximately ¼” water on top of each cube. This ensures the seedlings won’t dry out.
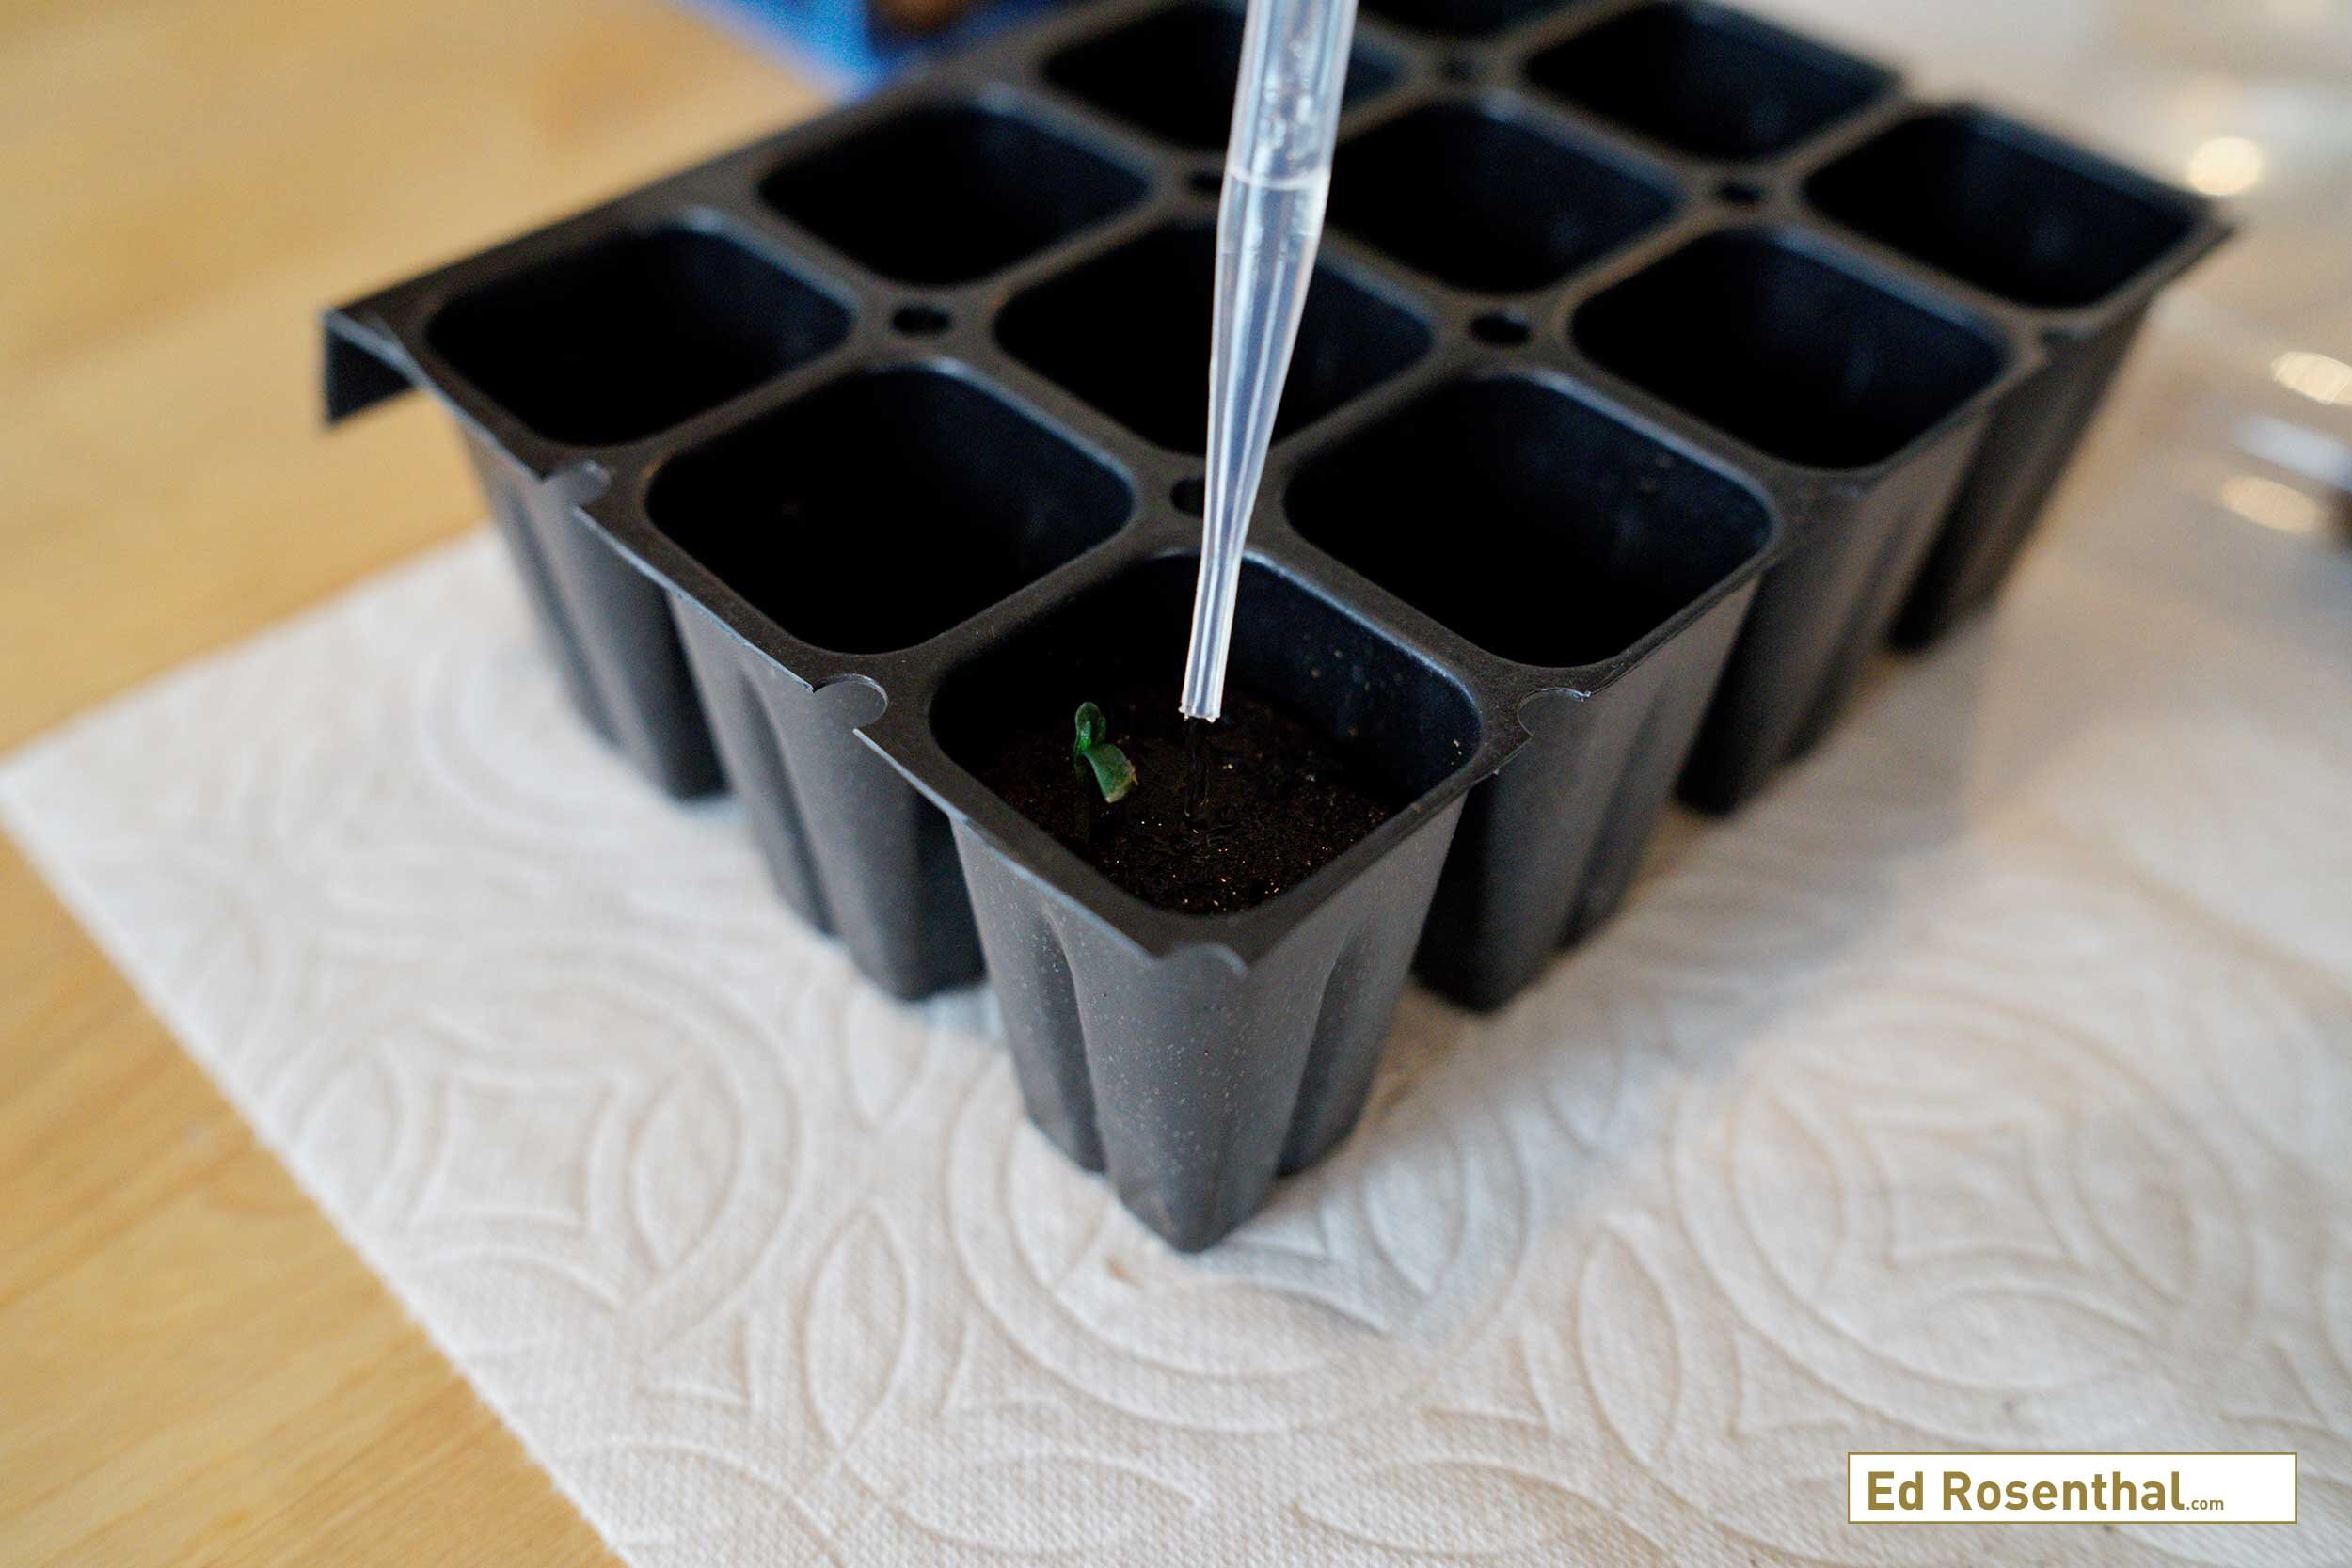
The cannabis seedling and rooting cube are placed in the tray. Purple Caper Seeds photo by Lizzy Cozzi.
Voila! You’ve successfully germinated in test tubes and transplanted. Your seedlings will need some time to recover from the transplant, but when they are robust enough, they’re ready to move to a larger container.
We think you’ll find this process, while slightly more effortful than casual germination methods, will yield higher germination rates and more robust seedlings.
Once you’ve done it a few times, perfecting your timing and experimenting with the gear and sterilization methods that are right for you, it’s a process that can be done often and with relative ease.
Popped cannabis seeds by Purple Caper Seeds. Photo by Lizzy Cozzi.
Join our cannabis community
Follow Us