Four Options for Small-Scale Drying and Curing of Cannabis
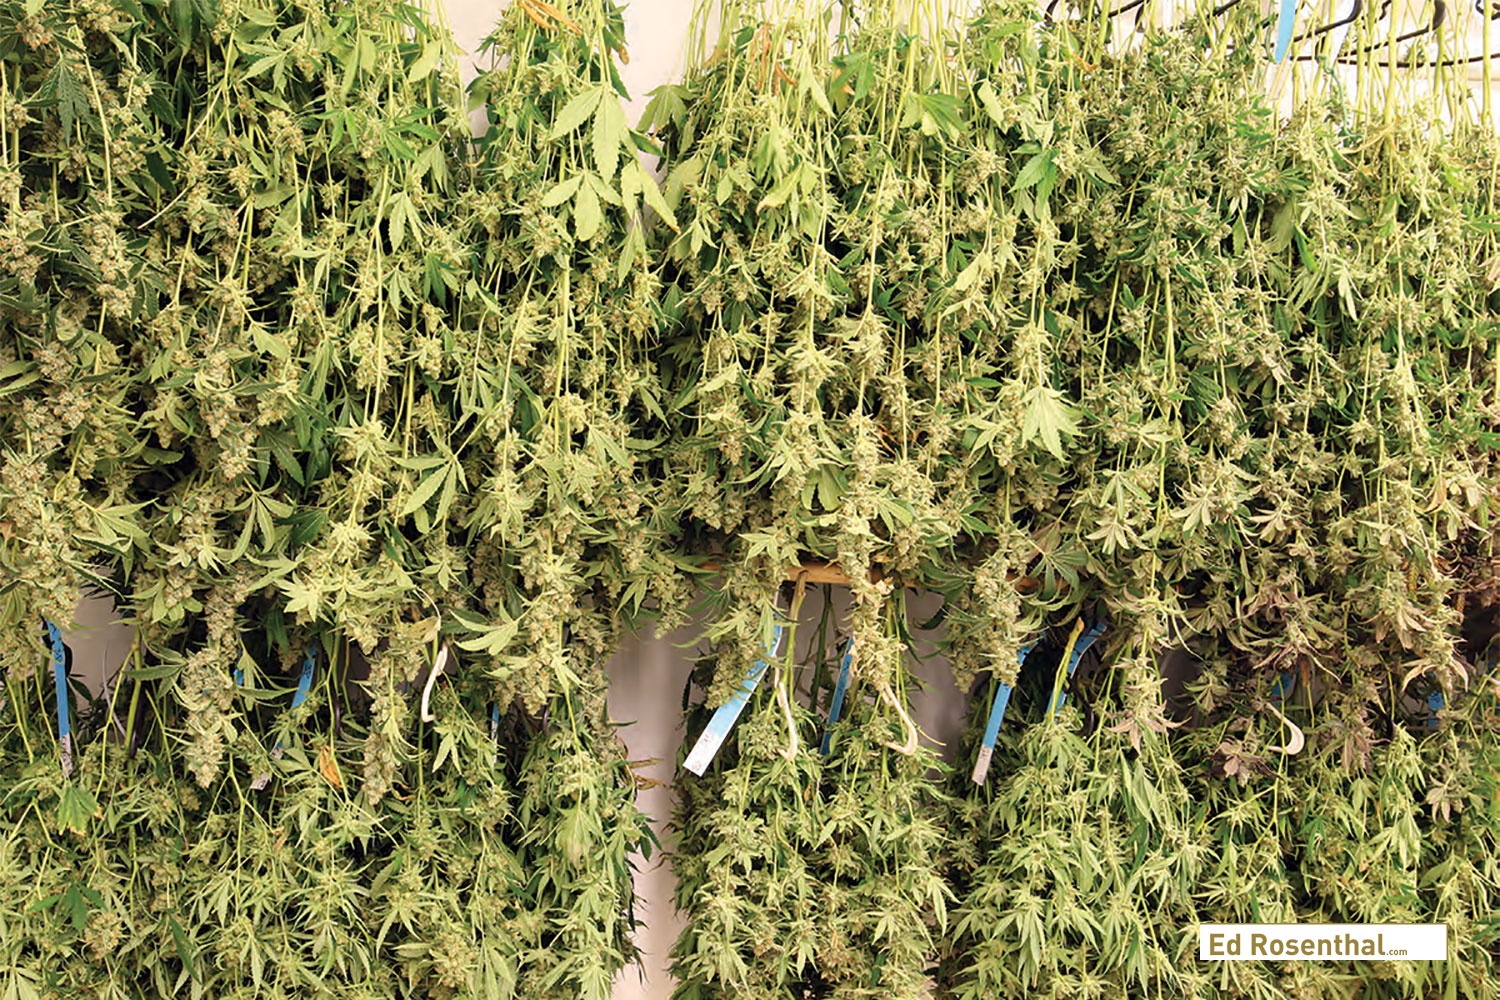
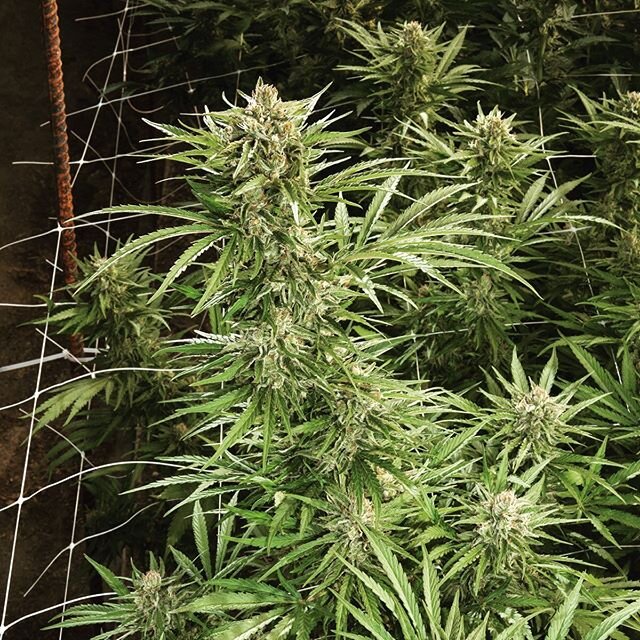
Fresh cut whole marijuana plants in the dry room.
How and why you want to dry cannabis
Properly grown, dried and cured flowers burn smoothly and taste flavorful. The smell and flavor come from the terpenes and flavonoids in the buds. Terpenes also contribute to the strain’s specific effects.
For buds to be proud of, think “low and slow.” Drying and curing flowers takes time and patience, but the finished buds are worth the wait.
”Low” refers to temperature. Terpenes evaporate at different temperatures, and some at slightly below room temperature. When the air is fragrant with flower odors, the buds are losing their terpenes. Improperly dried and cured buds lose terpenes due to evaporation.
For example, the terpene myrcene — found in mango fruit, hops, bay leaves, eucalyptus, lemongrass and cannabis — evaporates at just 68º F (20º C). In addition to contributing to the smell, myrcene has analgesic, antibacterial, anti-inflammatory, anti-depressant and anti-anxiety properties and helps THC cross the blood/brain barrier. Terpenes are essential to cannabis consumers. Buds must be dried at low temperatures for the terpenes to be preserved. Drying at low temperatures and moderate humidity takes longer, hence “low and slow.”
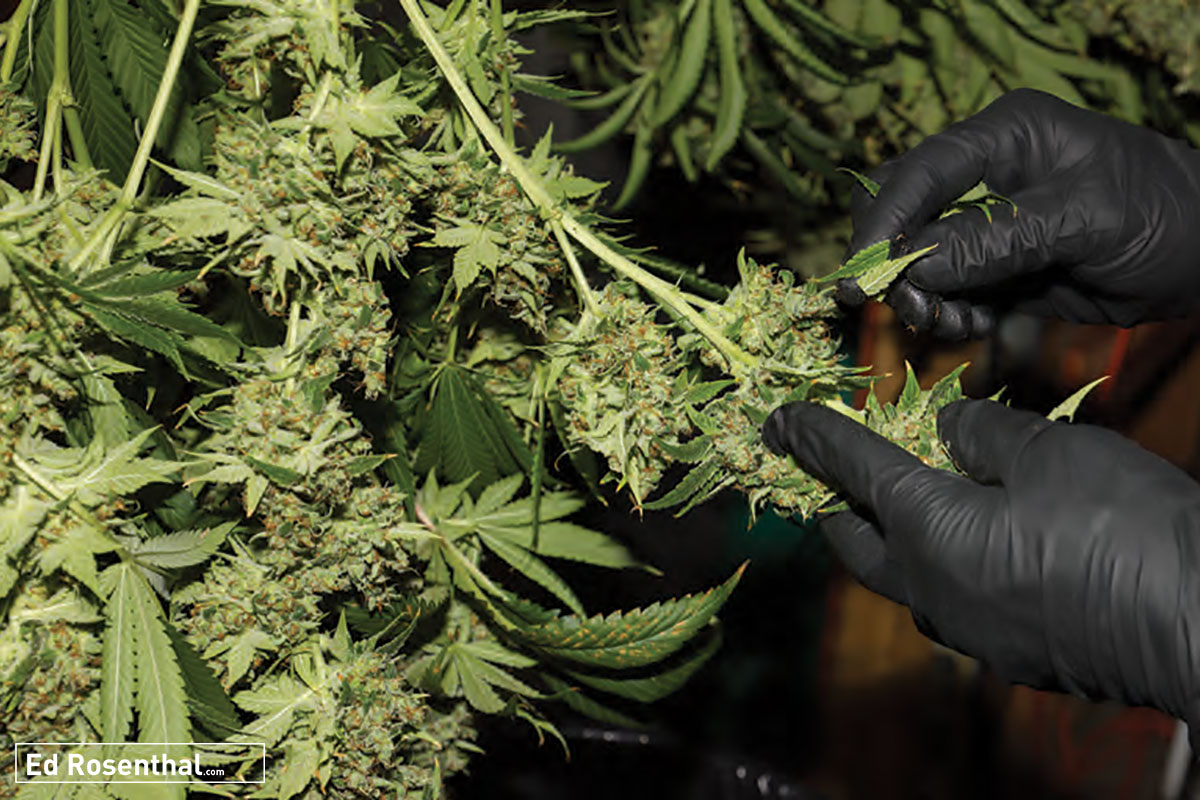
Cannabis fan leaves are removed by hand. The buds are manicured after they dry and cure.
Keeping the area clean is imperative when slowly drying buds at low temperatures. Do not allow pets in the area because they shed fur and dander that become airborne and catch on sticky buds. Workers should wear gloves. Fungal spores and bacteria are ubiquitous and germinate under favorable conditions: moist environment, oxygen, temperatures between 50 and 70° F (10-21° C) and an acidic surface on the host.
Buds infected with powdery mildew are considered unfit for smoking but have not been implicated in any human ailments. Buds attacked by bacteria turn brown and crispy. When anaerobic bacteria attack, they emit an acrid ammonia gas that turns buds to mush.
Under cool conditions the plant’s cells stay alive for up to 72 hours after cutting. During the early part of drying, the plant consumes some of its store of water and carbohydrates. Dried too fast, the buds use fewer starches, resulting in a harsher smoke. Cells on the surface of the plant die first, and the ones farther inside die last. During the first stage of drying, water loss is rapid. At the same time some of the chlorophyll degrades, creating a smooth smoke. Buds dried slowly and then cured for a few weeks develop the smooth draw of fine herb. Rushed drying locks in chlorophyll leaving a “green,” minty taste and a rougher smoke.
Heat and light degrade THC into cannabinol (CBN), which has only a fraction of the psychotropic effect and induces sleepiness. When buds, especially large ones, are dried at high temperatures to speed the process, they dry unevenly. By the time the inner portion is dry, some of the THC on the outer portion has turned to CBN.
Four Options for Small-Scale Drying
1. Climate-controlled drying box

Buds drying in cardboard boxes. The pile in each box is 2-3 inches deep. Opening and closing the lids is used to regulate the drying rate.
Find a climate-controlled drying box such as a grow tent, large appliance box, or construct one using wood and plastic or plasterboard walls. Add a hygrometer connected to a small dehumidifier and a thermostat regulating a heater or air conditioner.
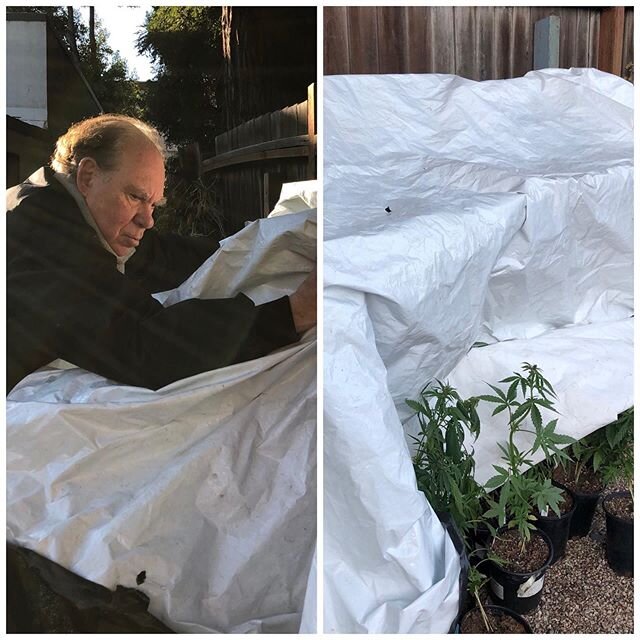
2. Drying in a bag

Drying and curing in an open or partially closed bag is popular because it’s convenient and it slows down the drying time of small batches so they don’t dry out too rapidly.
A brown paper bag is a simple way to keep humidity higher than the humidity in a room; this slows evaporation. Recirculate humidity by opening or closing the bag. To keep the humidity lower, place only two or three layers of big buds in the bag.
Use a hygrometer to measure the moisture level in the bag. If the humidity climbs above 50%, use a fan to remove moisture-laden air.
3. Closed, humidity-neutral space
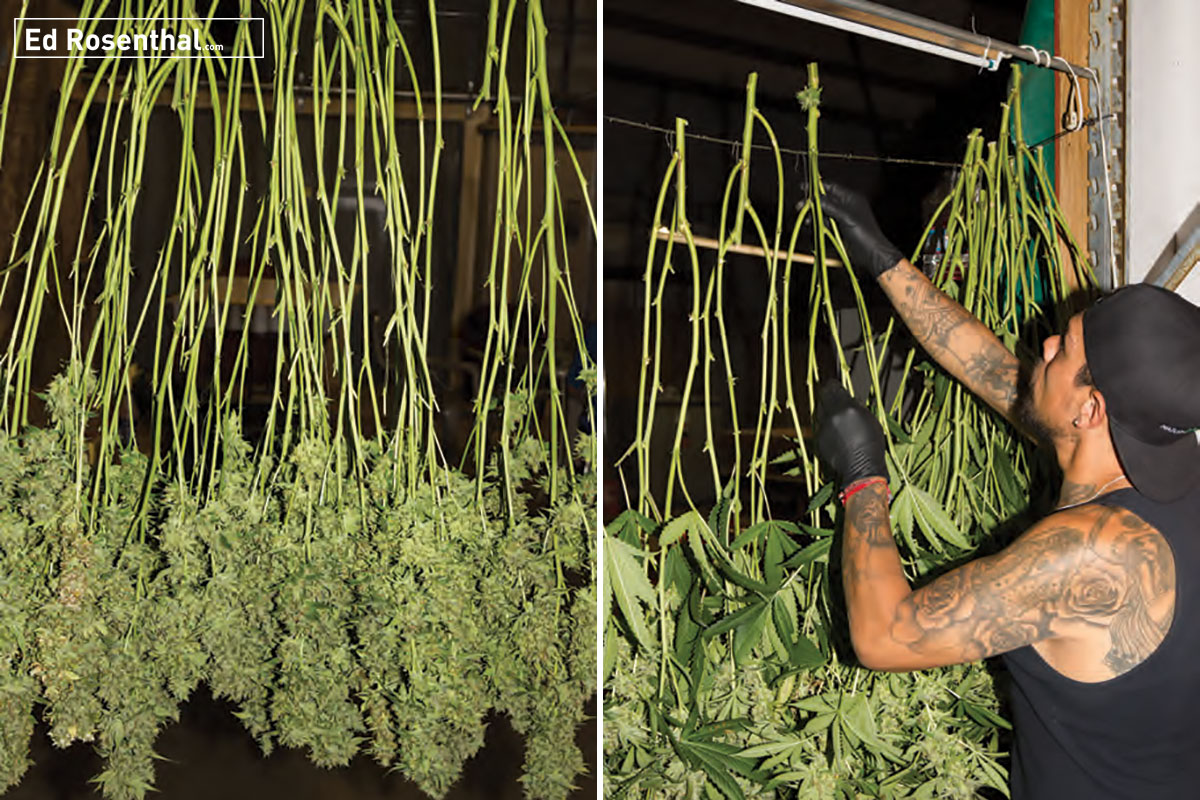
These plants were about 4 1/2’ tall with colas that stretch 15-18’. They are hung from a rod.
A small room or a closet is likely to have the right temperature for drying. If not, adjust the conditions by opening or closing the door and using a fan. For more control, use a heater, air conditioner, humidifier, or dehumidifier as needed.
4. Rack drying

Cannabis plants are tagged on rack.
The advantage of rack drying is that air flows freely around the buds. Using fans to circulate the air shortens drying time.
Two places to NEVER dry cannabis
1. Never dry in a room with growing plants
Don’t dry buds in a room with growing plants because the conditions required for the two operations are incompatible. The humidity and temperature in the growing room are likely to be too high for proper drying. The result may be mold attacks and loss of terpenes through evaporation.
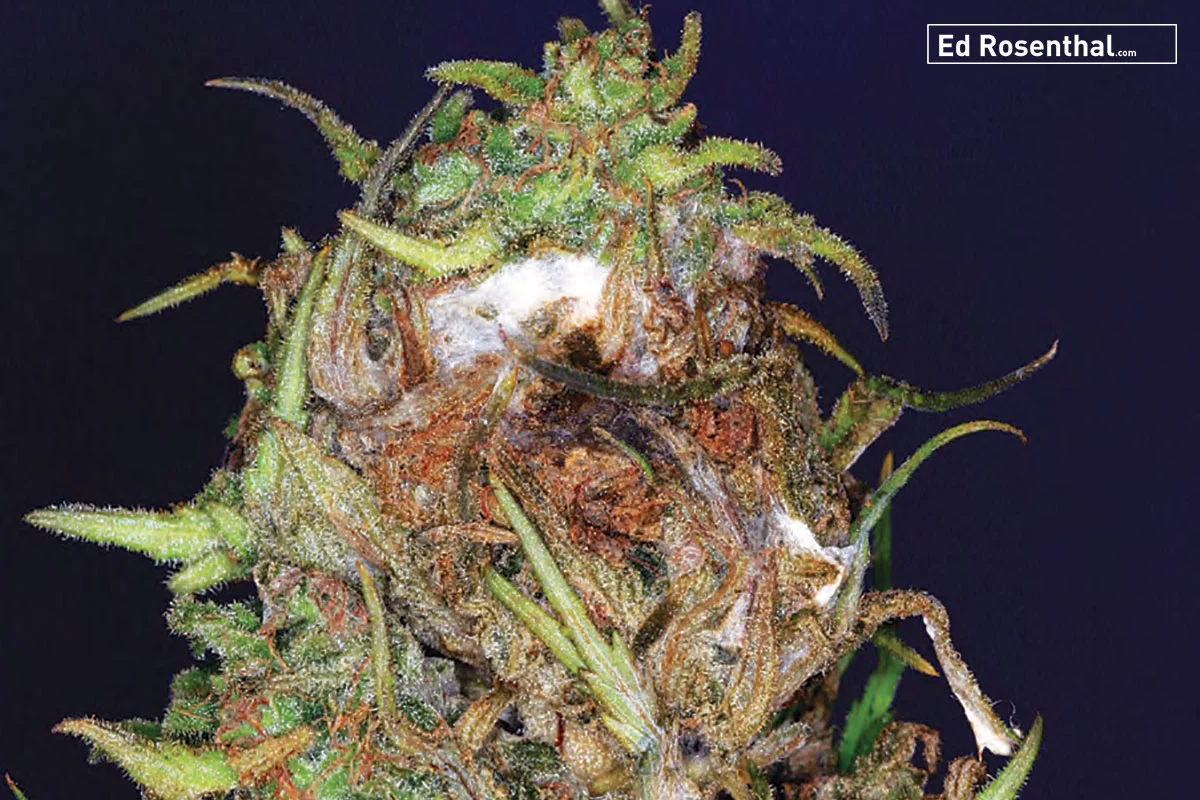
Bud is suffering from Botrytis (Brown or Grey mold) as well as powdery mildew. These are the two molds most likely to attack cannabis.
2. Never dry in jars or closed containers
Buds should neither be dried nor cured in an enclosed container such as a closed box, plastic container or jar that traps air. As the buds dry, humidity in the container builds up and water is likely to condense on the sidewalls of the container, increasing the ambient moisture. These are ideal conditions for mildews, molds and bacteria to thrive.
Mold and mildew are likely to attack in closed containers, causing rot (botrytis) and molds. The fungi and aerobic bacteria use up the oxygen and anaerobic bacteria, which thrive in a non-oxygen environment. Their telltale sign is the acrid odor of ammonia they emit.
Molds, mildews and bacteria have a devastating effect on the terpenes and flavonoids (taste molecules); infected marijuana loses its distinctive odors and smells earthier.
None of the conditions created by closed containers are good for buds. The microorganisms can quickly turn a good harvest into waste.
The concept of using a closed container for either drying or curing is an urban myth. People often “burp” (open) the jars during drying to remove excess humidity. However, the humidity is trapped until the burping takes place, encouraging the proliferation of molds.
Here are the six KEY steps to drying cannabis

Clean the space to be used for drying. If it has been used for harvests before, wipe it clean with a hydrogen peroxide solution or just spray the whole space using it. This decreases microorganisms on surfaces. To keep air free from mold spores, hang a UVC sterilizing light and set up a carbon filter to cleanse the air of odor, particulates and microorganisms.
Use an air conditioner and a heater to maintain a temperature of about 68o F (20o C) in the drying area. Set the humidifier/dehumidifier to maintain humidity at 50%. When relative humidity is higher than 55%, the germination and growth of fungi and bacteria on wet material proliferates after about two or three days. Humidity be- low 45% promotes faster drying, but at that humidity level big buds have a tendency to dry on the outside while the inside remains moist.
Turn on oscillating circulation fans to keep air moving throughout the space.
Add buds by hanging them or laying them on screens. Don’t flat-dry flower buds or branches on screens if intending to machine trim them. Gravity compresses the part of the bud touching the surface. Trimming machines don’t work well when fed flat-dried buds.
Monitor the buds during the drying process. This process can last from one to three weeks. Bud size, crop weight, crop moisture, ambient temperature and humidity all affect drying time.
Leave a dim light on throughout the drying process.
Here’s what you do when drying is complete

As the buds dry, they lose color and weight and become more brittle. The green color fades a bit as chlorophyll degrades, making yellow, brown, red and purple hues more prominent.
The first stage of drying is complete when buds feel dry on the outside but retain moisture inside that keeps them fairly pliable. Take an average-sized bud and slowly try to fold it in half. If the bud stem bends, the bud is still too wet. If the bud stem breaks, it’s ready to be cured. If it breaks with a crisp snap, it is ready to cure. Another way of subjectively judging readiness is by lighting up a thinly rolled joint. If it doesn’t go out between puffs, then it is ready for curing and storing.
Buds on cut whole plants take a longer time to dry than on cut branches and trimmed buds because there’s more vegetation and thus more water to evaporate. But the slower cure mellows the taste. Big, thick, dense buds take much longer to dry than smaller buds and are more susceptible to mold and powdery mildew.
How to cure your cannabis

Whole plant curing. Photo by David Downs
The first phase of drying is about removing the vast majority of water in the plant, which takes 1 to 3 weeks. The second phase, removing most of the remaining water while retaining the terpenes, is known as curing. It is analogous to the wine-aging process in that it uses a precise climate and time to bring out the aromas of the plant.
Curing is essential to the taste and experience of the finished buds. Like aged wines, well-cured buds are smooth and flavorful. Uncured buds still “work” but are not nearly as enjoyable or desirable. However, curing does not make buds more potent than they already are.
Four key steps to curing cannabis
1. Start with mostly dried buds or colas. The bud stems may be just brittle enough to snap after bending a bit.
2. Set up a climate-controlled environment with consistent temperature and relative humidity so the buds lose water at a stable, slow pace.
Temperature: 65-70° F (18-21° C)
Humidity: 50-55%
Continuous circulation using oscillating and/or ceiling fans on low
Buds or colas placed loosely on trays, in boxes, or hung on lines.
3. Time: 10 to 30 days
The buds dry slowly and consistently over several weeks. Curing allows the terpenes, which are oils, to continue to evolve. The trichomes continue to dry and smooth out and the THC-acid (THCa) converts to 9-tetrahydrocannabinol (THC).
4. Light: Constant dim light
Bright light, especially ultraviolet light, degrades cannabinoids and terpenes. Curing buds must sit in low light to total darkness.
Curing myths: Don’t bury buds
A long-running rumor involves burying buds to encourage certain microbes to eat them and secrete a more euphoric chemical. That’s total nonsense. Do not smoke buds with any kind of mold on them. There is no way to boost potency after the plant is cut.
Join our cannabis community
Follow Us