
Upgrading Your Indoor Cannabis Lighting: How Our 400W + 200W + Side-Light System Transformed the Tent
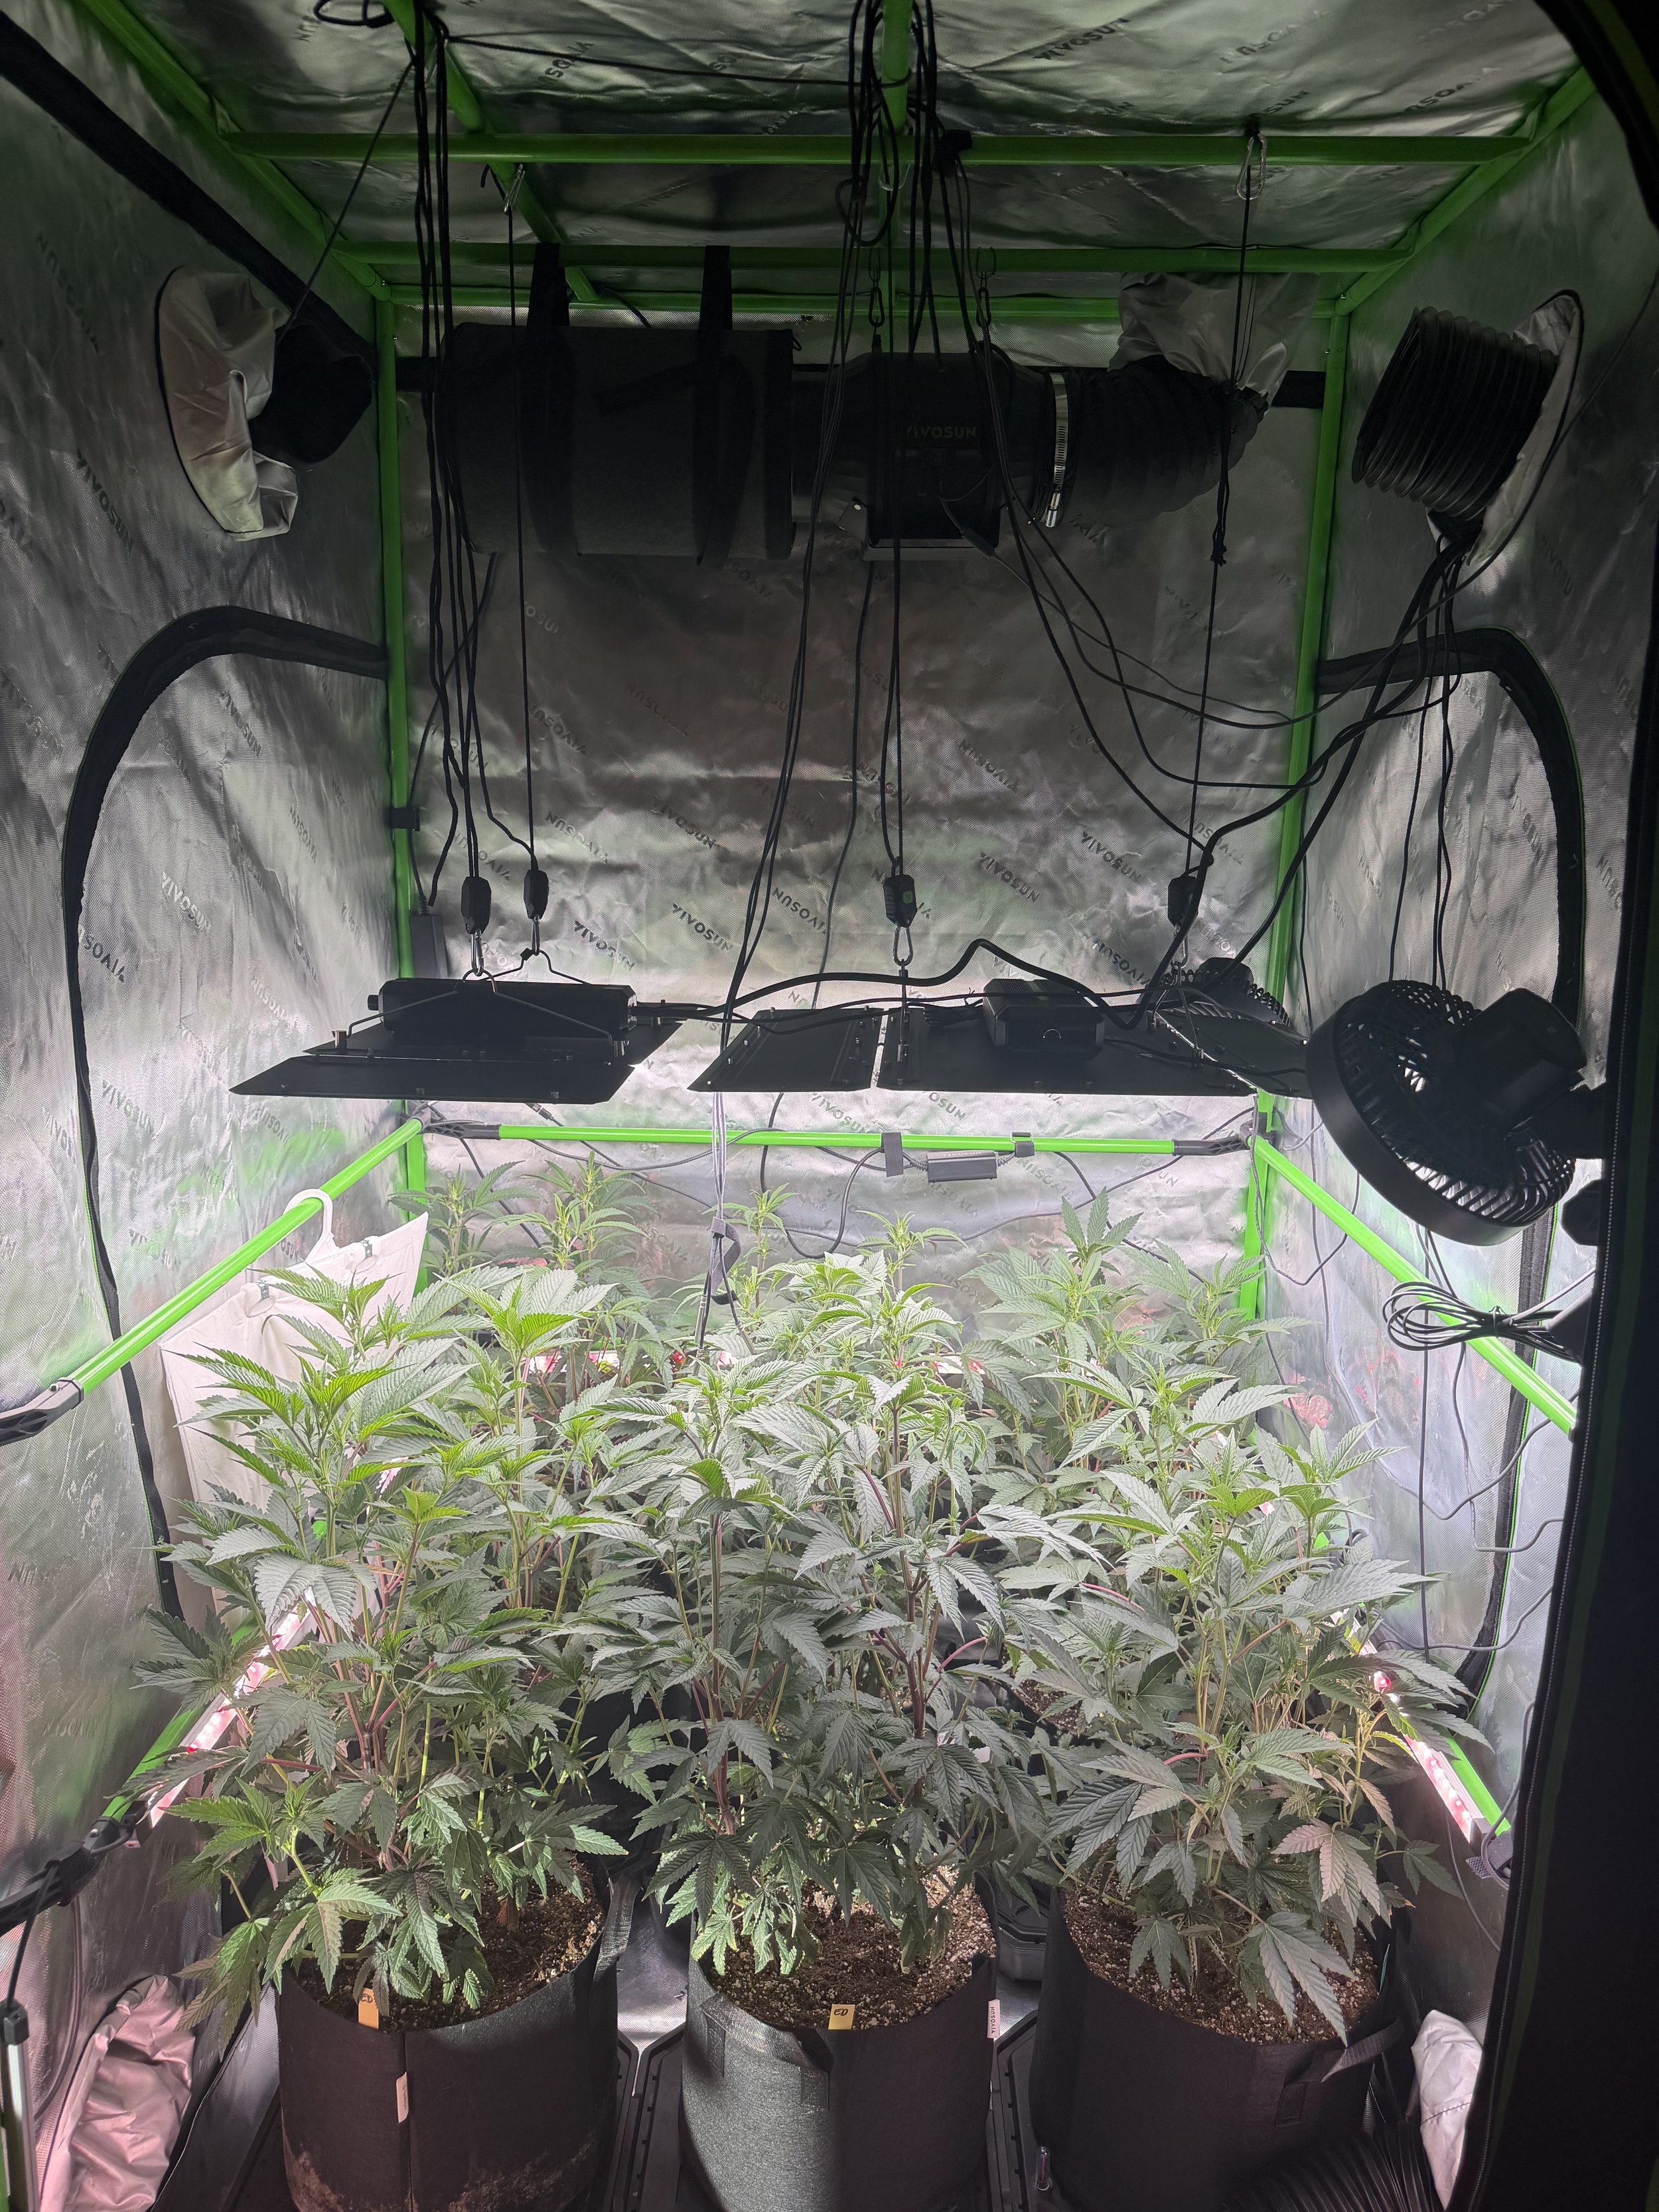
Our upgraded lighting system in full effect: the VIVOSUN LumaLight 400W paired with the 200W unit, positioned side-by-side to create an even light plane over the entire canopy. This layout removes shadow zones and keeps the Ed Rosenthal Super OG plants growing uniformly from edge to edge.
Lighting is the engine of an indoor garden. When it’s good, plants develop stronger stems, deeper color, tight internodes, and dense, resinous flowers. When it’s uneven—or simply outdated—you can chase problems all season long.
After our last grow, we realized we were asking too much from an older lighting setup. We wanted fuller canopy penetration, more even coverage, and a smoother environmental profile. So this season, we upgraded our entire lighting system: a 400W main fixture, a 200W companion light, and a set of powerful LumaLight side bars to eliminate shadows and boost lower-branch growth.
Here’s how the new system works, why we chose it, and how you can evaluate the right lighting strategy for your own tent.
Why We Needed a Lighting Upgrade
Even good lights can start holding your garden back. Our tent wasn’t failing—but it wasn’t performing at its best.
Uneven canopy coverage
The center of the tent was bright, but the corners lagged behind. Lower branches struggled, and we saw minor larfing toward the end of flower.
Aging spectrum
Diodes lose efficiency over time. The light still “looked” bright—but photosynthetic output wasn’t what it used to be.
Hot spots and cold zones
Older fixtures created temperature pockets:
Warm directly under the fixture
Cool at the tent edges
This inconsistency sends mixed signals to the plants.
Limited penetration
Top growth was strong—but middle and lower branches didn’t receive enough usable light.
When you layer these issues together, yields flatten out and plants lose uniformity.
Our New Lighting System: 400W + 200W + Side Bars
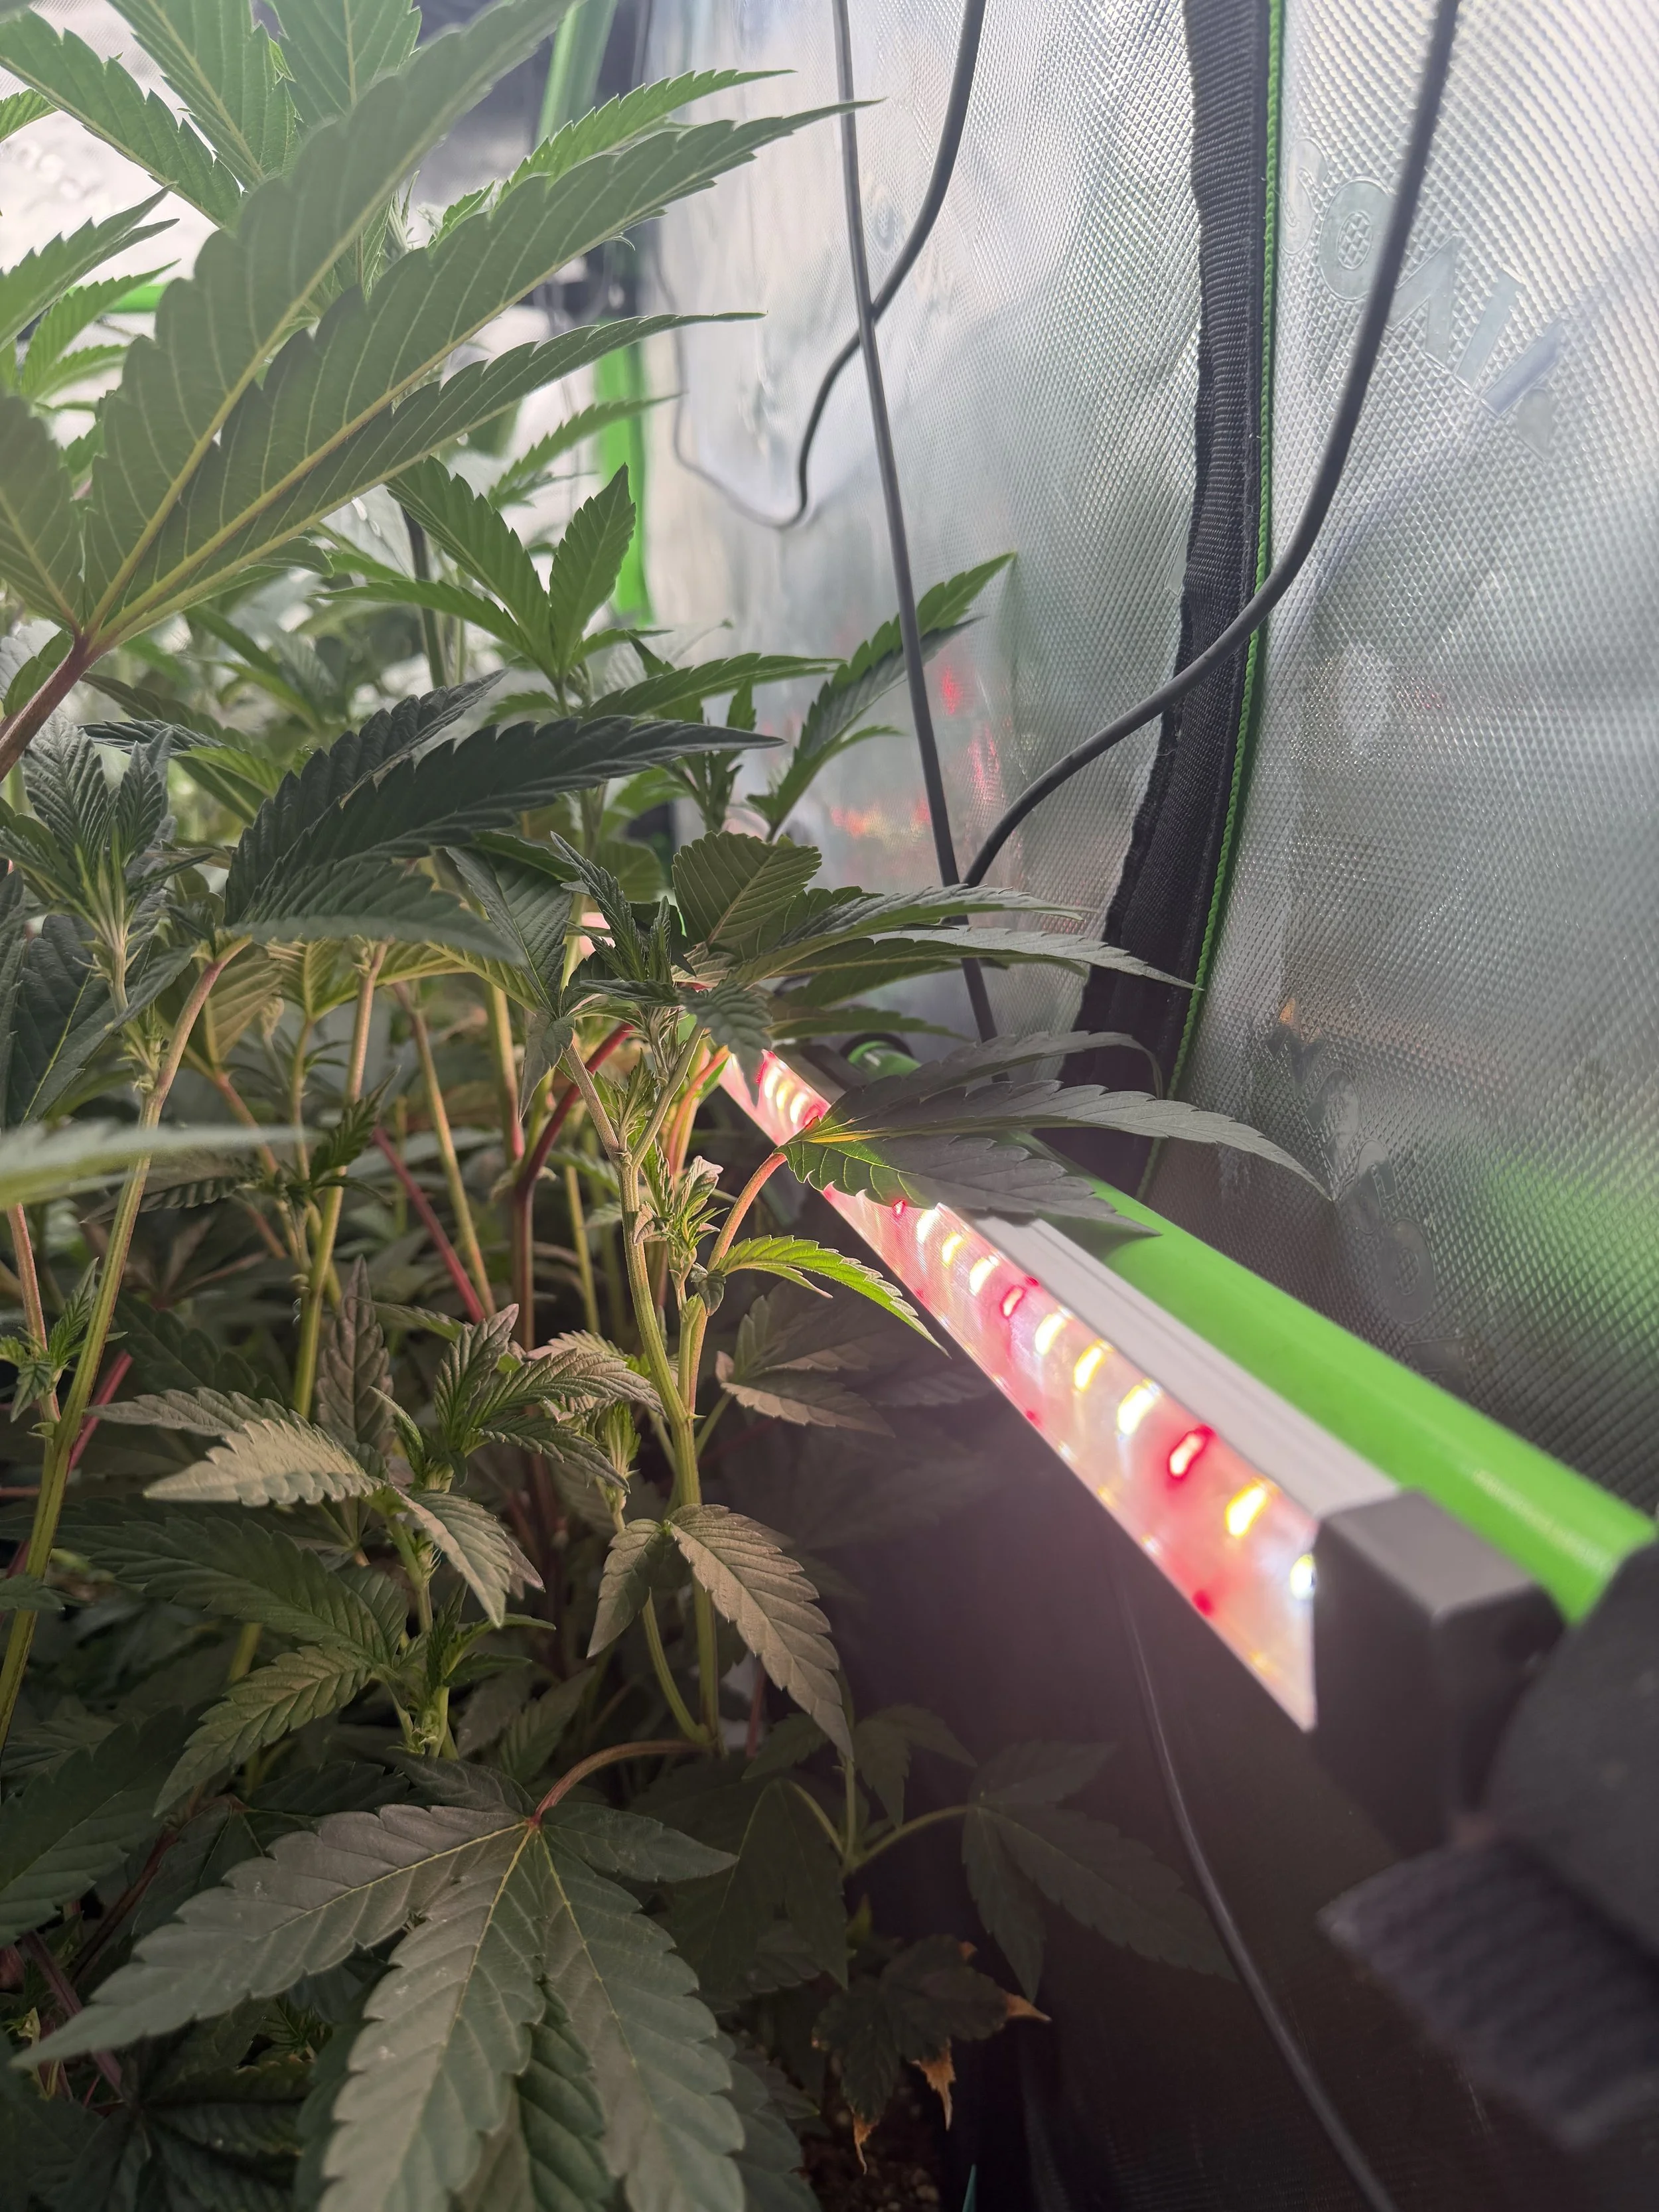
A close-up of our LumaRay side-lighting running along the tent wall, pushing full-spectrum light directly into the lower and mid-canopy. This extra lateral intensity eliminates shadow zones and keeps the Ed Rosenthal Super OG plants developing evenly from top to bottom.
This season we installed:
LumaLight sidebars on all sides of the canopy
This combination lets us shape the tent’s light profile the way commercial growers do—with multiple sources working together instead of one oversized fixture doing all the work.
Why the 400W main fixture?
Provides strong PPFD across most of the tent
Generates enough intensity for dense flowering
Efficient at mid-height hanging positions
Why add a 200W companion light?
Instead of blasting a single light at full power, we run two lights at moderate power:
Lower heat
Better distribution
Less stress on clones/young plants
Greater flexibility during stretch and late flower
Splitting wattage across fixtures creates smoother coverage.
The secret weapon — side lighting
Sidebars bring light where tents traditionally struggle:
Lower canopy
Mid-level branches
Early flower sites
Clone structures needing sideways fill
Side lighting dramatically reduces larf, increases usable bud sites, and helps develop symmetrical plants. It’s one of the most underrated upgrades a grower can make.
Full-Spectrum Lighting Explained (And Why It Matters)
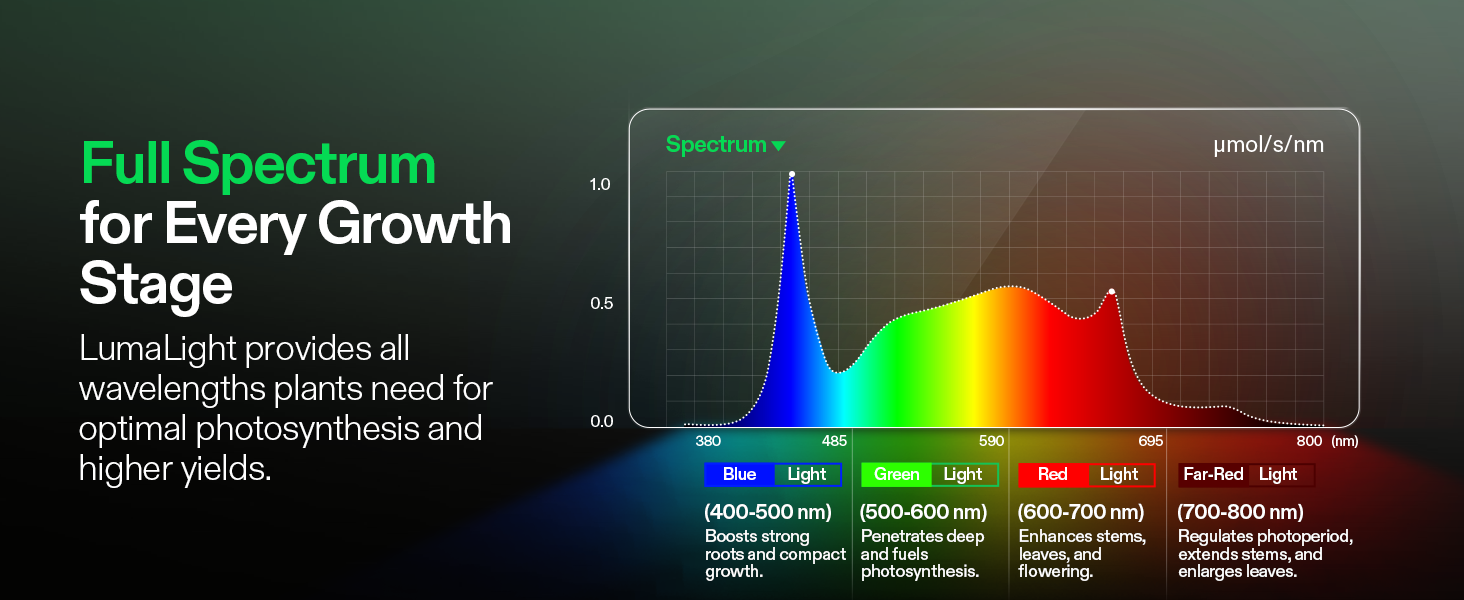
The VIVOSUN LumaLight spectrum delivers balanced blue, white, green, red, and far-red wavelengths, giving our plants the full photosynthetic range they need from early veg through heavy flowering.
Good LED lighting mimics the natural sunlight plants evolved under.
Our system includes:
Blue spectrum (400–500 nm): Supports tight internodes, compact structure, and strong vegetative growth.
White spectrum (comprehensive PAR coverage): Provides full-spectrum energy for photosynthesis, root-zone development, and overall plant vitality across all growth stages.
Green spectrum (500–600 nm): Penetrates deep into the canopy and improves photosynthetic efficiency in interior leaves that typically receive less light.
Red spectrum (600–700 nm): Accelerates flowering development, enhances bud formation, and increases efficiency in the generative phase.
Far-red (700+ nm): Influences photoperiod signaling, encourages controlled stretch, and improves light penetration for fuller flower development.
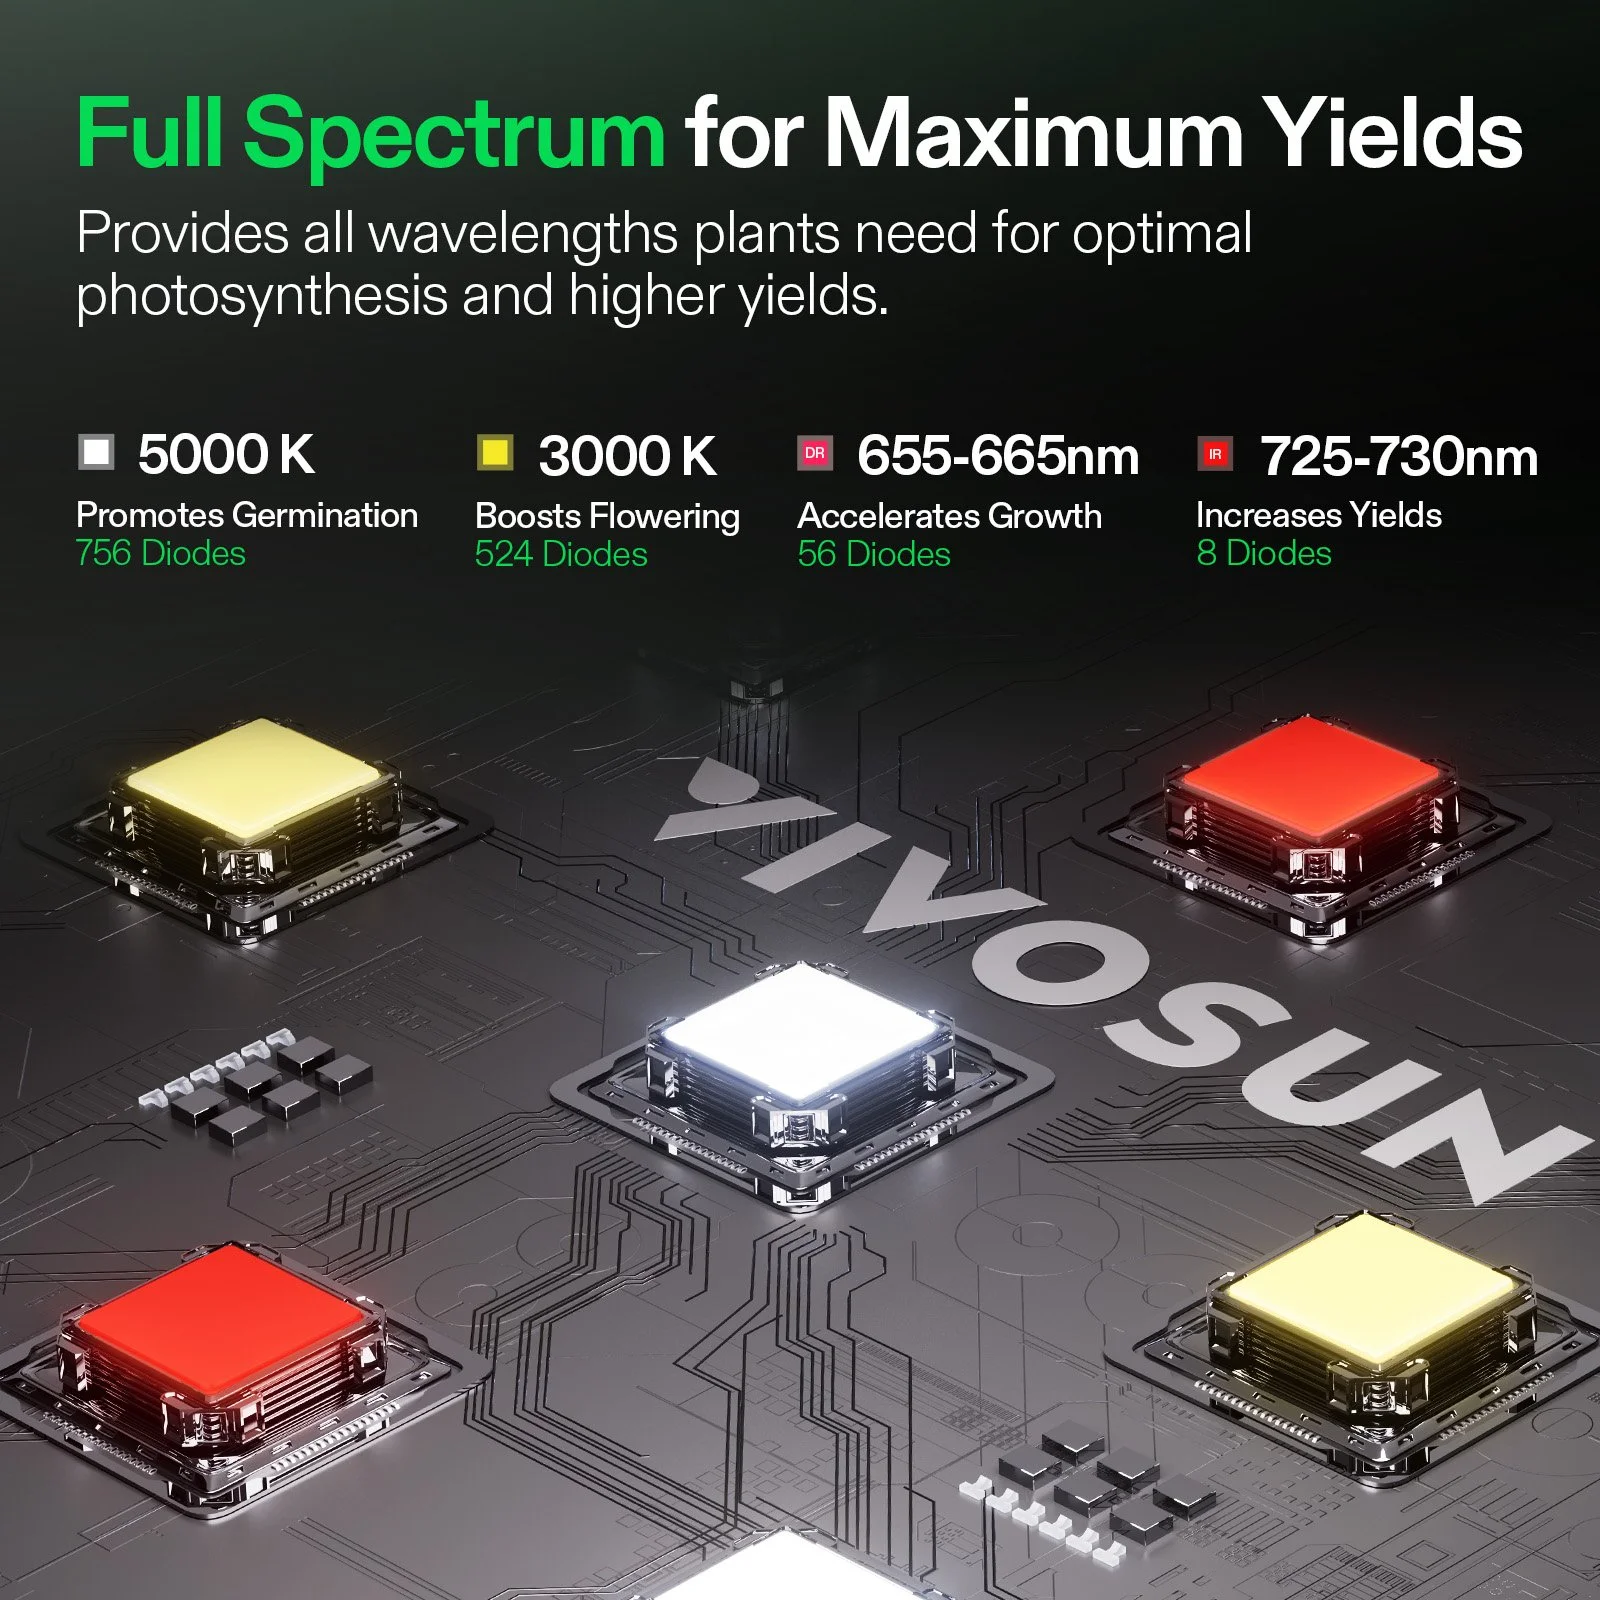
The VIVOSUN LumaLight uses a balanced diode array—5000K and 3000K white diodes supported by targeted 655–665 nm red and 725–730 nm far-red chips—to drive germination, vegetative stacking, vigorous growth, and high-yield flowering.
Spectrum consistency = morphology consistency
When spectrum is complete and evenly distributed, you get:
Thicker stems
Richer leaf coloration
Higher nutrient efficiency
A more uniform canopy ready for training
This is exactly what we observed within days.
How to Choose the Right Grow Light for Your Tent

A canopy-level view of the VIVOSUN LumaLight 400W + 200W system from below. The dense diode layout and full-spectrum output push light deep into the lower canopy, reducing stretch, tightening internodes, and keeping every layer of the Ed Rosenthal Super OG plants actively growing.
Every tent is different, but there are universal principles.
1. Wattage per square foot
For cannabis:
Veg: 20–30 watts per sq. ft.
Flower: 35–50 watts per sq. ft.
A 4×4 tent (16 sq ft) should ideally run 600–800 total watts of LED.
We’re right in that sweet spot with 400W + 200W + side bars.
2. Evaluate real PPFD—not just wattage
Use a light mapping app or PAR meter (even basic smartphone ones).
You want:
600–900 PPFD in veg
900–1100 PPFD in flower
Smooth distribution across the entire space
3. Spread out your lighting sources
Two or three well-placed fixtures outperform one giant fixture every time.
4. Heat management
Modern LEDs still produce heat—but distributed lighting reduces spikes and improves environmental stability.
Installing & Positioning Your Lights Correctly

Top-down view of our custom VIVOSUN lighting layout, with the LumaLight 400W and 200W mounted side-by-side to create a unified light plane. This pairing evens out PPFD across the tent, eliminates corner drop-off, and keeps the Ed Rosenthal Super OG canopy growing at the same pace from row to row.
Height and placement are as crucial as the lights themselves.
Our setup
400W LumaLight: Mounted slightly off-center rather than directly in the middle of the tent.
200W LumaLight: mounted slightly offset to even out corners
Sidebars: placed vertically to hit mid-canopy and lower branches
Combined System Behavior
Together, the 400W + 200W act as one unified light plane:
Strongest PPFD concentrated where the plants need it most
Corners and edges filled with supplemental intensity
A more even canopy response
Better internode consistency across all rows
Avoid common hanging mistakes
Don’t place fixtures too high—wasted photons
Don’t place fixtures too low—light burn
Don’t aim side lights straight at the soil—point them at productive sites
Think sculpting, not blasting.
What Changed in the Tent After the Upgrade
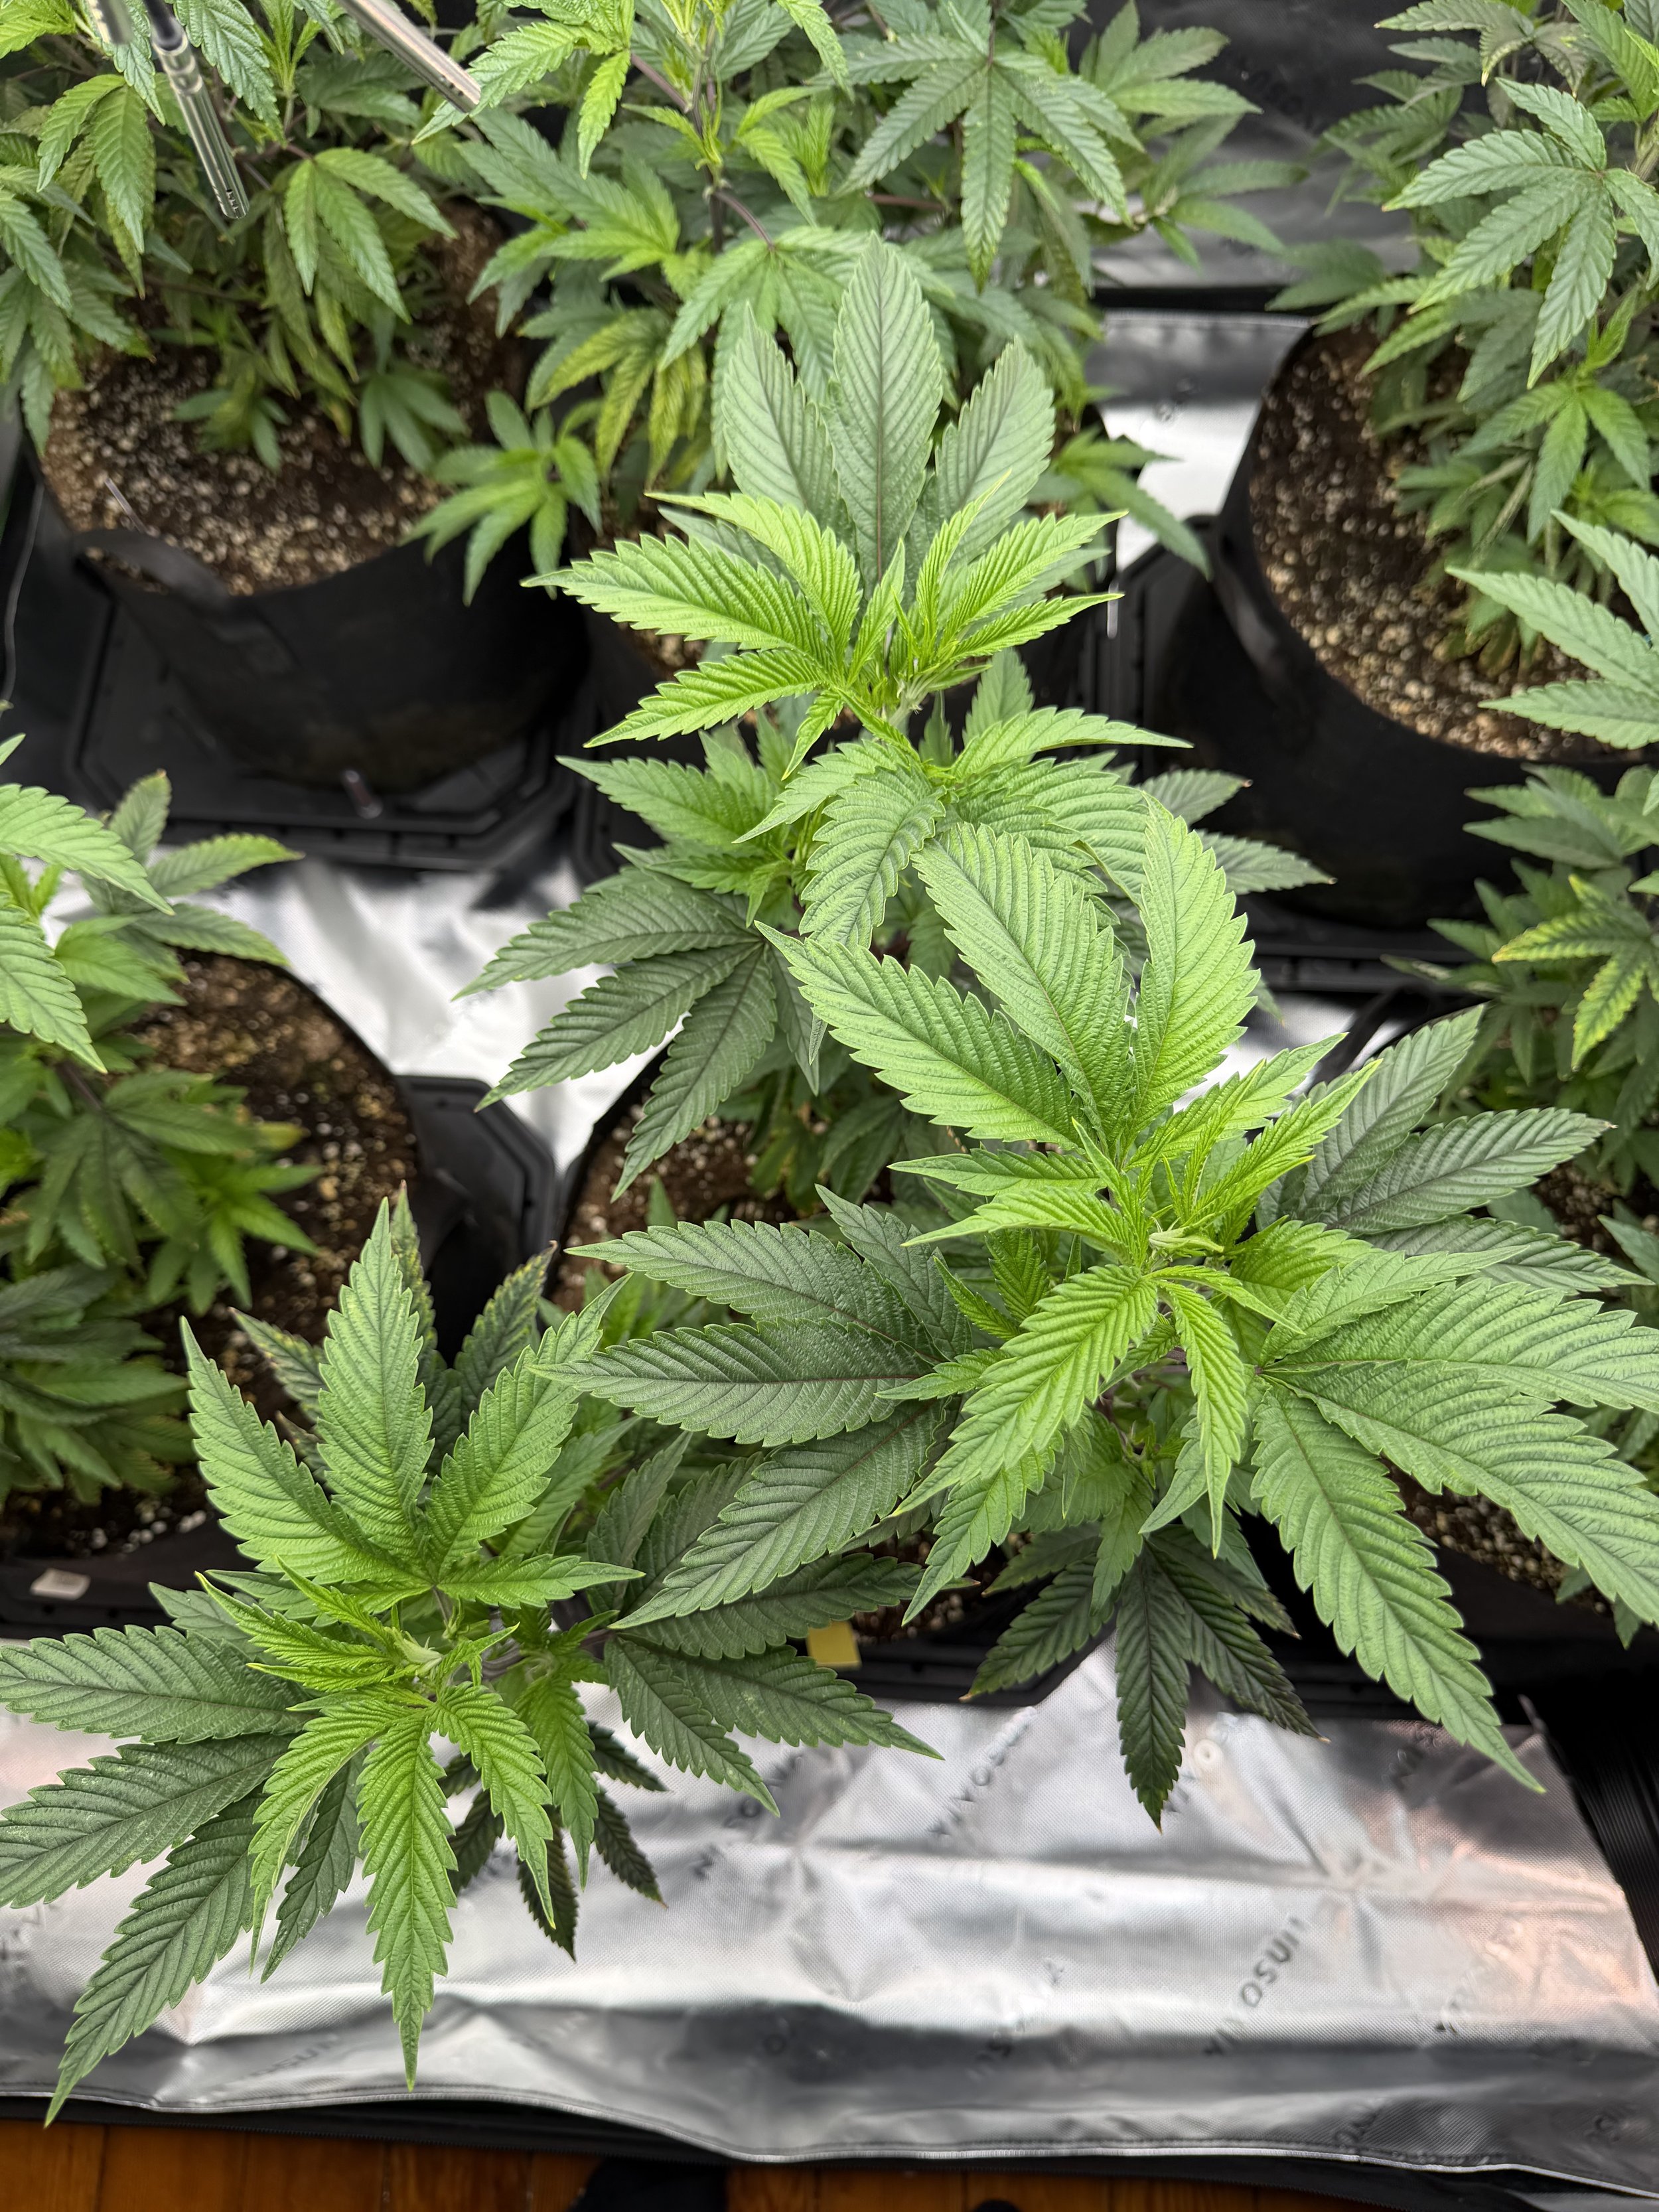
The upgraded LumaLight 400W + 200W system pushing vigorous growth—tight internodes, strong branching, and uniform development across all clones.
Switching from our previous lighting setup to the custom VIVOSUN LumaLight 400W + 200W + side-light system made an immediate difference. Within the first week, the canopy responded in ways we didn’t see in the last run.
Here’s what stood out:
Thicker, sturdier stems from the increased intensity and fuller spectral range
Stronger side-branch development, especially on interior nodes that previously lagged
Richer, deeper leaf tone, signaling more efficient photosynthesis and higher chlorophyll density
Uniform plant structure across all three clones per pot — something the last cycle struggled to achieve
Zero dead zones, with no patches of stalled growth under the new layout
No corner lagging, thanks to pairing the 400W and 200W fixtures to smooth out PPFD across the entire footprint
And most important: consistent temperature and humidity, giving us far steadier VPD and making fine-tuning the environment dramatically easier
The plants aren’t just growing better — the entire tent is more stable, predictable, and responsive.
Common Lighting Mistakes to Avoid
Growers often trip up in the same places:
Over-powering young clones
Running a single center light too hot
Using bargain LEDs with poor spectrum balance
Ignoring diodes aging over time
Forgetting to adjust light height after training
Assuming brightness = good PPFD (it doesn’t)
Good lighting is measured—not guessed.
What’s Next in This Series
With the lighting system upgraded, the next step is mastering the environment.
Up next:
👉 Part 3 — Dialing In Your Environment: VPD, Smart Controllers & Climate Stability
(VPD explained simply, how we upgraded to the GrowHub E42A+, and how to automate your tent for near-perfect conditions.)
If you’re thinking about upgrading your lighting, this season is the right time to do it. VIVOSUN’s Shop offers significant discounts on lights, sidebars, controllers, fans, and tent accessories.
Use my code Ed420 for additional savings on qualifying products.
A good lighting system isn’t an expense—it’s an investment that pays off every single harvest.